The Cannot Verify Server Identity error message is a common issue that many Apple users have faced. This usually happens when you try to send a mail from your Mail app. However, there are some easy fixes to the situation.
We will learn about the easy solutions to this issue. And we will look at the main reasons why this error message keeps popping up on your iPad.
Why Does It Keep Saying Cannot Verify Server Identity on My iPad
With the introduction of iOS 16, Apple enhanced its mail and online security considerably to help prevent various types of phishing, fraud, etc. But with increased security, there are some drawbacks.
If you see the Cannot Verify Server Identity error, it usually points to a data mismatch somewhere on your iPad. So, your iPad security flagged the action and raised the message to inform you of the situation.
Some probable causes for this popup are mismatched or expired SSL certificates, faulty Network Settings, outdated iPadOS, etc. A weak internet connection can also cause the popup to occur. This issue occurs in the Mail app, Safari, Google, and Outlook.
What Is an SSL Certificate?
An SSL certificate is a digital certificate that is used to authenticate a website’s identity. The term SSL stands for secure socket layer. Your Incoming Mail Server authenticates the validity of the sender’s email address by their SSL certificates.
When you use a web browser to access any website, your iPad will first authenticate the SSL certificate. If there are any discrepancies, the Cannot Verify Server Identity error keeps popping up on the iPad.
How To Fix Apple Cannot Verify Server Identity on iPad
There are a few easy solutions that will help you solve this issue. Try them in the order that they appear.
Reset Network Settings
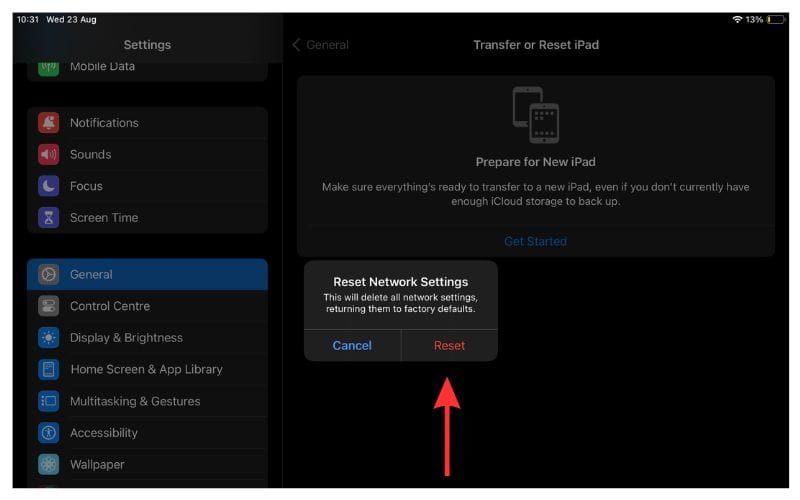
Faulty network settings are the most common causes of the Cannot Verify Server Identity error message. You can solve this by resetting your Network Settings. Here is how to do so.
Time needed: 3 minutes
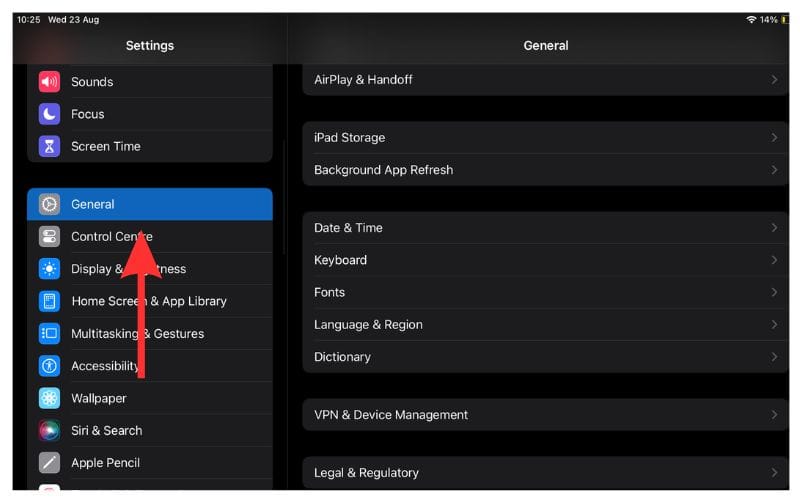
Steps to reset Network Settings on your iPad.
- Open Settings on your iPad and tap on General.
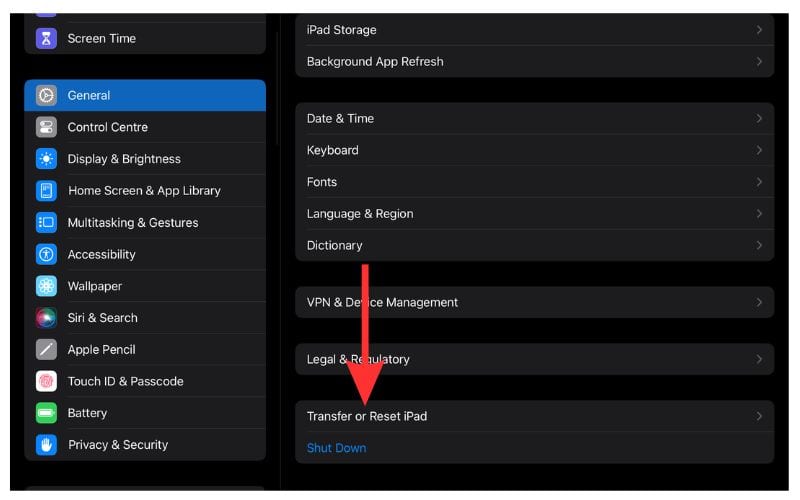
- Scroll down and select Transfer or Reset iPad.
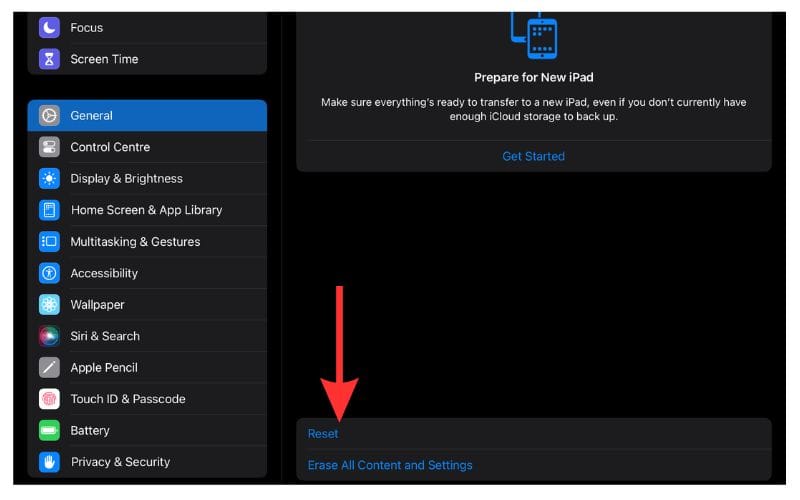
- Select the Reset option.
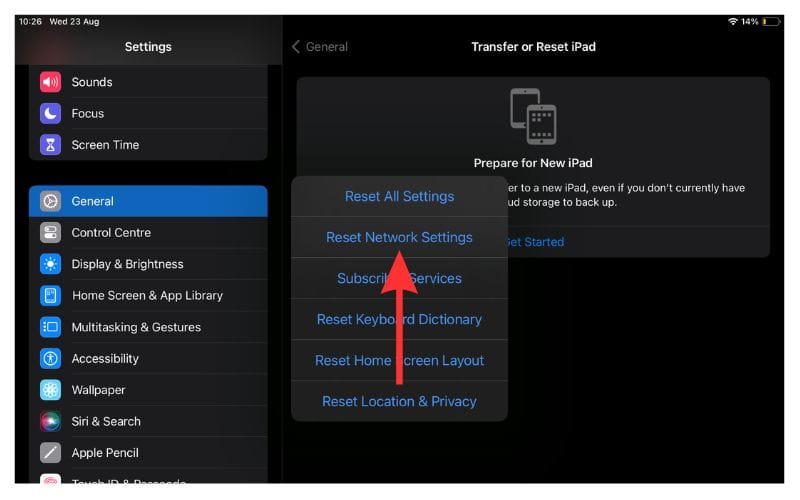
- Now choose Reset Network Settings. You will now have to enter your iPad passcode.
- Select the Reset option and your iPad restarts.
Now open your iPad and check if the issue has been solved.
Restart the Device
Restarting your iPad is an easy fix for any minor bugs or glitches in the system.
1. Hold down the Power button till the slide to power off slider appears.
2. Then swipe the slider to turn off your iPad.
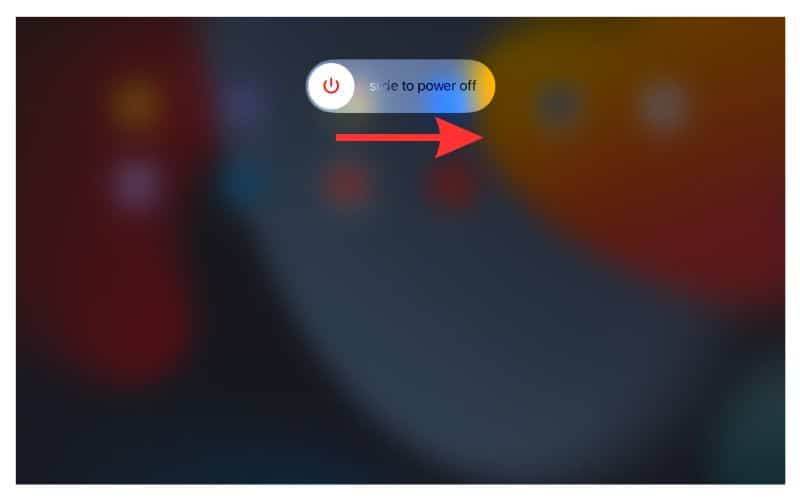
3. Turn your iPad back on by holding the Power button down.
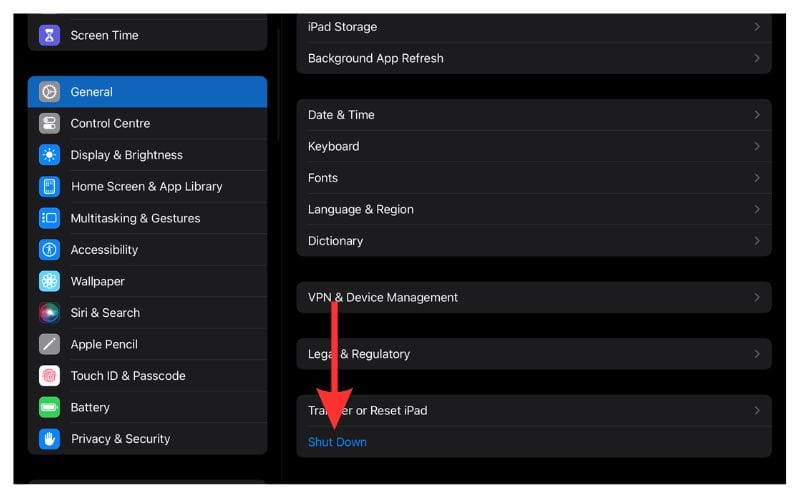
You can also turn off your iPad by going to Settings > General > Shut Down.
If you wish to learn how to shut down an iPad when the screen is frozen, refer to our complete guide.
Restart Mail App To Fix Cannot Verify Server Identity
If there is any issue with the app settings of your Mail app, a restart can fix it. Here is how to do so.
1. Slide up from the bottom of your iPad Home Screen.
2. You will see a list of saved apps that you have recently used. Now locate the Mail app.
3. Swipe up to close Mail.
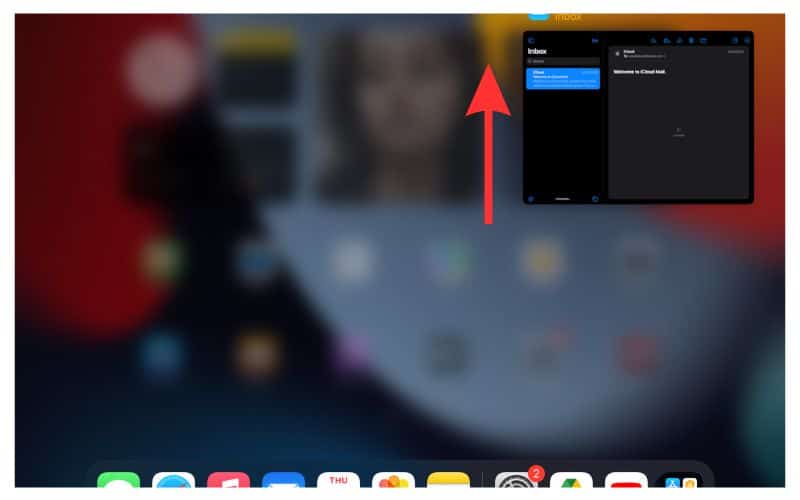
4. Tap on the Mail app icon on your iPad to restart Mail.
This should fix any issues caused by minor bugs and glitches. If your problem still persists, please move on to the next solution.
Delete Mail Account and Add It Back
Sometimes there can be some minor issues with your email service provider. In such cases, if you delete the account and add it back, it can be resolved. Here are the steps to do so.
1. Open the Settings app on your iPad.
2. Now select the option that says Mail and then go to Accounts.
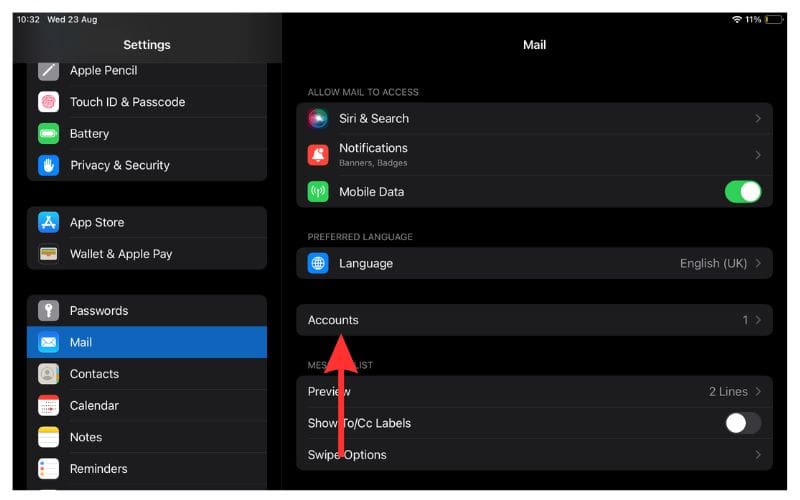
3. Tap on the email account you wish to remove from your iPad.
4. Then press the Delete Account button.
5. You will see a popup asking you to confirm the deletion. Tap on Delete.
Note: Deleting your account means you will lose all your account information from your iPad. So, back up anything you need before deleting the account from your device.
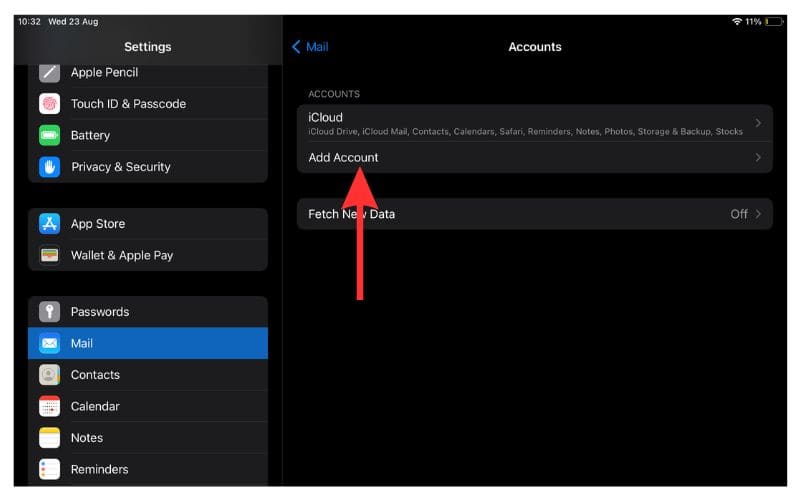
6. Now tap on Add Account to enter your account again.
Update iPadOS
Usually, if there is an update available, an alert pops up. You can follow the on-screen instructions to update your software. But, if you are using your iPad, you can choose to do the software updates later. Here is how to do so.
1. Open Settings on your iPad and go to General.
2. Select Software Update.
3. If there is an available update, select Download and Install.
Check Server Status
Sometimes the server of the service that you are trying to use might be down. Google, Outlook, Safari, and all other services and email providers can sometimes face server crashes. In such cases go to the DownDetector website to check whether the service that you are trying to use is facing any issue.
Turn Off SSL To Fix Cannot Verify Server Identity
Faulty SSL certificates are a major cause of this error. So, if you disable the SSL settings from your account, you can get rid of the error. However, doing so will make your iPad prone to more risks. So, please only do this for sites and services that are verified.
1. Open the Settings app on your iPad and go to Mail.
2. Choose the email account that you wish to disable SSL for.
3. Under the Account section, there will be your email address. Tap on it.
4. Now select Advanced.
5. Then, disable SSL on the Outgoing Server.
Wrapping Up
Hopefully, one of these solutions helped you fix your iPad’s Cannot Verify Server Identity issue. Which solution did the trick for you? Do let us know in the comments. If your problem persists, it is time to contact Apple Support or other proper support channels. Furthermore, here’s how to fix Cannot Verify Server Identity error on iPhone.
If you found this guide helpful do share it with others who might benefit from it.

