Ever since the release of iOS 13, I noticed that certain photos in iCloud Drive and Apple Notes had display issues. It was limited to long, vertical photos. I would tap on them but they wouldn’t zoom in all the way, instead looking like a very low quality, blurry photo. But they looked just fine on macOS. I recently found a solution that fixed the problem.
HEIF/HEIC
Apple adopted the High Efficiency File Format several years ago. It’s a way to store photos with lossless compression. Lossless compression means that you can reduce the file size without losing file quality. For example, the format Portable Network Graphic (PNG) is also a lossless format but the file size tends to be big. The JPEG format is a lossy format. This means the file size is smaller than a PNG but you lose some photo quality.
HEIF photos (file extension .heic) gives you the best of both worlds. You can have lossless compression while still maintaining a small file size. And that’s basically what I did. The vertical photos I had were PNGs. I converted them to HEIF and they display just fine. There are a couple of ways to convert a photo to HEIF.
Correction: HEIF can be both lossy and lossless. Apple video here.
A Photo Editing App
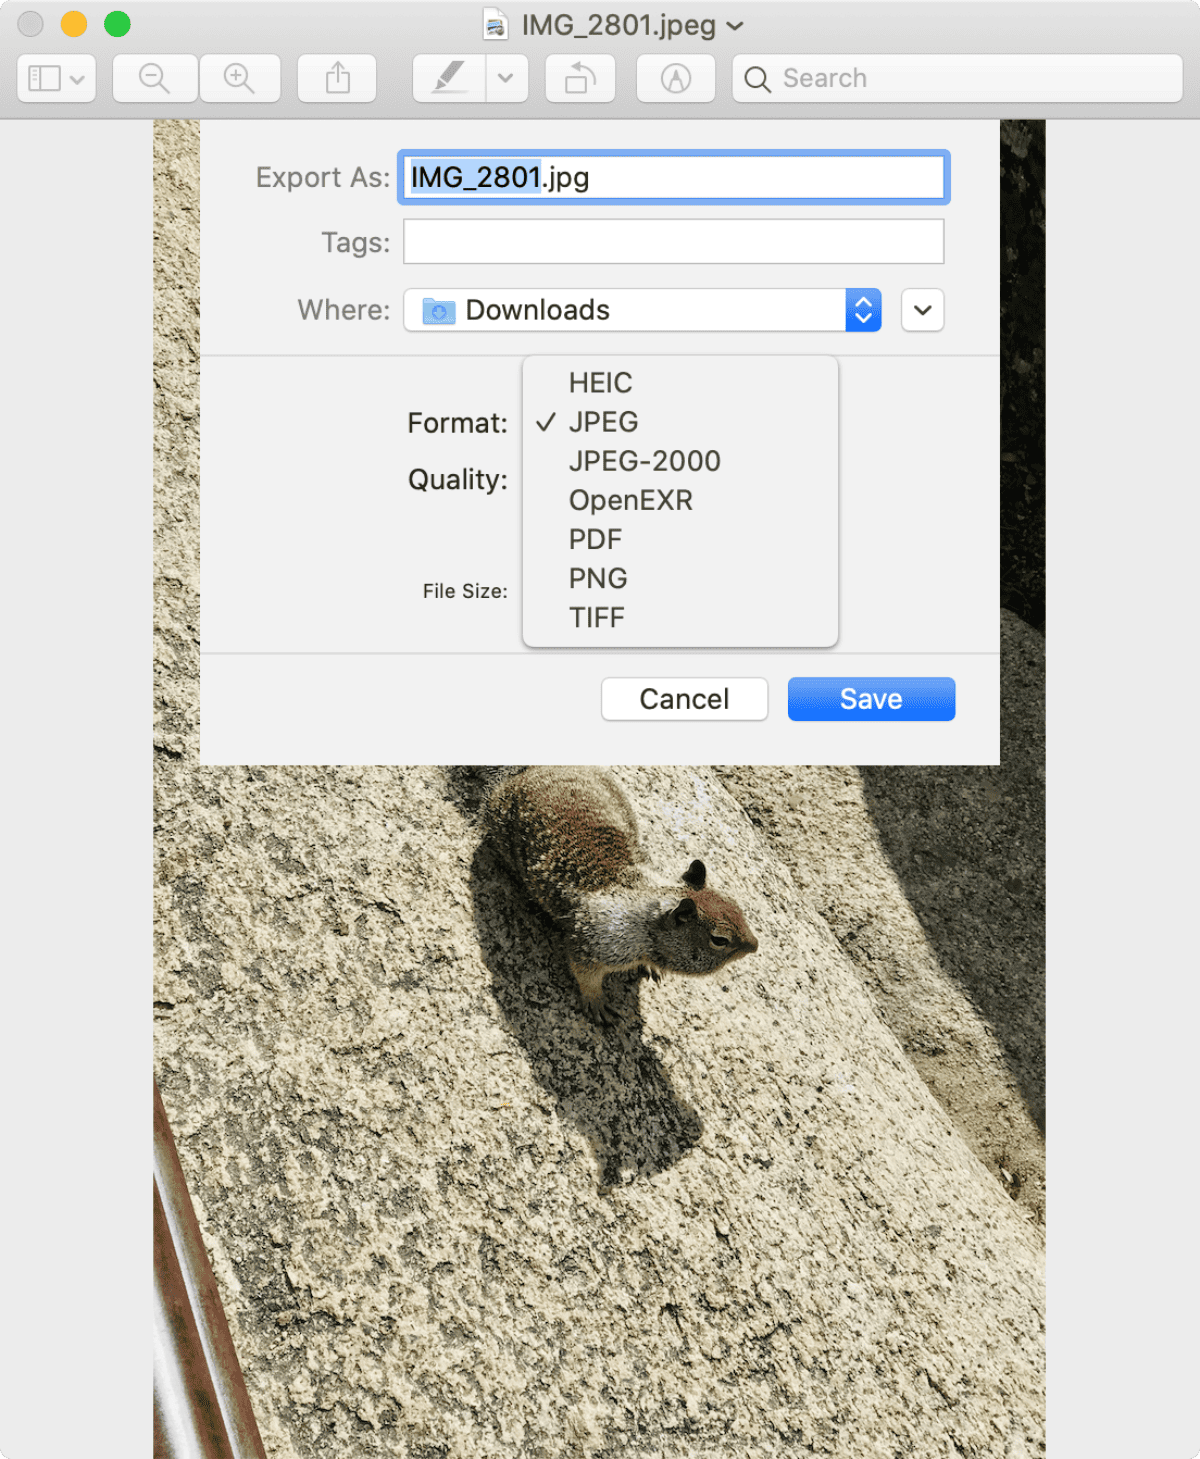
For a photo editor on the Mac I use Pixelmator Pro. It supports multiple file formats when you export a photo, including HEIF. But it costs money and if you just need it for file conversion you probably won’t want to buy it. Fortunately, Apple’s own Preview app built into macOS can also export photos as HEIF. The process for both apps is the same.

- Open a photo in Preview or Pixelmator Pro.
- In the menu bar click File > Export.
- Click the dropdown menu to select HEIC.
Automator
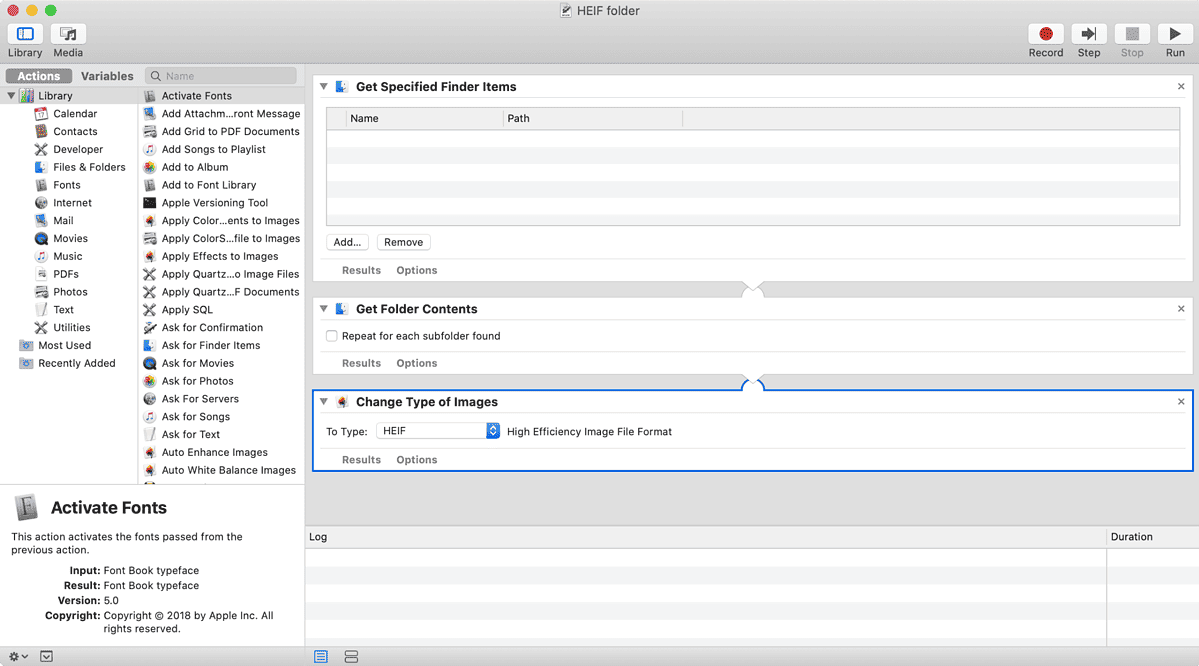
Using Pixelmator Pro or Preview is good for when you want to convert a single image at a time. But if you want to convert a bunch of files at once we’ll need to create an Automator workflow. You only need three actions.
- Get Specified Finder Items. This lets you drag and drop the folder containing the photos you want to convert.
- Next, Get Folder Contents.
- Finally, use Change Type of Images. There are two actions for this: One for Preview and one for Pixelmator Pro if you have the latter installed.

Since you’re altering photos, you’ll be asked to add a fourth option when you add Change Type of Images. A Copy action will be suggested, which will copy the photos to a new location and convert those.
iOS Shortcut
I also created a shortcut that lets you convert photos to HEIF on iOS. I don’t know a way to batch convert them like Automator, but it works great for single photos. Here’s the iCloud link: https://www.icloud.com/shortcuts/b53c7cdafbe34c958d86b7e61371a5fb.
Further Reading:
[HEIF: Here’s What You Need to Know About iOS 11’s JPEG Replacement]
