With all the buzz about video reels on various social media platforms, it seems that vertical video is now the new norm for content creators. Most modern video cameras allow you to seamlessly edit videos in vertical format, i.e. with an aspect ratio of 9:16. Sadly, Apple has not jumped onto that bandwagon yet when it comes to editing vertical videos in iMovie. Knowing how to make an iMovie video vertical is pretty simple. But it may take some time before you can master the technique since you’ll be manually working with your video footage.
What is a Vertical Video?
By standard, a vertical video has an aspect ratio of 9:16. Most phone cameras, including the iPhone, record video with an aspect ratio of 9:16 if you hold them vertically. That makes the content perfect for posting on social media such as Instagram Reels, Facebook Reels, or YouTube Shorts. When it comes to dimensions, the ideal measurement for vertical video is 1080 x 1920 pixels. A standard 16:9 horizontal video has dimensions of 1920 x 1080.
How to Make iMovie Video Vertical on iPhone or iPad
As of this moment, iMovie does not support editing vertical videos. That means when you load a vertical video on an iMovie project, it will letterbox the content, inserting black bars on each side of your video to make it fit with the iMovie’s 16:9 screen. But can you edit a horizontal video in iMovie and make it a vertical video with an aspect ratio of 9:16? You certainly can.
Time needed: 1 minute
Follow the steps below to make your horizontal iMovie video vertical on iPhone or iPad.
- Open the iMovie app on your iPhone or iPad.
- Tap Movie > Media.
- Tap Video > All.
- Tap on the video you want to edit, then tap the checkmark to confirm your selection
- Tap Create Movie.
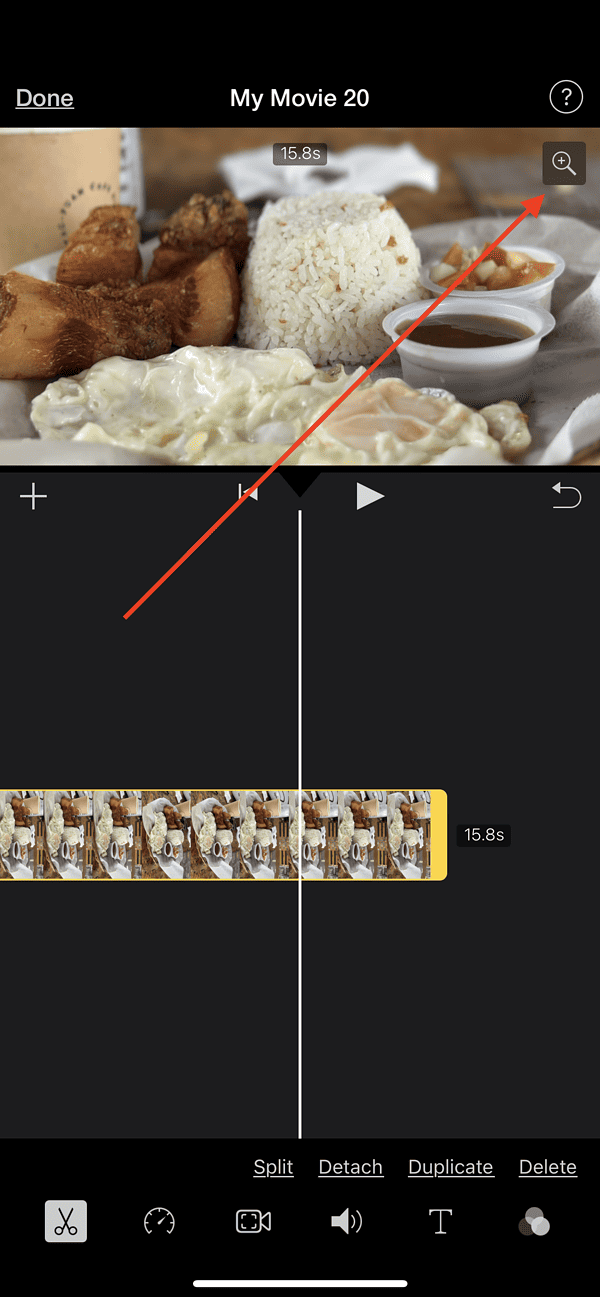
- Tap the video on the project timeline
- Tap on the Pinch to Zoom icon in the upper right corner of your iPhone screen.
- Make a pinch gesture on the video, then tap Pinch to Zoom to deselect it.
- Rotate the video by making a twisting motion using two fingers over the video image.
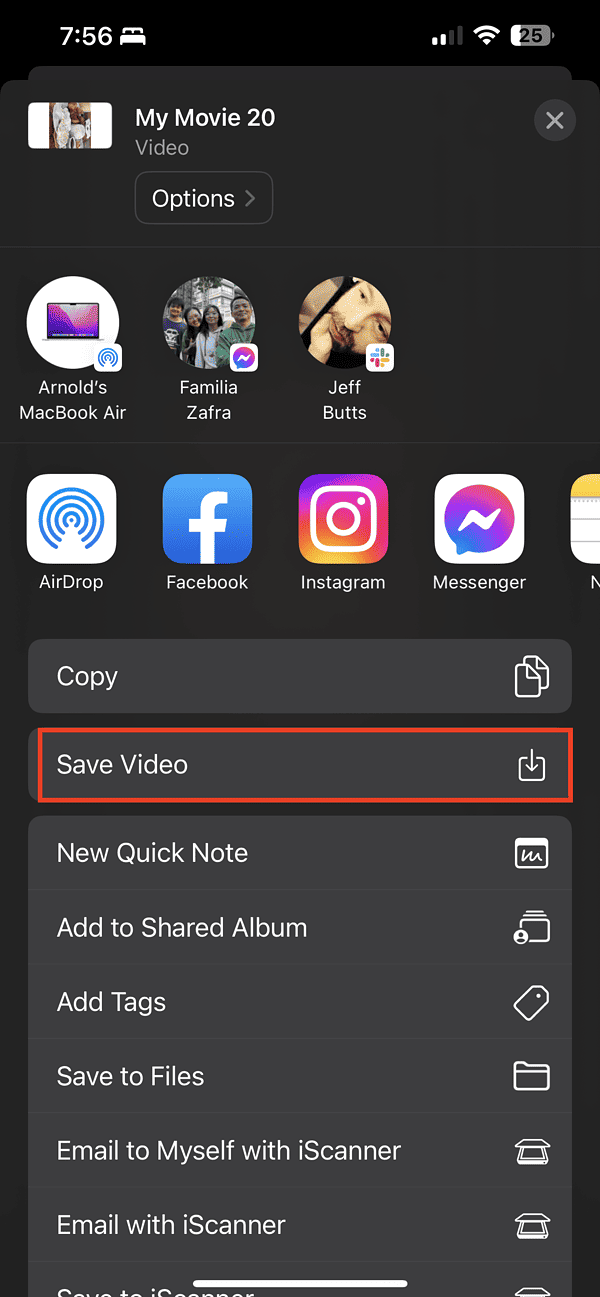
- Tap Done > Share > Save Video.
- Open the Photos app and select the video you just saved.
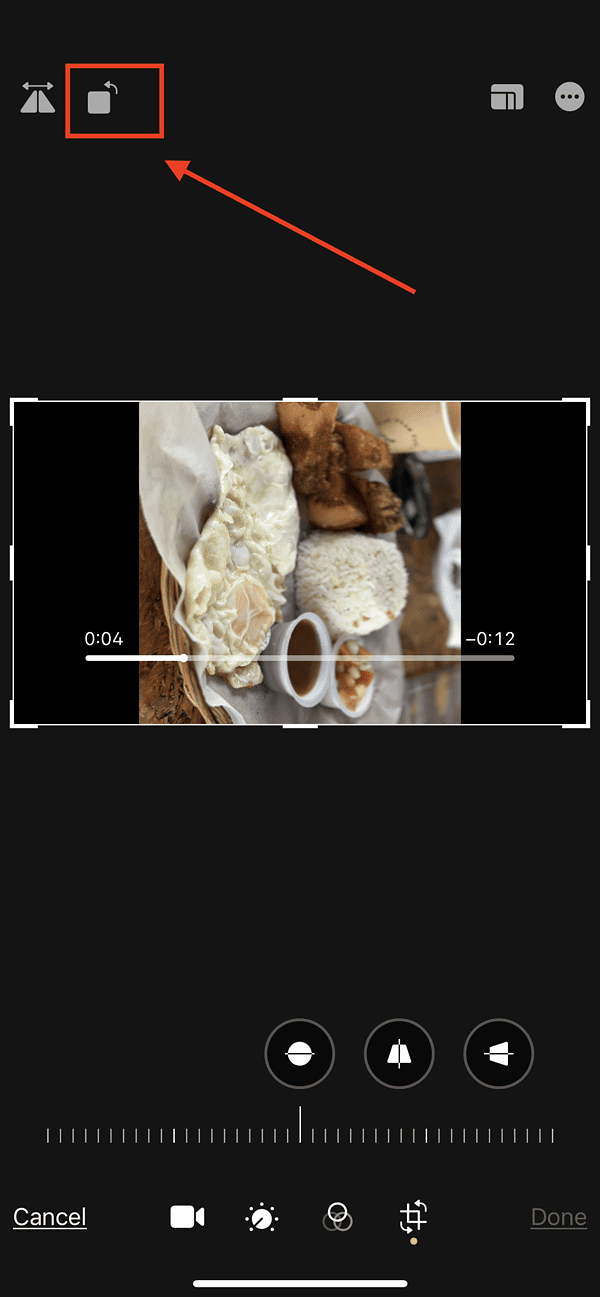
- Tap Crop, then use the Rotate buttons to adjust the video accordingly.
How to Make an iMovie Video Vertical on Mac
- Open the iMovie app.
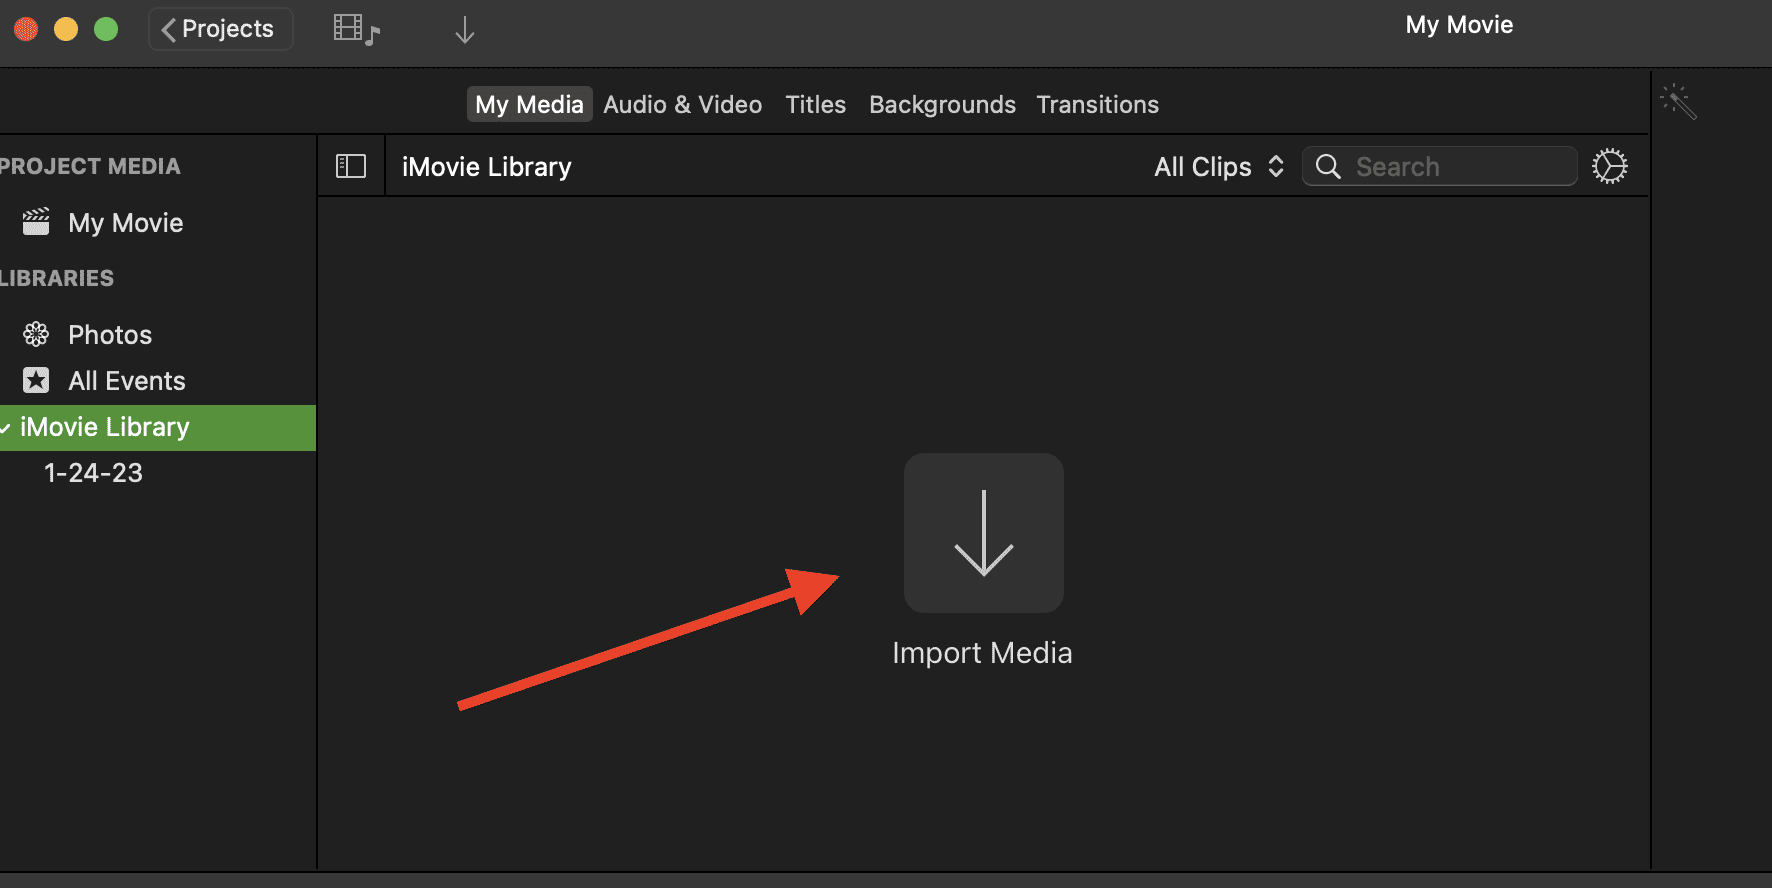
- Click New Movie > Import Media.
- Select the video you want to convert to vertical.
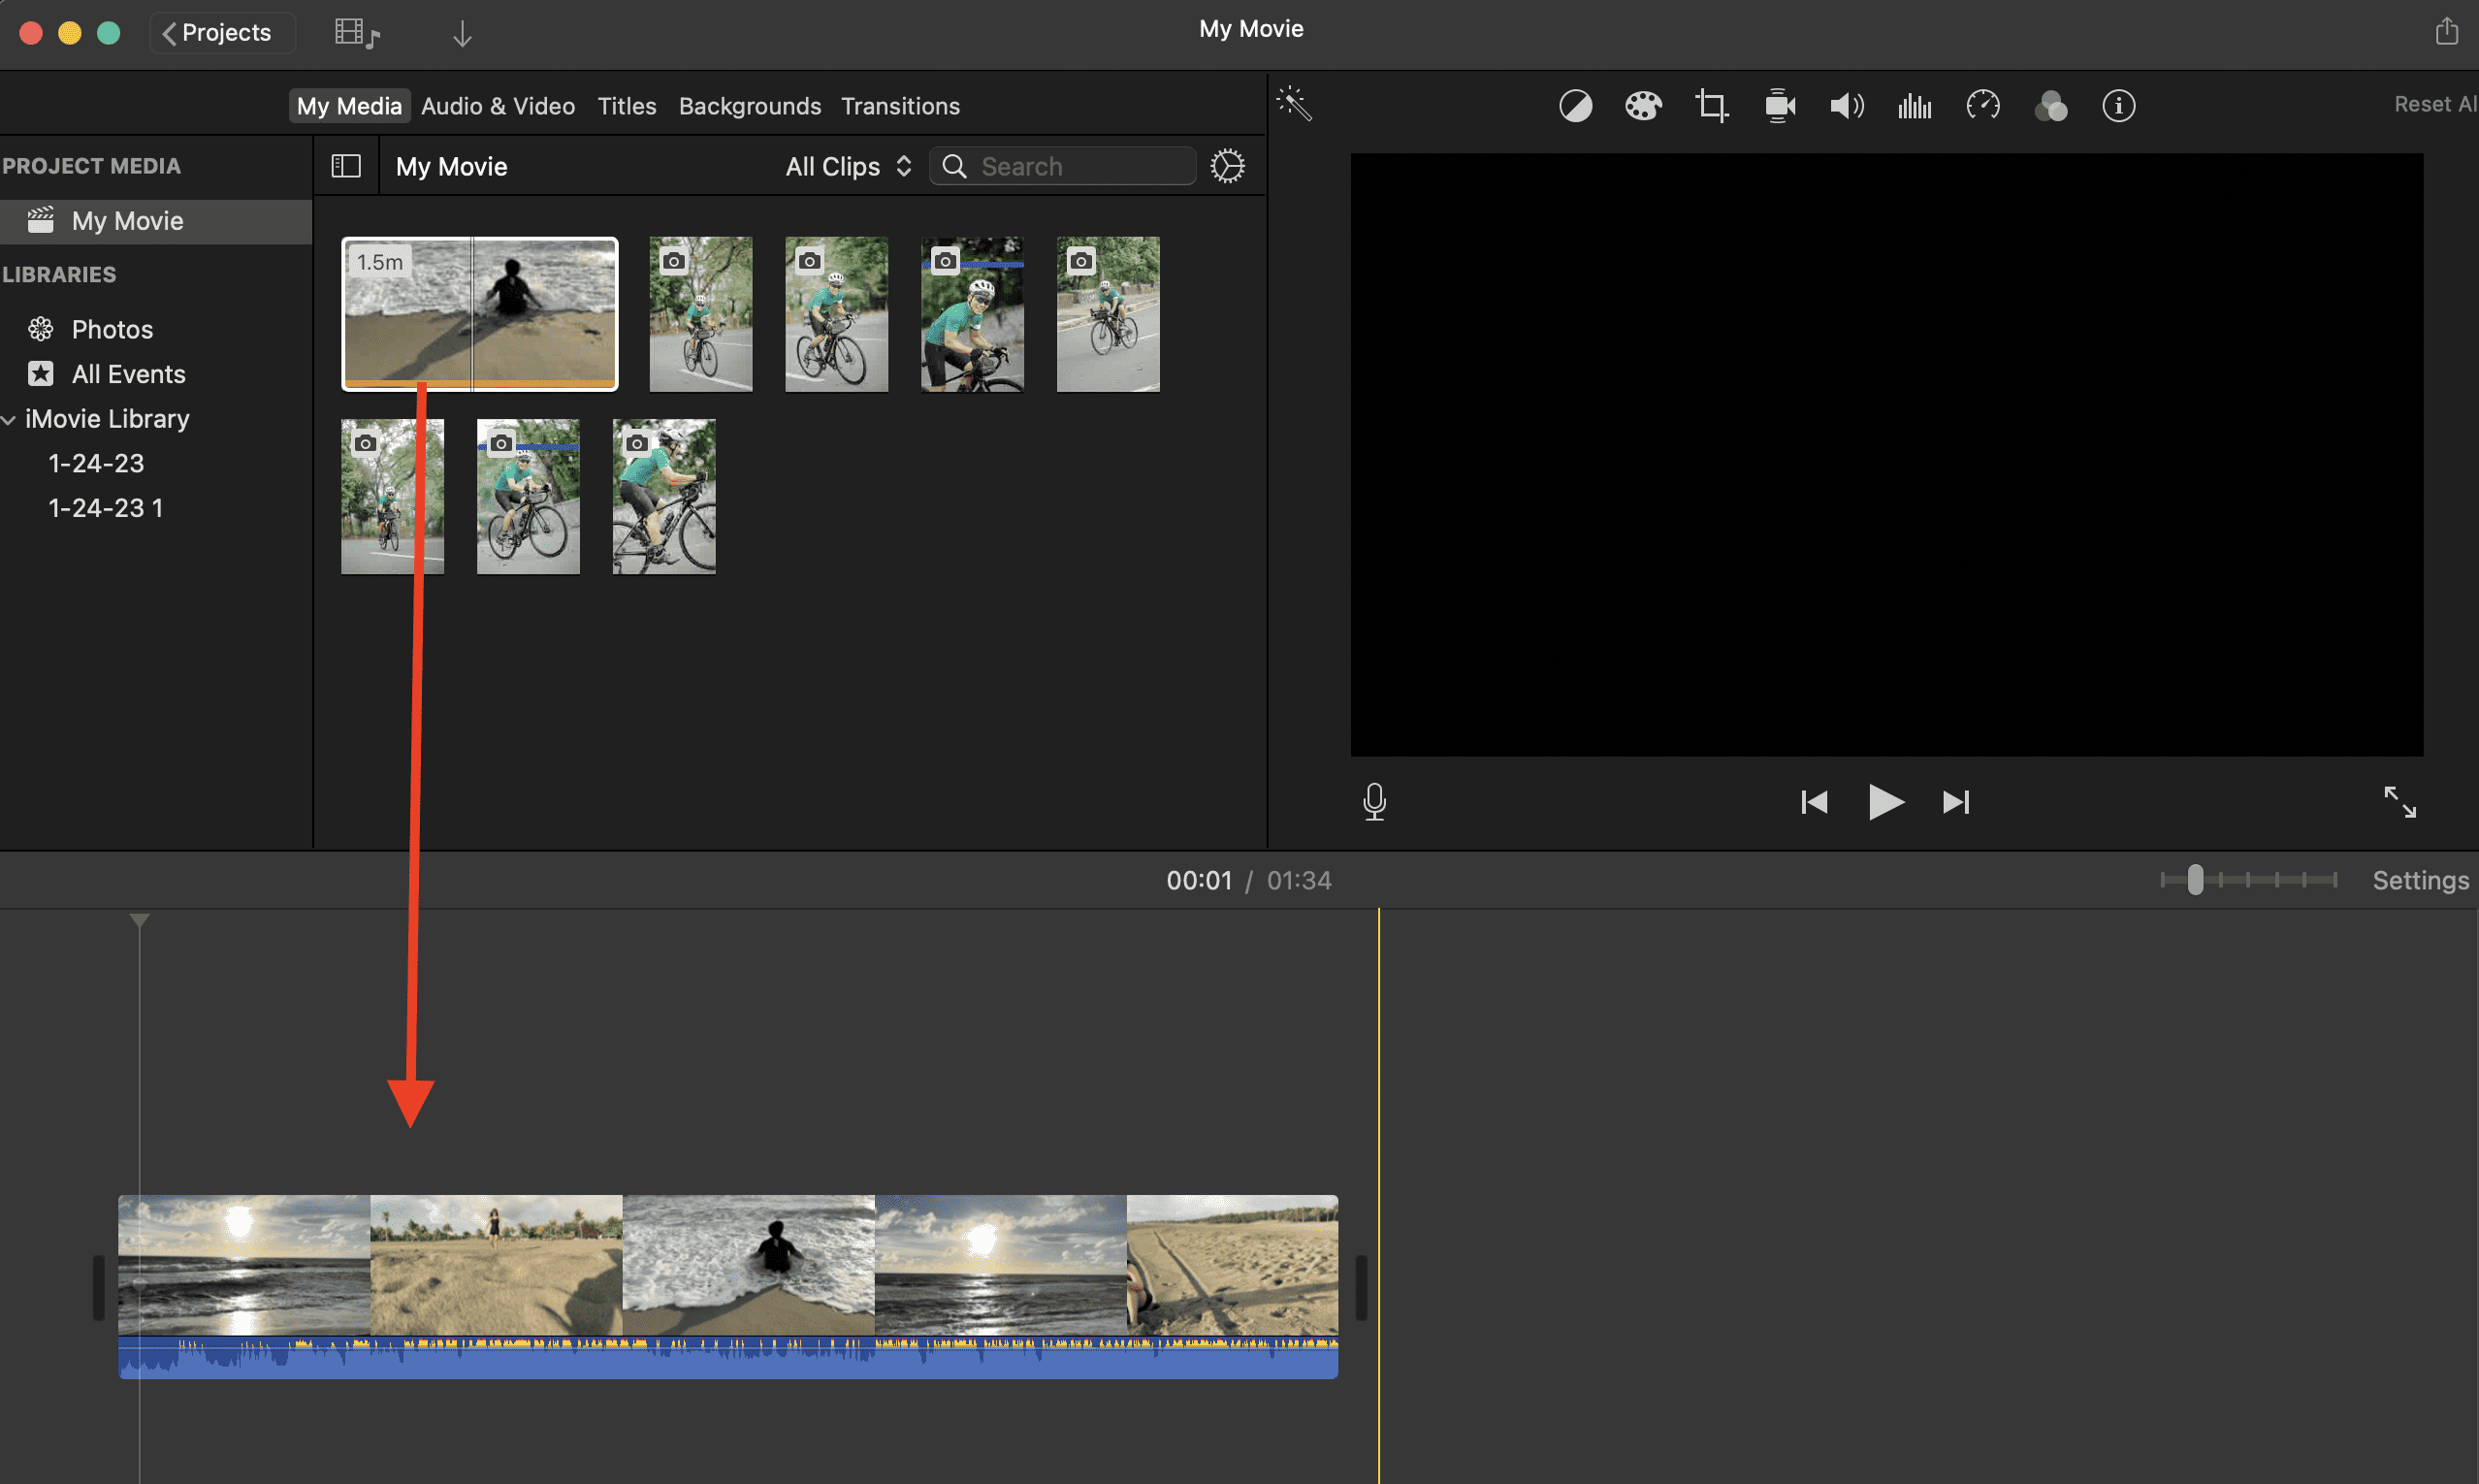
- Drag and drop the video on the project timeline.
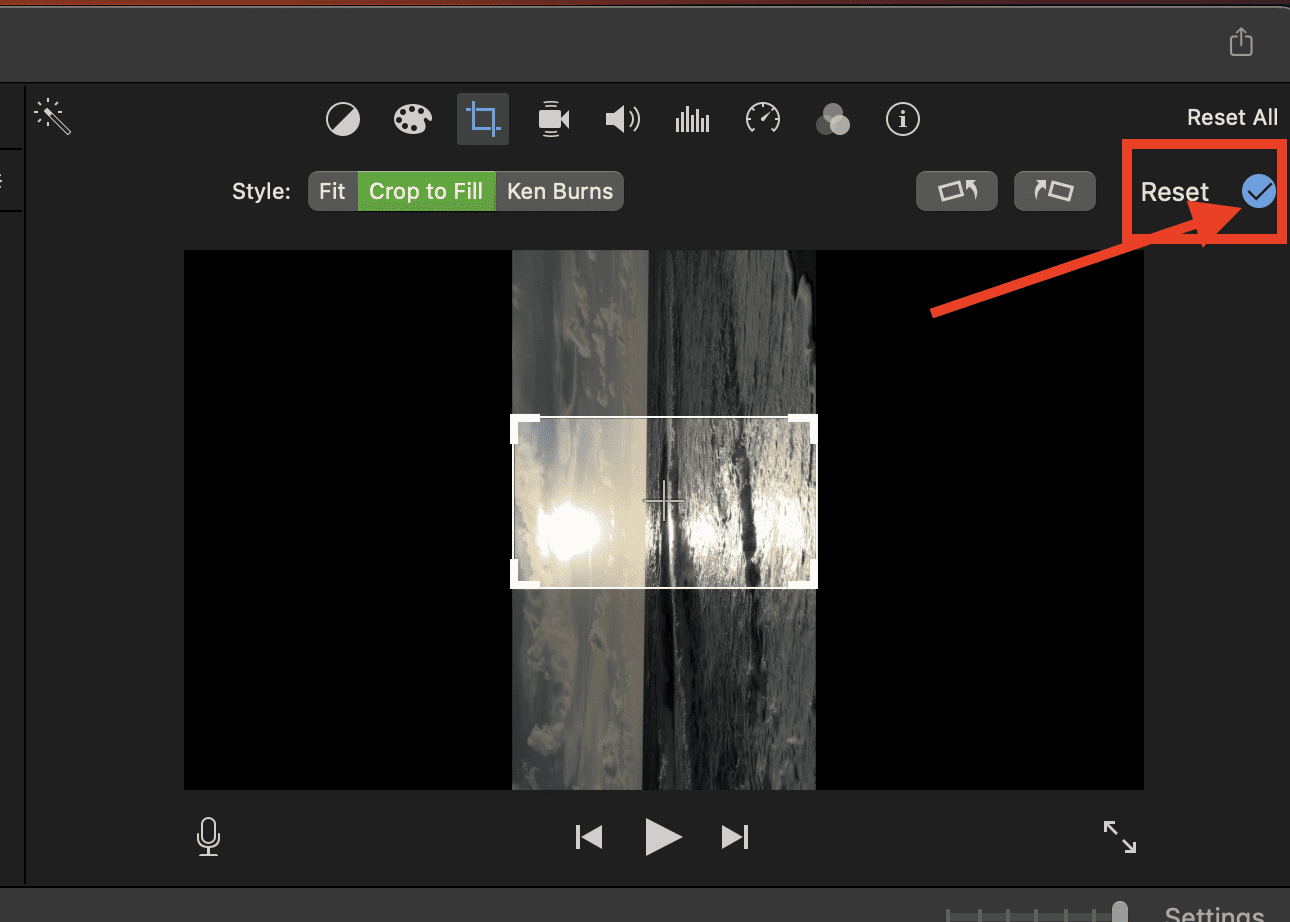
- On the Preview Window, click the Crop icon.
- Select Crop to Fill under style.
- Click Rotate Clockwise and adjust cropping to fit the subject of your video.
- Click the Checkmark icon to apply the crop to fill.
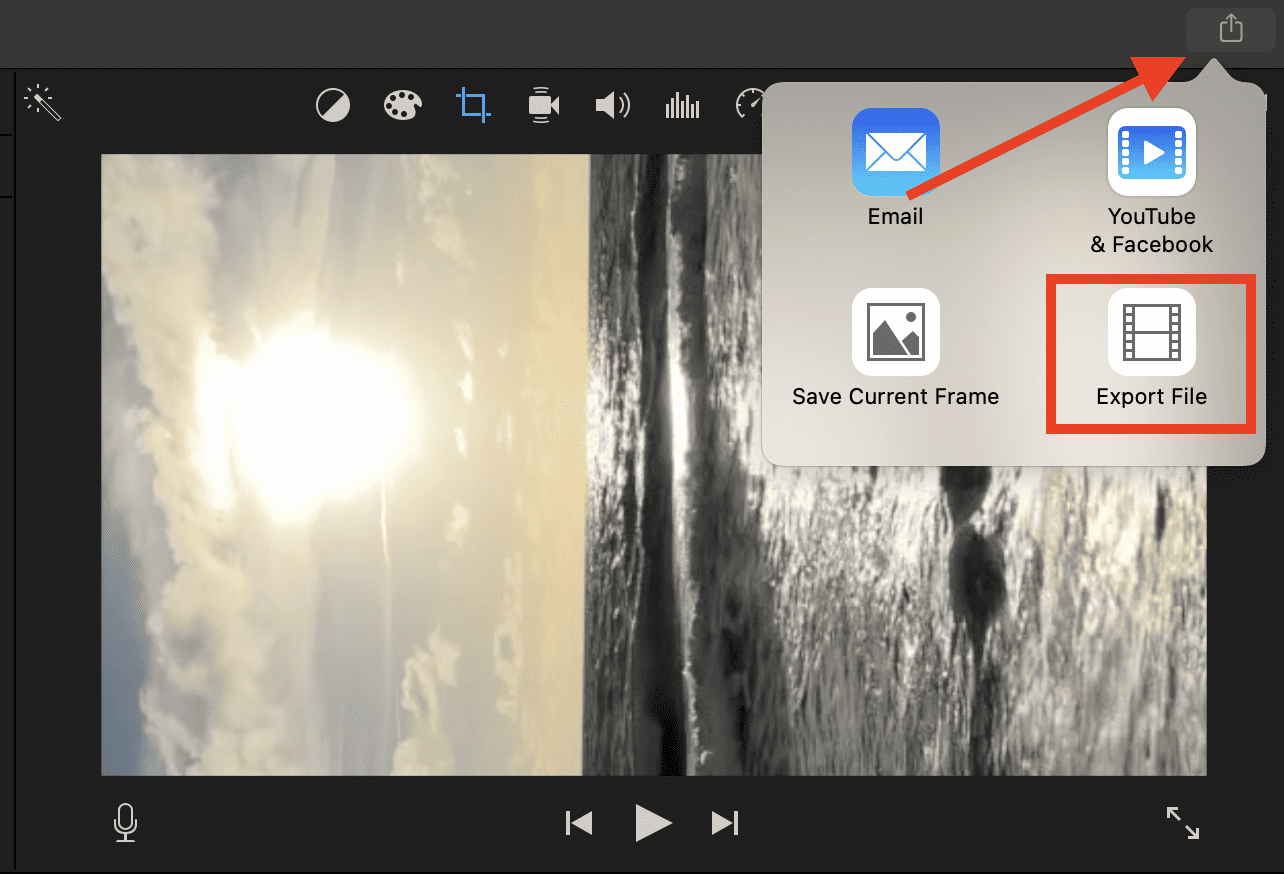
- Click the Share icon at the upper right corner of the preview window, then Export File.
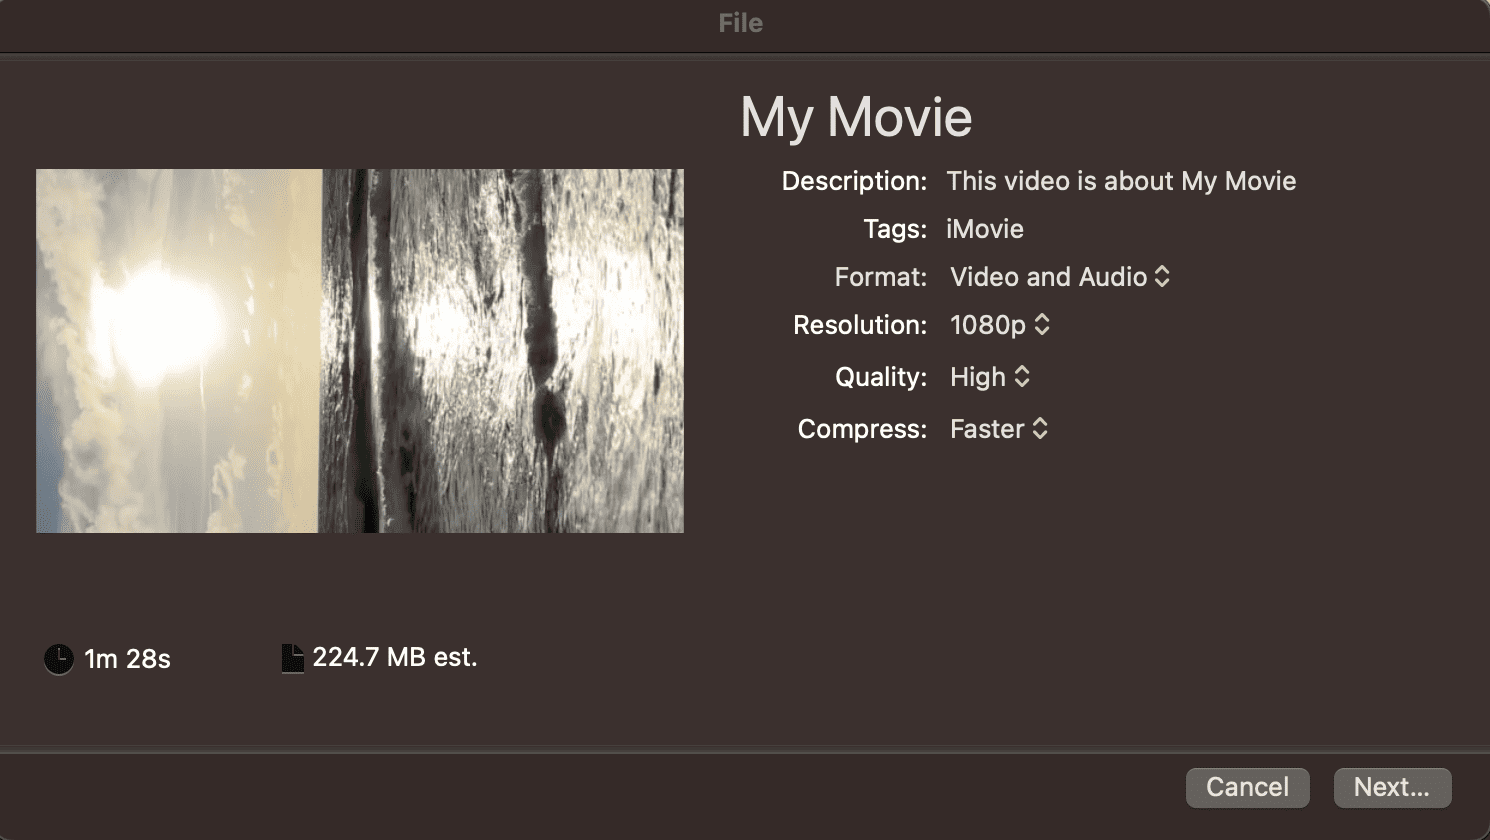
- Click Next > Save.
Once the file has been saved on your Mac, open the Finder app and locate your video. Preview the video and rotate it accordingly to correct its orientation.
Final Words: Some Things to Consider
When using the technique I described above to make iMovie video vertical, always consider its applicability to the horizontal video that you are editing. The technique can be applied to videos with a subject that is captured from a bit far away. That way, when you use the crop to fill, it won’t suffer too much distortion and noise. You can still preserve its quality despite having to crop it. The technique is most useful when converting horizontal video showing scenery, since you don’t have to worry about cropping to fit a particular subject.






I wish that iPhone designers, and those for other phones, would understand that it is more secure to hold an iPhone vertical when you need to hold it one-handed. Give us the option of shooting in landscape mode when the phone is vertical. Yes that might require a larger camera sensor and that might cost more, but that cost may be worth it. I have given Apple feedback on this matter.