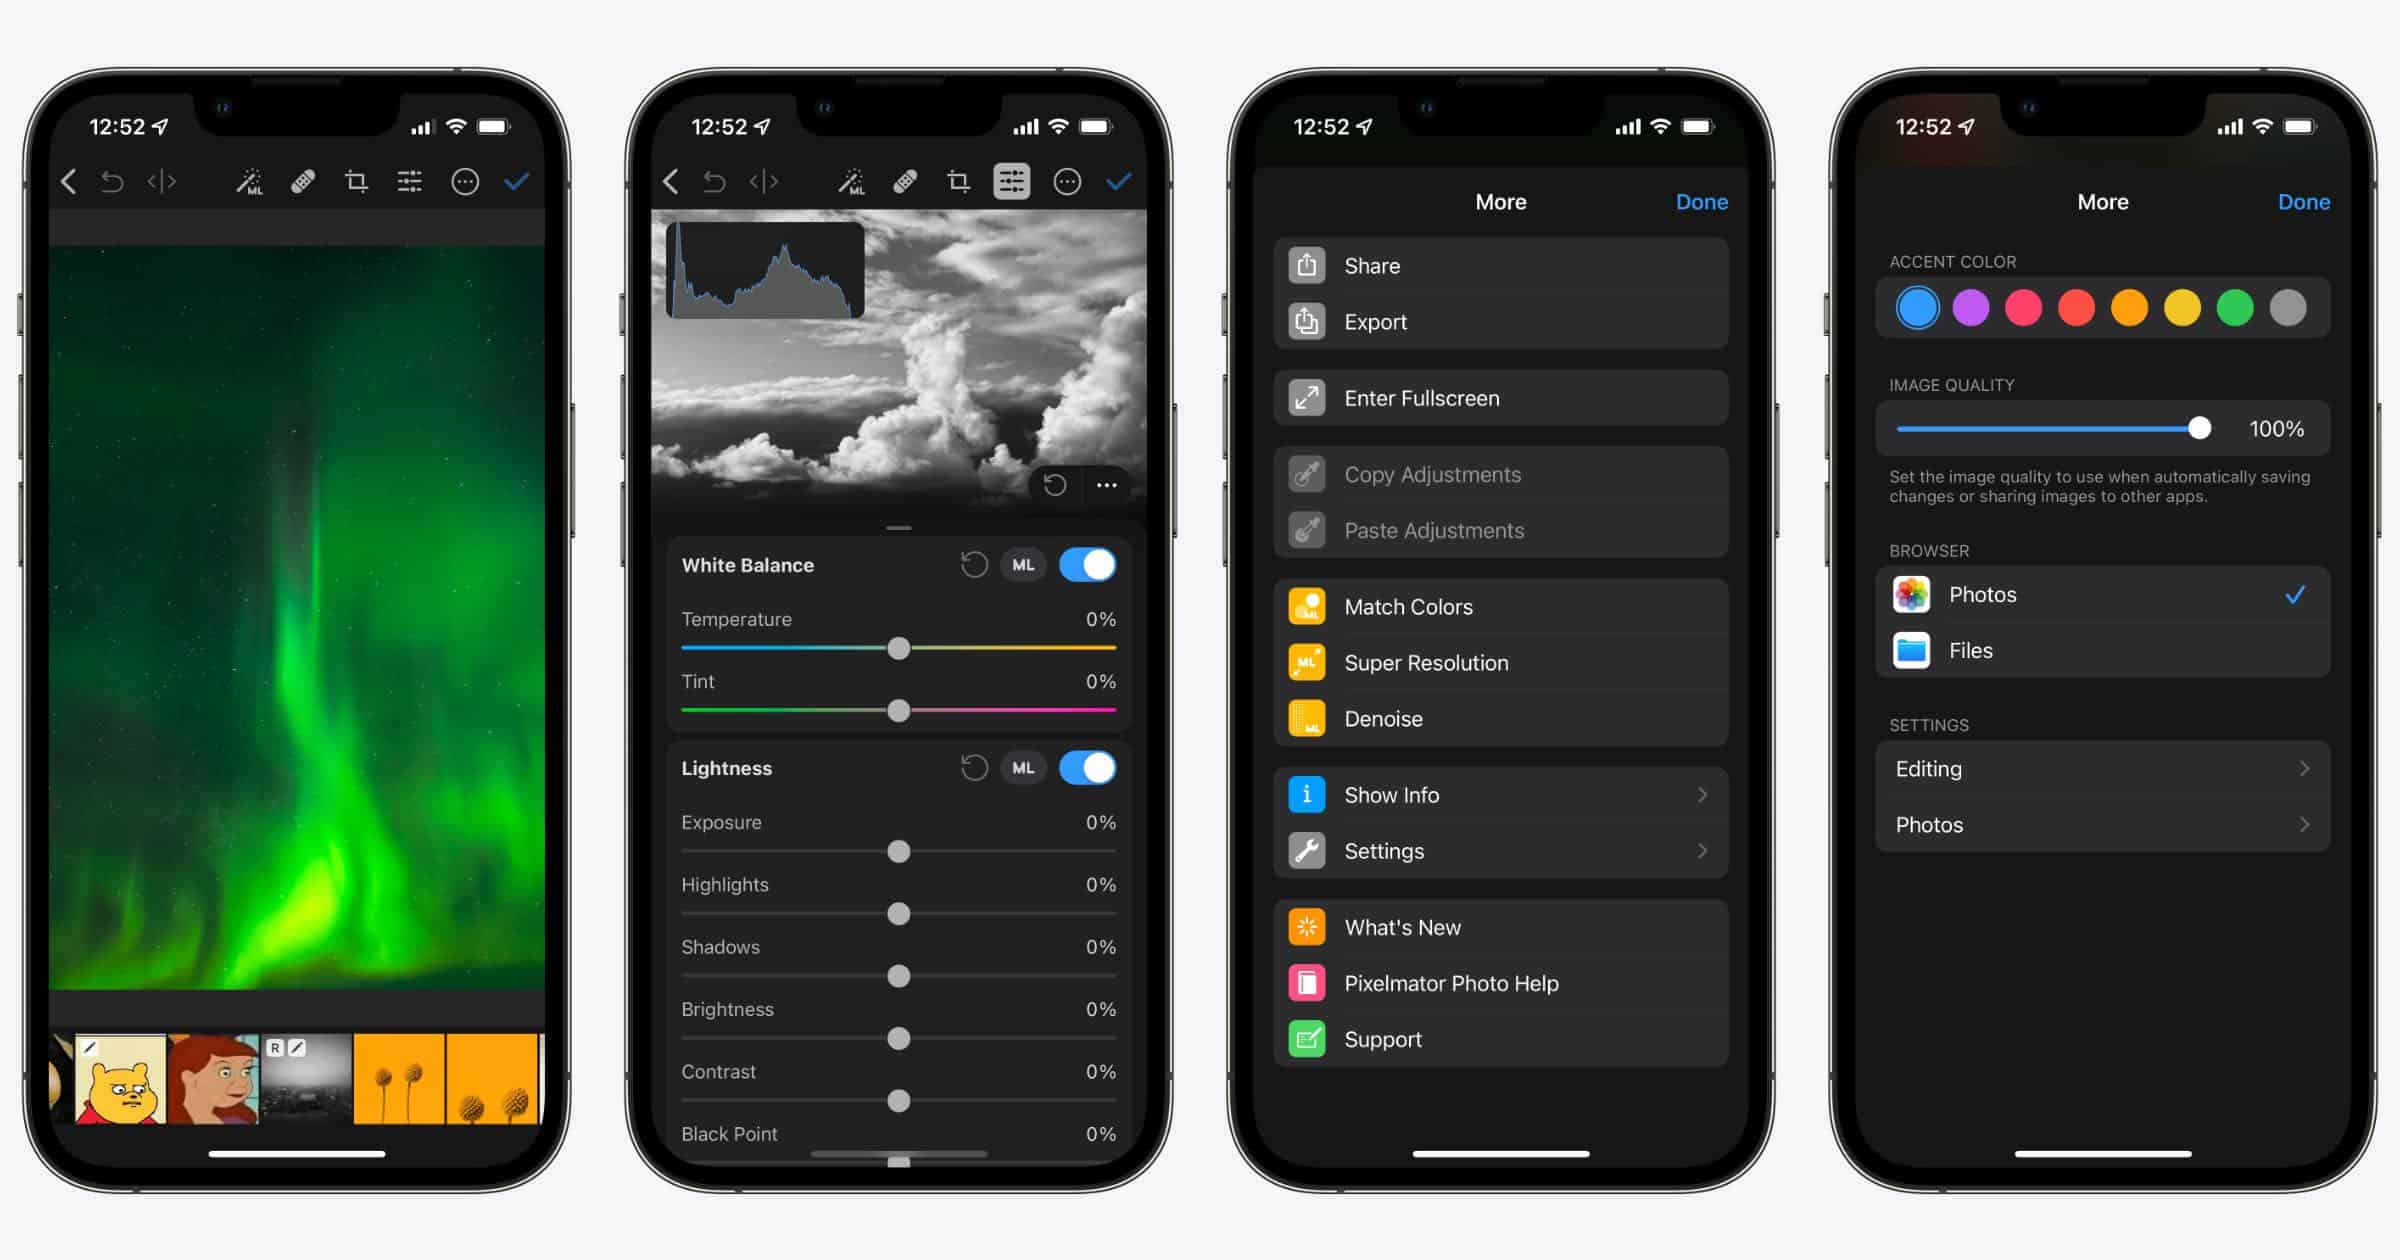
Pixelmator Photo was released for the iPhone on Thursday, and due to the smaller screen the UI is different than on the iPad. Here are some quick tips to get started.
Using Pixelmator Photo
Navigation
When you open the app you’ll find four tabs at the bottom: All Photos, Albums, Recents, Favorites. Fairly standard. A gear for Settings is in the upper-left corner, and you’l find a Menu icon and a Select button in the upper-right corner. Inside the menu you have choices to zoom into and out of the photo view, which is important because you can’t pinch-to-zoom. The Aspect button changes the way your photos are displayed; either as squares or in their natural ratio.
Inside of Settings you can change the accent color, control the image quality when you export a photo, change the browser between Photos and Files, and other settings for editing and photos. Inside the Editing tab you’ll see a toggle to preserve photo edits or not. It’s enabled by default, it means that when you edit a photo and save it, it will create a linked file in iCloud Drive, or inside the On Your iPhone section in Files. This gives you nondestructive editing so you can revert the image back to its original, unedited state if you want.
Inside the Photos section within Settings you can choose whether you want the app to create its own Pixelmator Photo album or not. Second, you can choose whether you want your photos within the app to be displayed as a list or as thumbnail images.
Editing
Once you tap on a photo to begin editing, you’ll see tools on the top as well as inside of another menu. These icons are fairly standard in any photo-editing app.
- ML Wand: This is one-tap button to have the app automatically apply edits to your photos using AI.
- Bandage: This is the repair tool to let you remove things from the photo. Brush over the object with your finger, and you can control the size of the brush with the slider.
- Square: This is the crop tool. It lets you rotate the image, straighten it, change the vertical or horizontal perspective, and flip the image vertically or horizontally. There is an ML Crop button here to have the app automatically crop the image for you, and a button to change the aspect ratio.
- Lines: This is the adjustments button where you can apple various filters to the image. A three-dot button displays the histogram, adjustment history, and a filmstrip to switch to another photo. Drag the bottom section up that displays the filters. You’ll find more tools to fine-tune your image.
- Three Dots: This is the menu to share or export your image, and more tools such as Super Resolution, Denoise, and Match Colors with another image. Super Resolution will automatically scale up your image, but you can’t control the specific width or height like you can with Pixelmator Pro on the Mac.
- Check Mark: After editing, the check mark saves the image.
It’s a nice update overall and I’m glad that the app is on the iPhone now. The team tells me that Pixelmator Photo doesn’t support Shortcuts at this time but it is on the roadmap.
