Syncthing is maybe my favorite app ever. The idea of joining the permanent availability of cloud storage with the security of a local drive is just amazing. As someone who uses two, sometimes three computers, I love how clever the app’s approach to sharing is. There’s one aspect that Syncthing lacks, though: mobile apps — both for iOS and for Android. Here’s how you can work around this limitation.
Is There A Syncthing App for iOS?
Until last December, there used to be an official Syncthing client for Android. You won’t find a “Syncthing”-branded app on iOS, though. That’s because Syncthing’s developers don’t offer one. However, that doesn’t mean you can’t use the app on iOS—you’ll just have to do so through third-party clients.
Syncthing Clients for iOS
For years, there was a single Syncthing iOS client, Möbius Sync. Last year, a new app was developed, Synctrain, but it’s still in the testing stages. We’ll talk briefly about both below.
1. Möbius Sync
Presently, Möbius Sync is the only widely available way of using Syncthing on iPhone and iPad. The app has a limited free version and a paid one.
The former is basically a trial, just so you can make sure everything is working with your setup before purchasing. It has a 20MB storage limit, and files are kept in a sandbox — other apps can’t access them. You can still share the files with other apps from within Möbius Sync, though.
To have the full experience, you either make an in-app purchase in the free version or buy Möbius Sync Pro. In both cases, it’s a one-time purchase, not a subscription.
2. Synctrain
Last September, a developer announced another iOS Syncthing client, called Synctrain. It’s open-source, but it requires you to compile the app and install it yourself.
A paid version is in the beta stage. You can try it through Apple’s TestFlight, which allows users to download pre-release apps and give feedback to developers.
How To Use Möbius Sync
After downloading Möbius Sync from the app store, setting it up is pretty much the same as on a computer. Check the steps below:
Time needed: 15 minutes
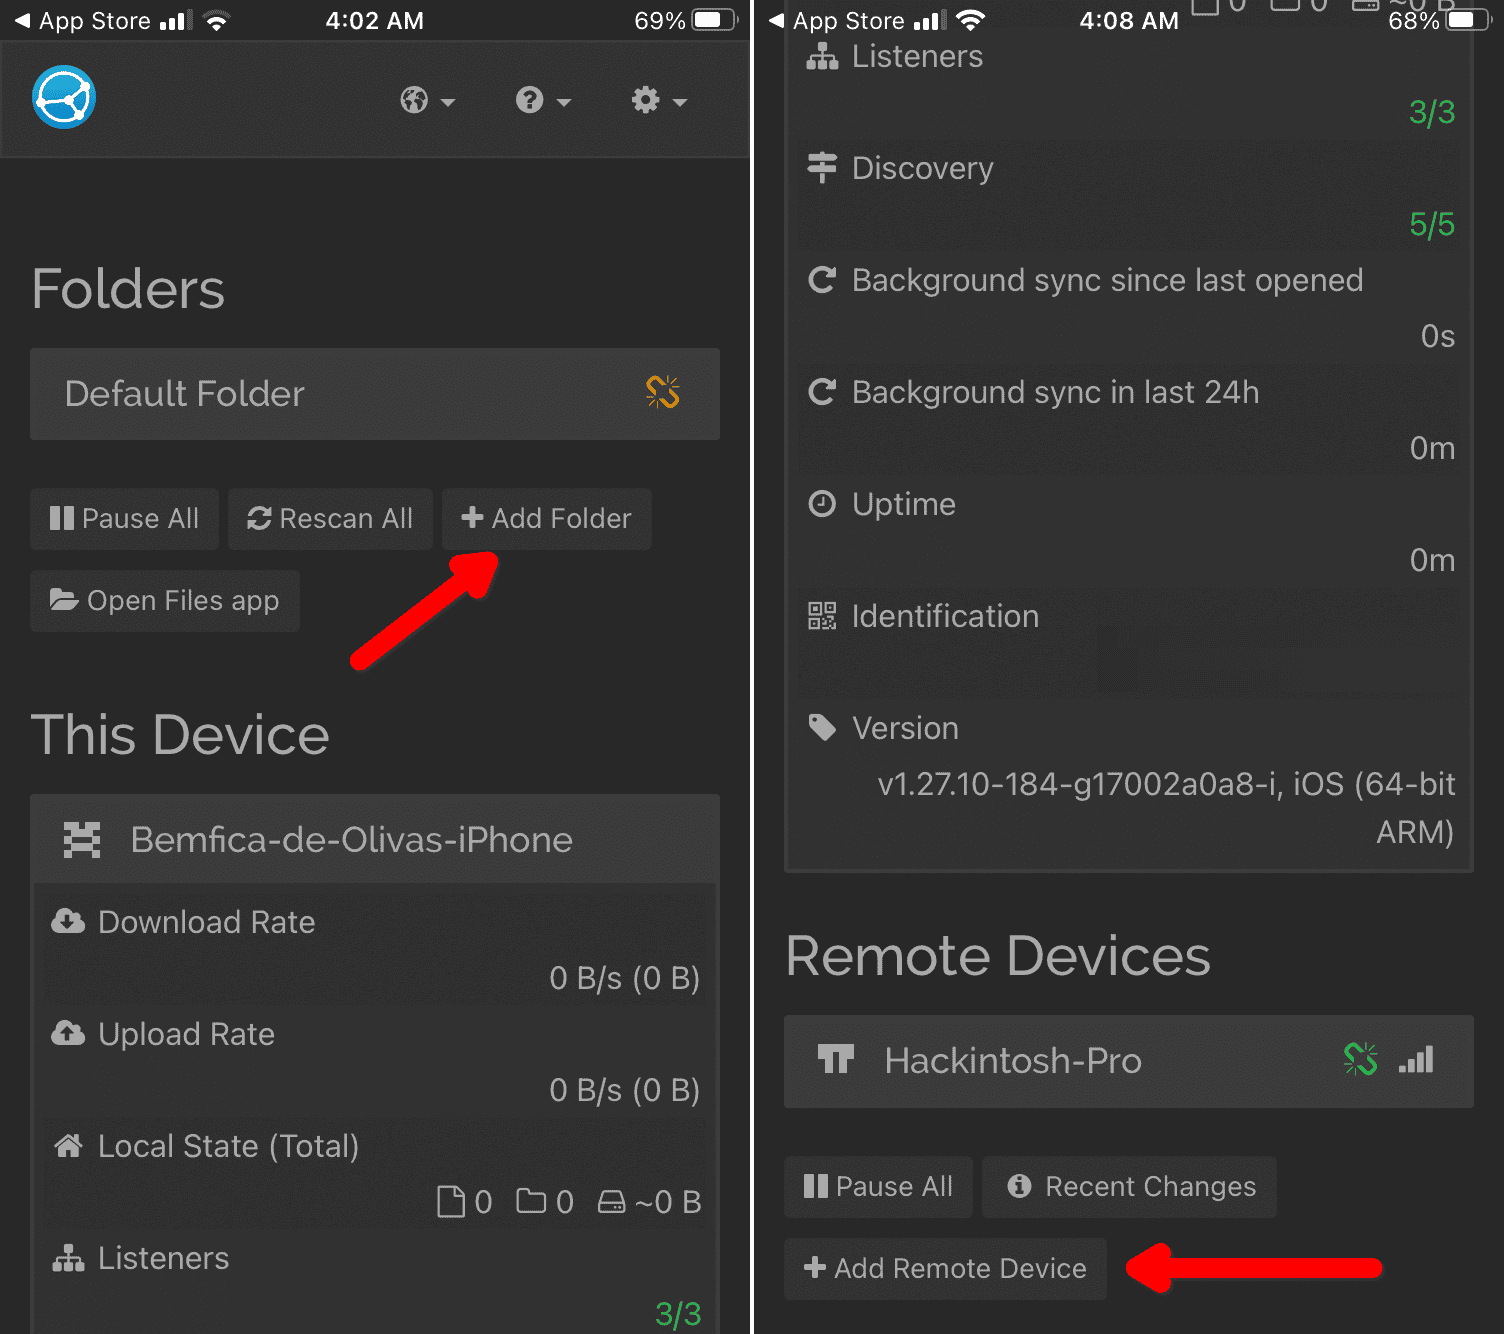
- The initial screen shows your device’s information. Here, you can see its name and ID — that huge character string used to pair with other devices.

- At the bottom of this screen, you’ll find a list of connected devices. There’s a button to add new ones and one to pause syncing. Tap the Add Remote Device button.
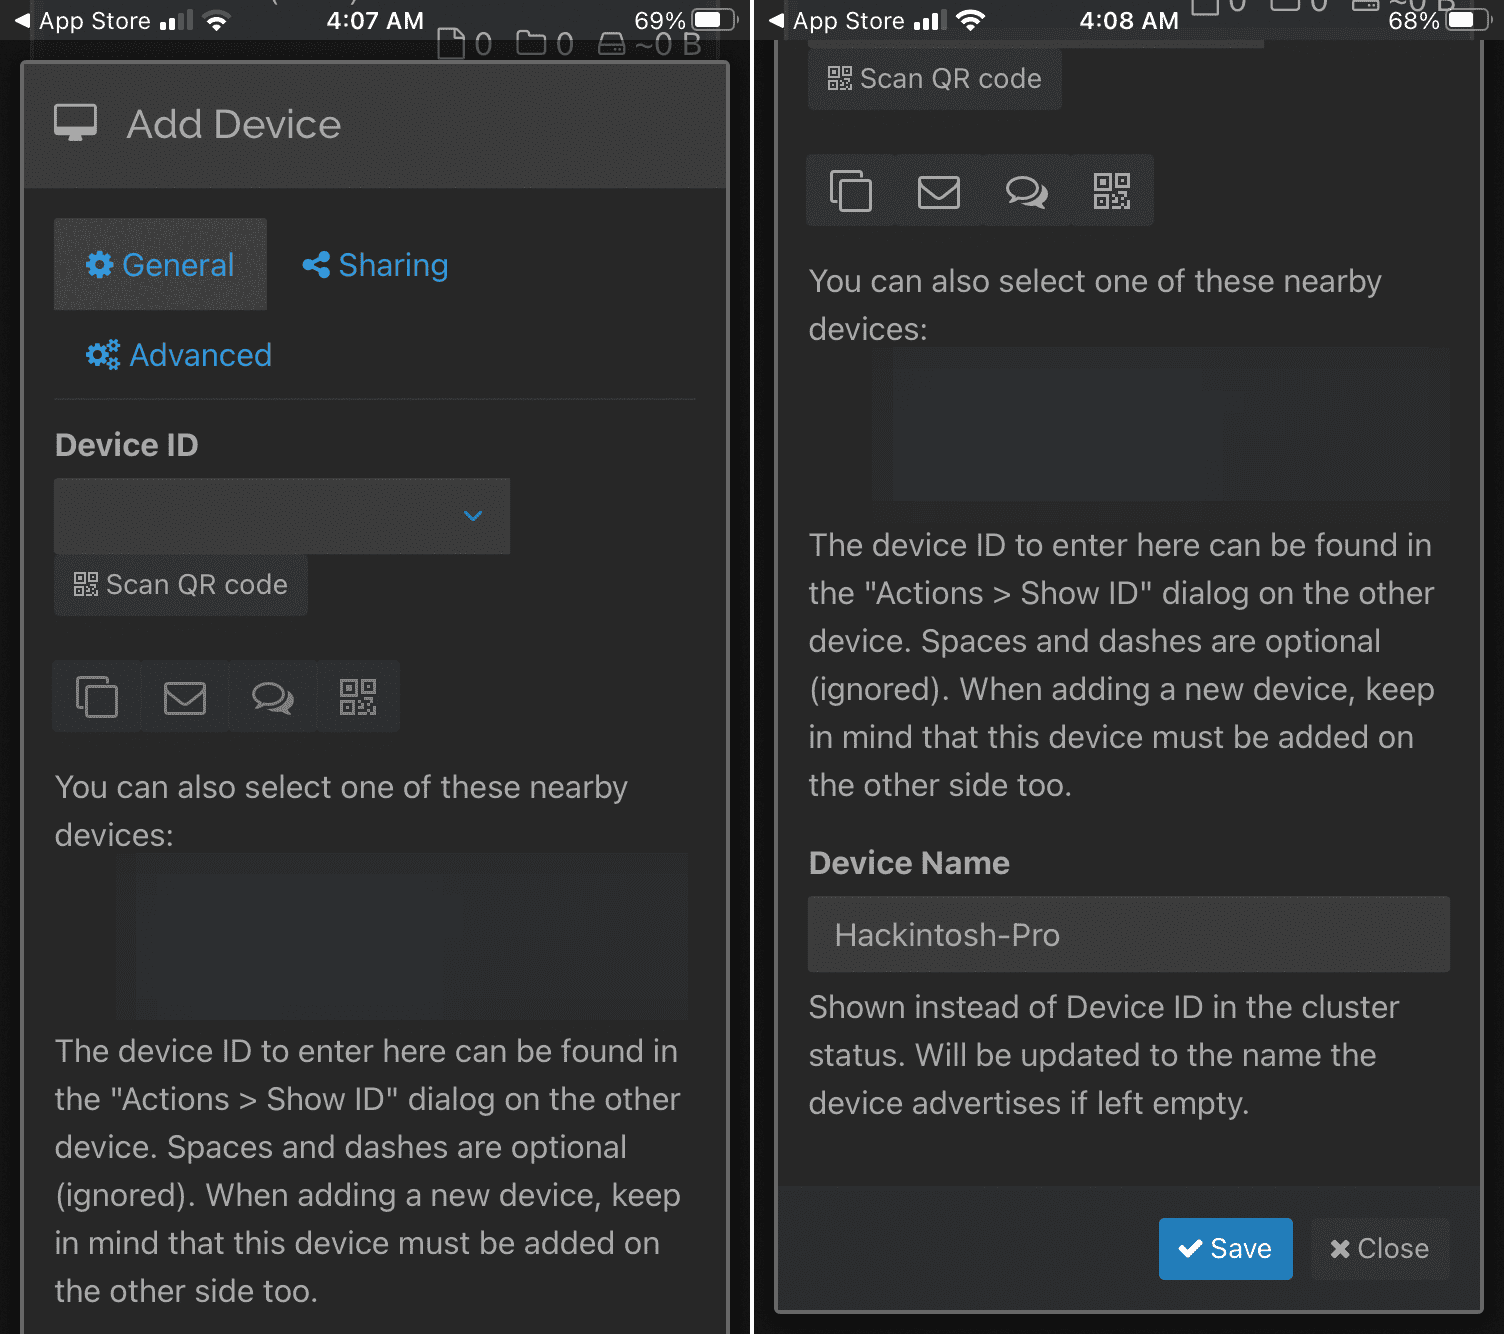
- A dialog will appear. You can get the ID in a few ways, including typing it manually. Considering the string length, I recommend you either scan the QR code or, if available, use the “nearby devices” option. Tap Save, and you’ll be back on the initial screen.
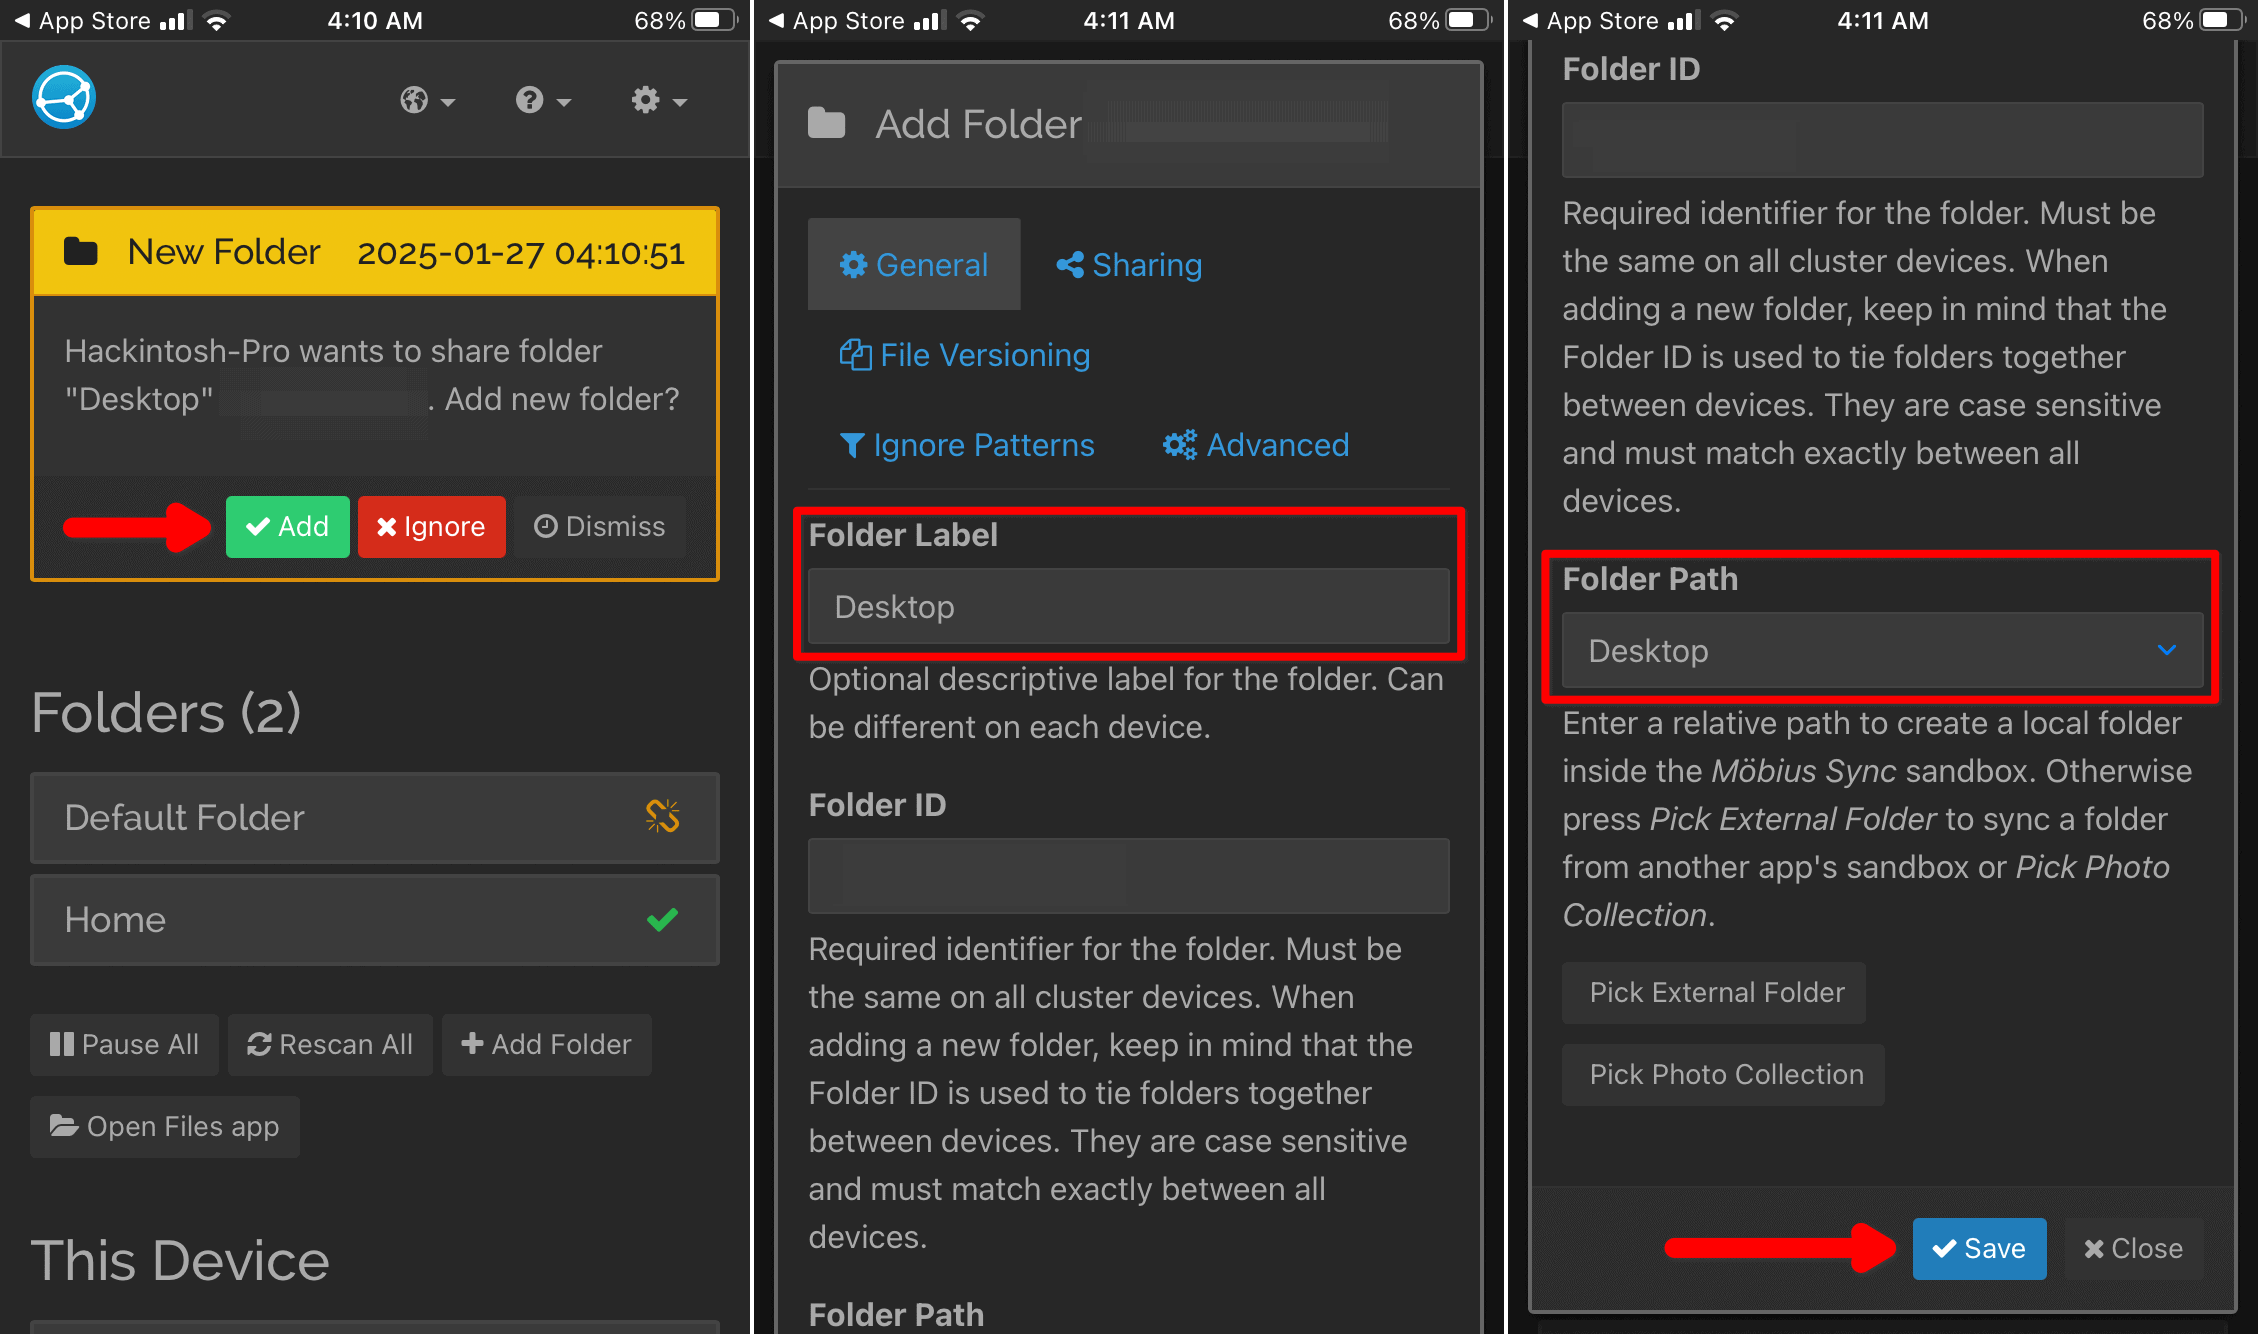
- Tap Add Folder if you want to share a folder that’s not available on other devices. You’ll be able to give it a name (under Folder Label) and, on the paid version, set a different location.

- On the Sharing tab, you can choose which of your paired devices can access this folder. When you select a device here, it will receive a notification to accept or ignore the request.
- Similarly, when you share a folder from another device with your iPhone, you’ll see a notification. Review the folder information, and tap Save to add it to your phone.

Syncthing takes a bit to get used to. After you understand, it, however, having multiple devices becomes a breeze. With instantaneous file sharing, they function pretty much like one computer. With the proper configuration in iOS, even your iPhone can join the Syncthing party.