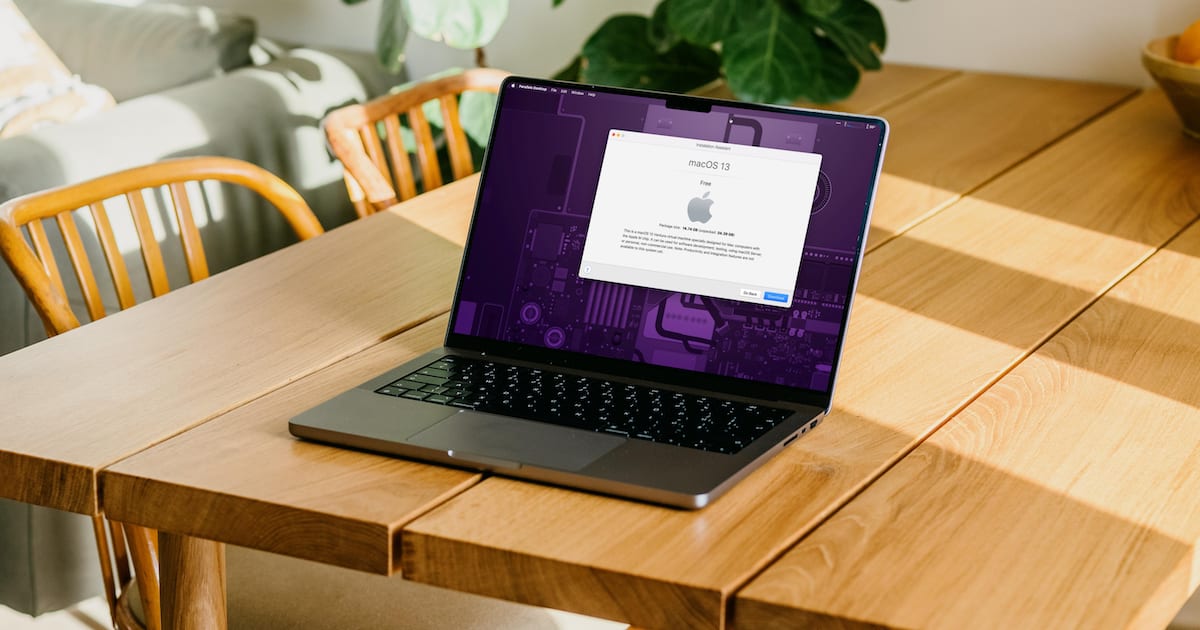
For the Mac enthusiasts who wish to experiment with multiple macOS versions on their computer, your day has finally come. Installing another copy of macOS in a virtual machine, or VM, is entirely possible, and there are quite a few benefits. This setup can be especially helpful for software developers or users who need to test applications on different macOS versions without needing an additional Mac device. Let’s dive into it!
Is It Possible to Install macOS in a VM?
Yes, it’s possible to get macOS in a VM, allowing you to run multiple instances of macOS on a single Mac computer. In this article, I’ll be focusing on one of the more popular options for this available for Mac: Oracle’s VirtualBox. But keep in mind that there are other options available that you can rely on.
Can You Run a Mac VM on a Mac?
Indeed, this is certainly achievable, though certain limitations and prerequisites apply. Primarily, you must possess an Apple computer compatible with the operating system version intended for your VM, along with sufficient disk space and memory to ensure smooth functioning. Moreover, a legitimate installer file, obtainable through the App Store or Apple’s website, is necessary.
How Do I Download a New Copy of macOS Installer?
Apple advises using the most recent version of macOS that is suitable for your Mac, as the most recent features and built-in programs are included in these updates and upgrades, which also assist in maintaining the security, reliability, and compatibility of your computer. But since you are using the operating system inside a VM, you can download any version of it. It’s a good idea to back up your Mac before installing a new version, even if it’s in a VM.
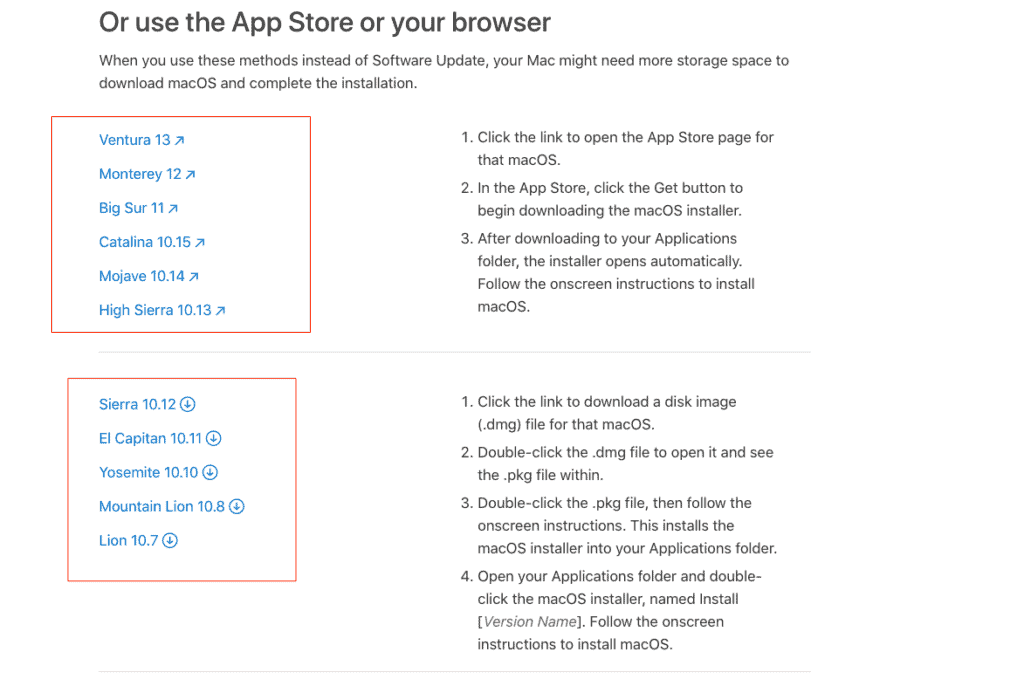
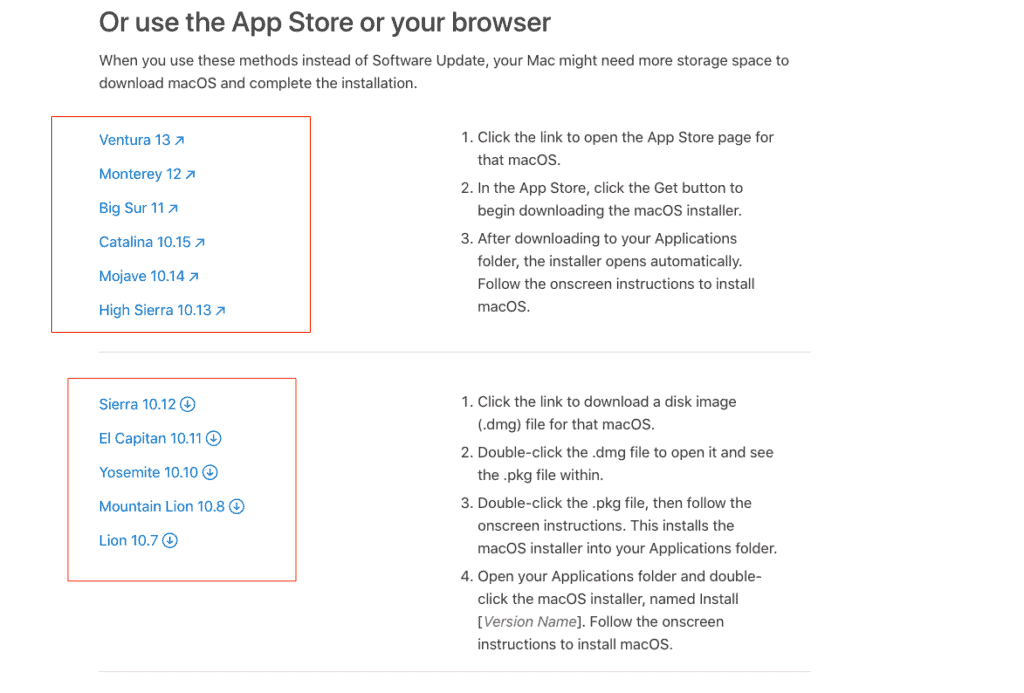
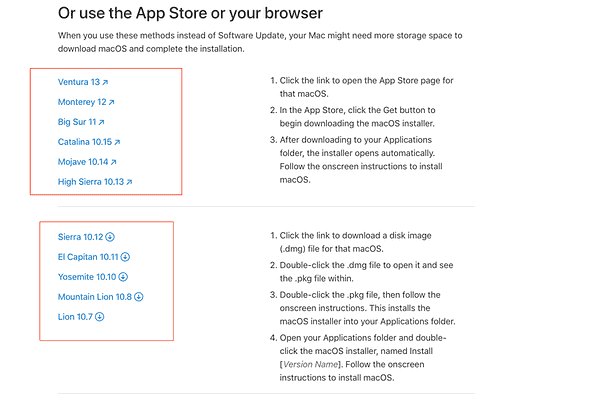
To download a new copy of the installer, simply head to Apple’s official website and click on the link to the desired version. If you encounter the error “This copy of the install macOS application is damaged,” check out our separate guide to fix it. Note that after you download the file, you will have to convert it to ISO, as we will show in the next section.
How Do I Create the ISO File I Need?
- Download the correct setup package in the VM from Apple’s website.
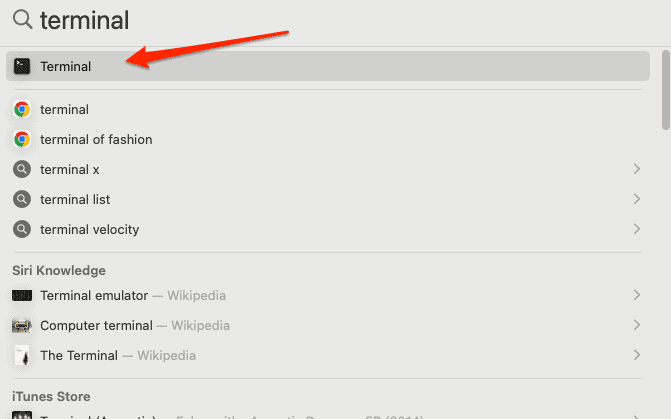
- If it was downloaded from the App Store, we will have to first convert it to dmg. To do this, press Command + Spacebar, type Terminal, and open the first result.
- Next, enter the following command and make sure to replace the Version_name with the actual version of the installation file you downloaded. For example Monterey:
hdiutil create -o /tmp/Version_name -size 8500m -volname Version_name -layout SPUD -fs HFS+J - Mount the disk image file with the following command and again replace Version_name with the actual name of the macOS version:
hdiutil attach /tmp/Version_name.dmg -noverify -mountpoint /Volumes/Version_name - Use the createinstallmedia tool to copy the installer files to the disk image with the following command. Don’t forget to replace Version_name:
sudo /Applications/Install\ macOS\ Version_name.app/Contents/Resources/createinstallmedia --volume /Volumes/Version_name --nointeraction - If you don’t have enough space, you will need to optimize your storage space.
- Unmount the disk image with the following command and replace Version_name:
hdiutil detach /volumes/Install\ macOS\ Version_name - Convert the disk image file to an ISO file with the following command and replace Version_name:
hdiutil convert /tmp/Version_name.dmg -format UDTO -o ~/Desktop/Version_name.cdr - Rename the ISO file extension with the following command:
mv ~/Desktop/Version_name.cdr ~/Desktop/Version_name.iso
You should now have a bootable ISO file on your desktop you can use to set up your VM.
How Do I Connect to a VM on a Mac?
In this article, we will use Oracle VM VirtualBox. Here’s how to download it on your Mac:
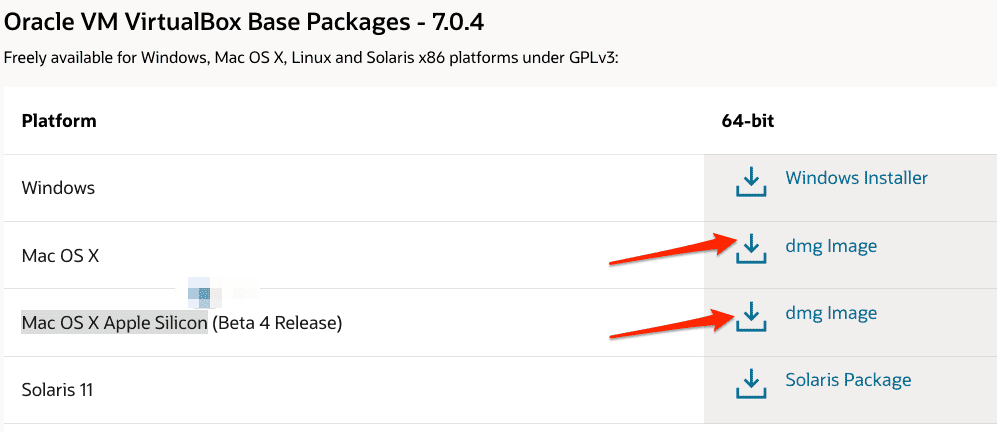
- Head to its official website and click the download link next to Mac OS X or Mac OS X Apple Silicon.
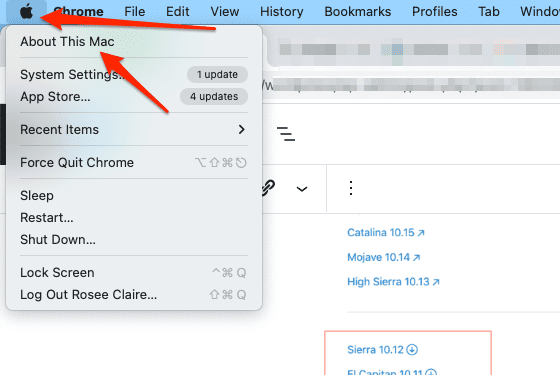
- If you don’t know whether you have the Apple Silicon chip, go to Apple menu > About This Mac and check the Chip details.
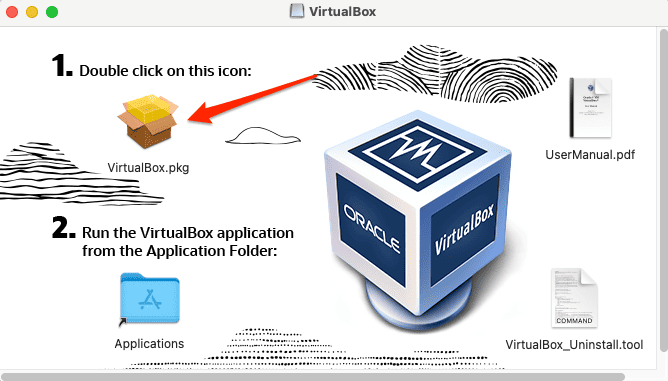
- Next, follow the on-screen steps to install Virtual Box.
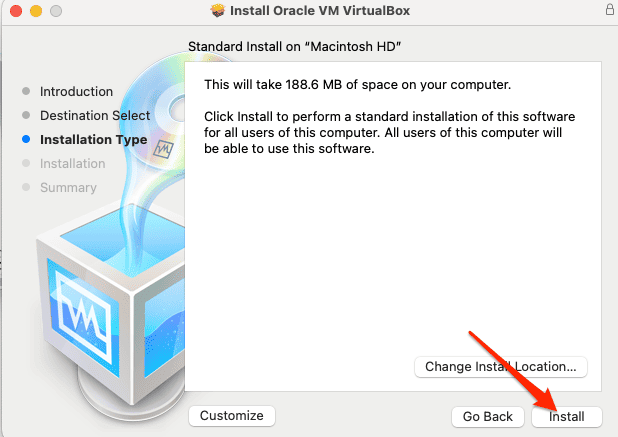
- Click Continue then Install, and enter your user password.
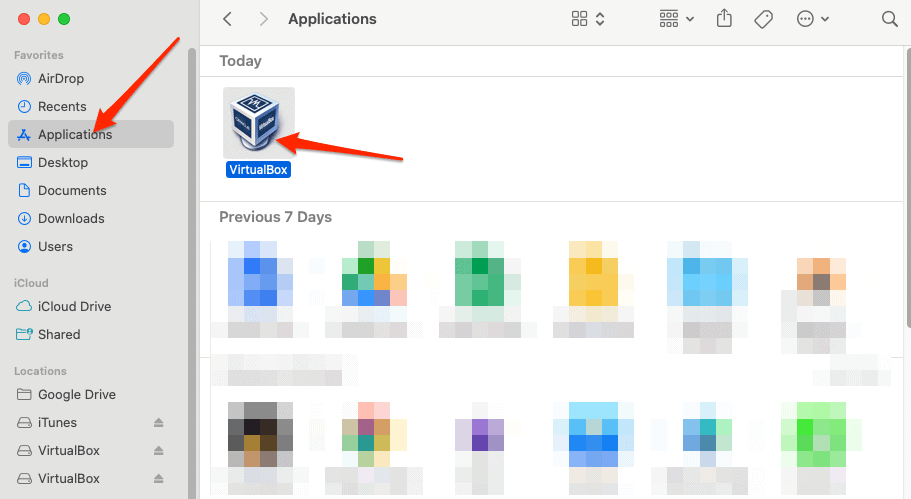
- Once the installation is done, go to Finder > Application and double-click the VirtualBox app to open it.
VirtualBox will be ready to use. Follow along to the next section to install another copy of macOS on it.
How to Proceed With Your Installation
As a preliminary step, you need to make sure your Mac supports the macOS version you want to use on the VM. You can go to Apple’s official website and search for the system requirements for the macOS version. For example, here are the system requirements for Ventura.
Time needed: 1 minute
- Download the macOS version from Apple’s official website.
- On the VirtualBox window click New.
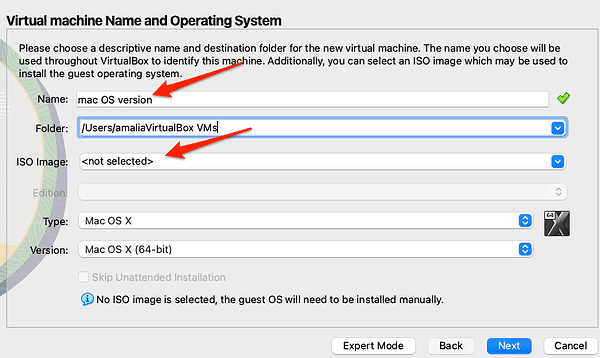
- Enter the operating system version as the name of the VM then select the ISO Image.
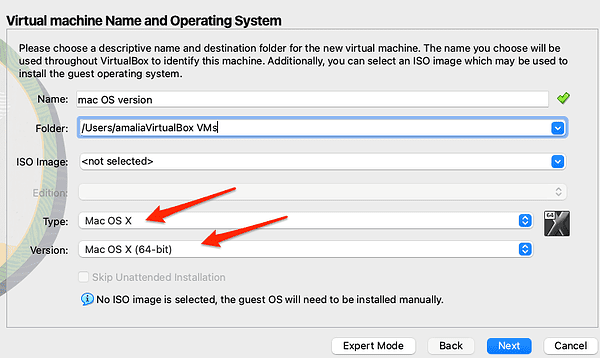
- Set the Type to Mac OS X and choose the right version of the operating system.
- Tick the box next to Skip Unattended Installation then click Next.
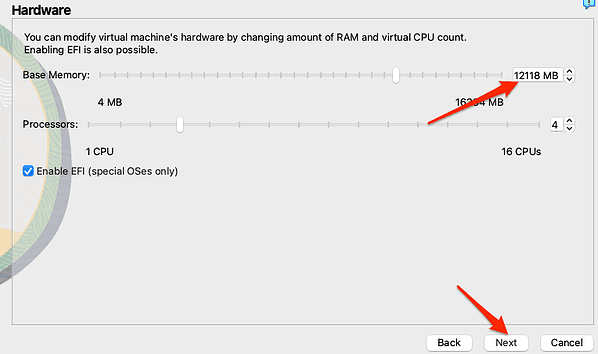
- Set the amount of RAM to use then click Next. You can go back to the system requirements page to see how much the version of macOS needs. Always add a bit more RAM to ensure a smooth experience.
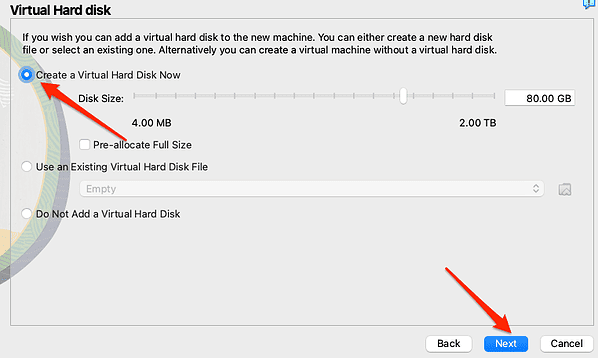
- Select Create a virtual hard disk now, select the disk size then click Next.
- Lastly, click Finish.
Configure the VM
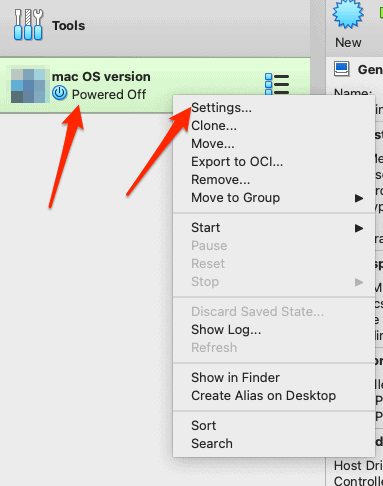
- Before you can use the VM, you have to configure a few things. Thus, control-click the VM and select Settings.
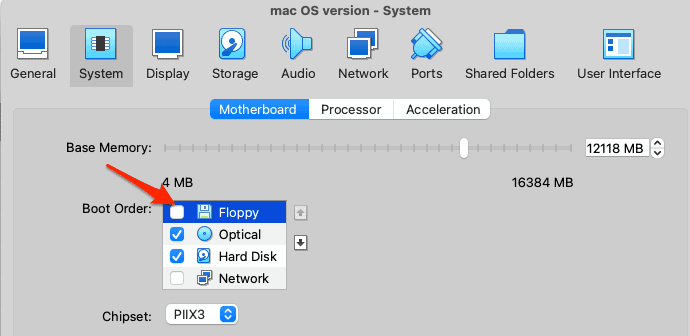
- Go to System and make sure that Floppy is unchecked.
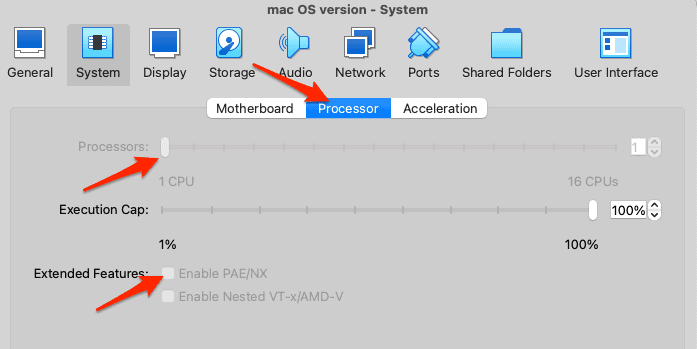
- Navigate to the Processor tab and set the number of CPUs to at least two. Then tick the box next to Enable PAE/NX.
- Next, go to Storage, and under Storage Devices click on Empty. Click the optical disk icon in the top-right corner of the window, then select your Monterey ISO file. Make sure that Use Host I/O cache is enabled.
- Next, go to the Display tab and set the Video memory to 128 MB.
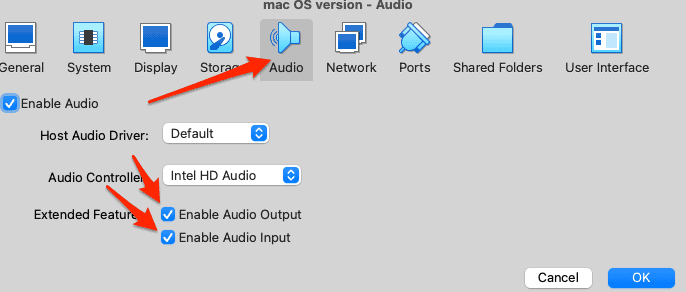
- Move to Audio and enable both input and output and click OK.
- That’s it! Now you’ll be able to run macOS in its own VM.
This setup is not only feasible but also offers significant benefits, particularly for software developers and users who need to test applications across different versions without the requirement of an extra computer.
By following the comprehensive guide provided in this article, you can harness the power of virtualization software to run multiple instances of macOS on a single computer. Alternatively, if you’re looking to run Windows on your Apple Silicon Mac, you have a few options that you can explore.
