Here’s how to create a PDF of a webpage in iOS 11, save it in Files app, rename it and delete it. For example, I’m using an article from The Mac Observer.

- Navigate to the webpage of interest in Safari.
-
Tap the Share button at the bottom. (Image above.)
-
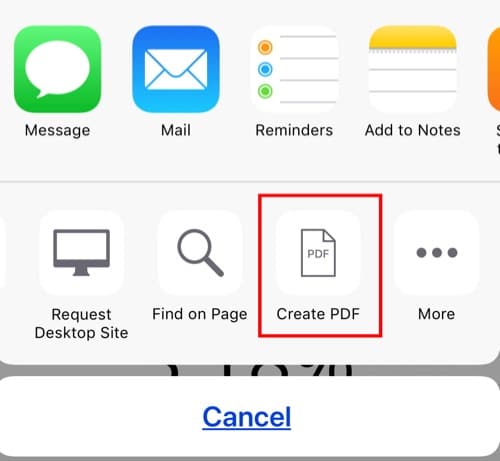
Swipe the Share options’ bottom row to the left until you see “Create PDF.” Tap it. (Fig, 1)
Fig 1. -
The page will be converted to PDF. At the top left, tap “Done.”
-
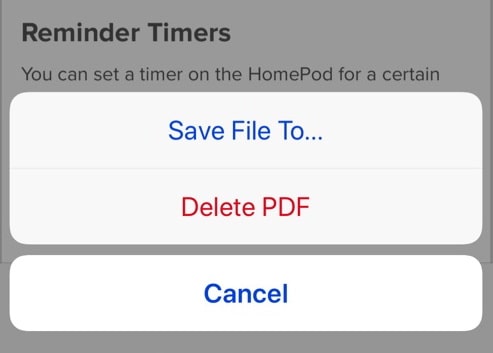
Tap “Save File To…” (Fig. 2)
Fig. 2 -
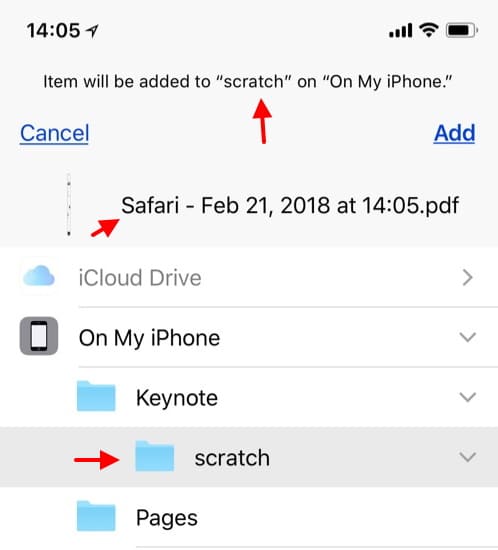
Navigate by tapping on File folders until you have the desired folder selected. In this example, I’ve selected the location “On My iPhone.” On the top right, tap “Add.” (Fig. 3) You’ll be returned to the original webpage.
Fig. 3 -
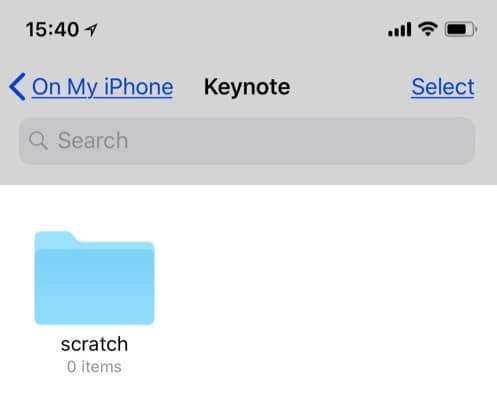
If you want to rename the file, launch the Files app. Select the “Browse” tab at the bottom. Navigate to the folder where you previously saved the file. In this example, I saved it in the folder scratch that’s inside the Keynote folder., “On My iPhone.” Tap it.
Fig. 4 -
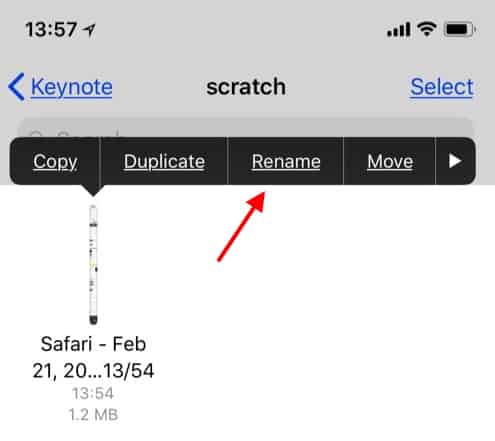
Press the file icon until you see the option to Rename it. Tap “Rename.” (Fig. 5)
Fig. 5 -
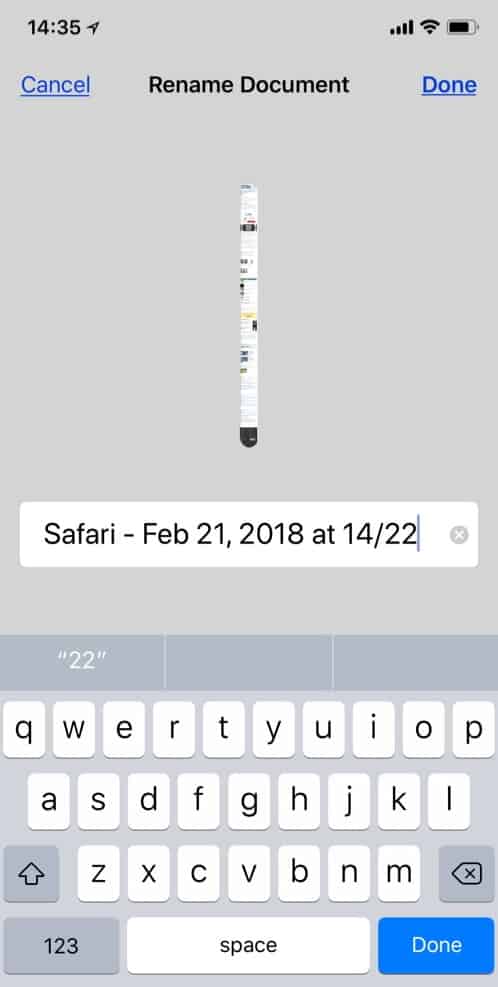
Use the keyboard to rename the file. Tap “Done.” (Fig. 6)
Fig. 6 -
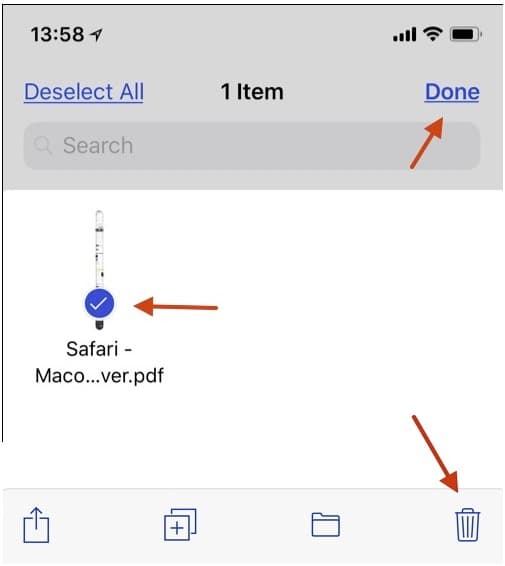
If you want to delete the file, when in the folder that contains it, tap “Select” on the top right. Tap the file. You’ll see a (blue) checkmark. On the bottom right, tap the trash can. (Fig. 7) The file is placed in the Recently Deleted folder where you can recover it if necessary. Finally, navigate to a new location to continue work. Or quit the Files app.
Fig. 7
There are many more things you can do here, but this should help you get your feet wet with creating, saving and managing a file with the Files app. Here’s an Apple support doc with more details.
Hmmmm, I couldn’t save to iCloud Drive as the Add button was greyed out. I could save it to my iPad.
Okay, I was able to save it to iCloud Drive, but not to the Pages or Numbers folder. I found that I could save to some folders, Pixelmator and Graphic though not to Affinity Photo, TextEdit, Preview, and to the top directory.