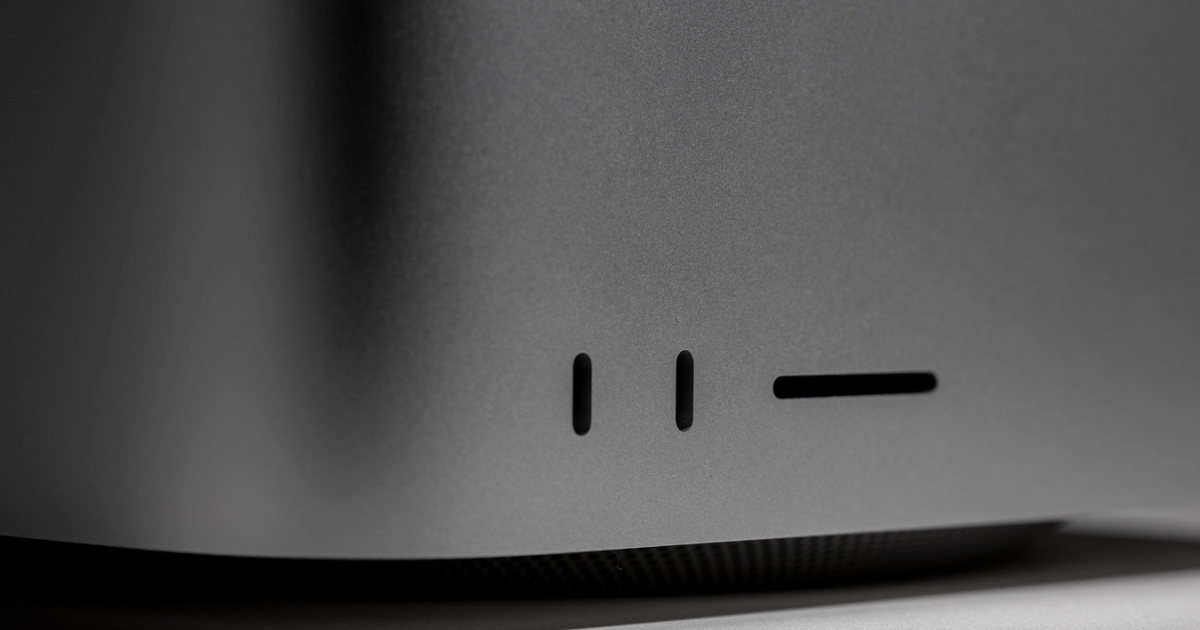
One of the most frustrating things that might happen on a Mac, especially if you create photo and video content, is encountering an issue with the Mac not reading your SD card. Thankfully, it’s not a hopeless problem since there are various fixes that you can try to fix issues causing your SD card woes.
Below we discuss the possible reasons why your Mac might not read or detect an SD card. This problem could happen not only to models with built-in SD card slots, but also on the MacBook Air and other Macs requiring an external SD card reader. In fact, there’s actually a greater chance of running into problems with an external SD card reader connected to your Mac via additional cables or connectors.
Reasons Why Your Mac Cannot Read Your SD Card
There could be a number of causes for your Mac’s inability to read an SD card. The most common problems include:
- Broken SD card, SD card slot, or SD card reader.
- macOS does not support the SD card file system (macOS Ventura supports APFS, HFS+, FAT32, and exFAT.
- Incorrectly mounted SD card.
- Corrupted or damaged SD card firmware.
- Virus-infected SD card.
How to Resolve Problems With Your Mac Not Reading an SD Card
Check the condition of the card
The first thing you need to do if you find your Mac is unable to read or erase an SD card is to check the card for damage or scratches. If the SD card is physically damaged, then you have no choice but to use a new one. However, if the card only has scratches, you may be able to get it repaired.
If the SD card is neither damaged nor has scratches, check if it is covered with dust. If it has accumulated dust, you can clean it and try inserting it again.
Check if the SD card is locked
If you’ve been using digital cameras and other devices with SD cards, you should know by now that the storage card has a switch on the side. Check if that switch is locked. If so, push it up to unlock it. Hopefully, that will allow your Mac to recognize the SD card.
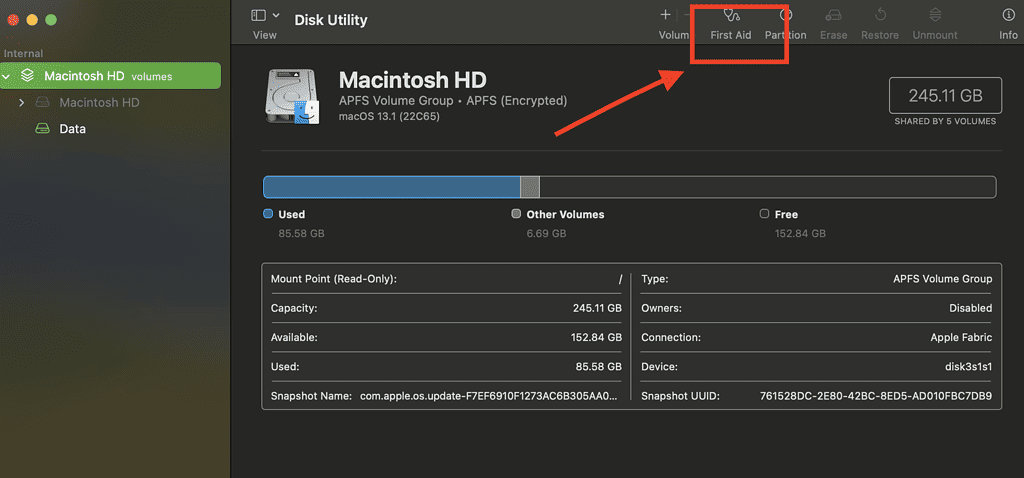
Repair SD card via Disk Utility’s First Aid Option
If your Mac won’t detect or read the SD card even after cleaning it, you can try to repair it using your Mac’s Disk Utility > First Aid option. Note that this process can repair the SD card, but the downside is that it may result in data loss.
To repair the SD card using the First Aid option in Disk Utility, simply launch Applications > Utilities > Disk Utility > First Aid > Run.
Check Finder Desktop and Sidebar Preferences
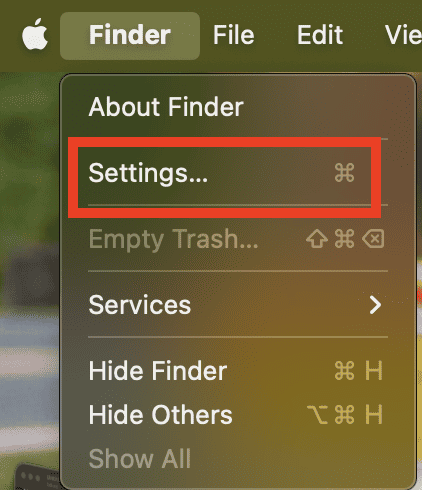
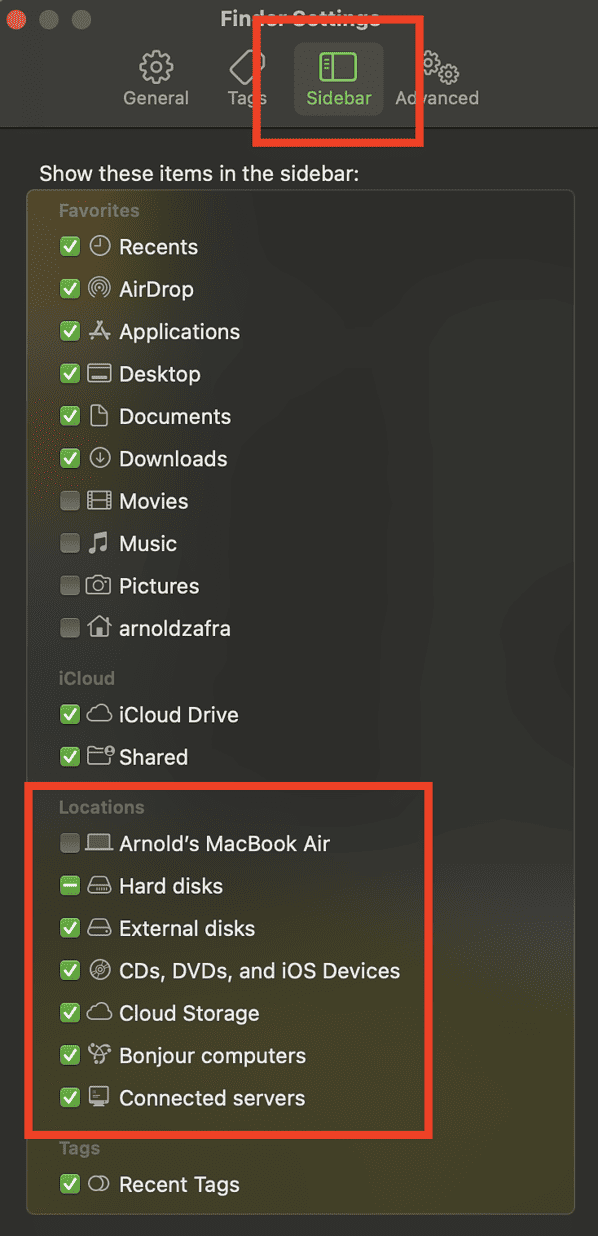
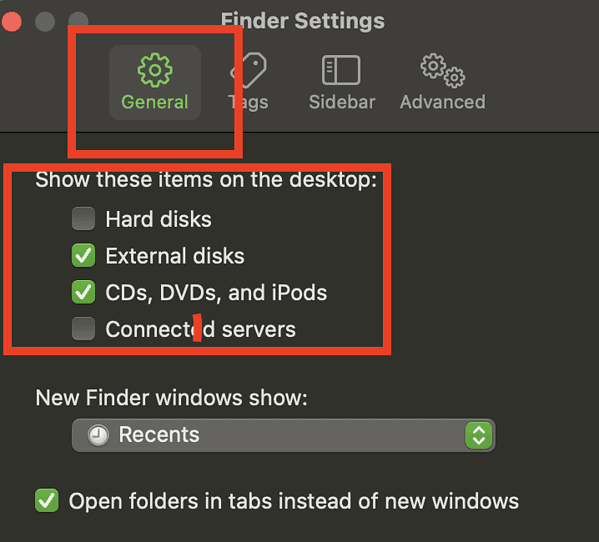
Normally, if you insert the SD card or connect an SD card reader to your Mac, it should show up in the Finder’s sidebar and desktop. If it doesn’t show up there, check your Mac’s Finder desktop and sidebar preferences through the steps below.
Time needed: 2 minutes
To display your SD card on Finder’s sidebar and the Desktop:
- Open Finder.
Click an empty space on your desktop, which will change to the Finder app.
- Open Finder Settings.
From your Mac’s menu bar, click Finder > Settings.
- Configure your Mac to display the SD card in the sidebar.
Select Sidebar, then check all items under Location.
- Configure your Desktop to display SD cards, if desired.
Click the General tab and select External disks under Show these items on the desktop.
Check if your Mac’s SD card port is functioning properly
For users of Macs with built-in SD card readers, you can check whether it is functioning properly via System Report.
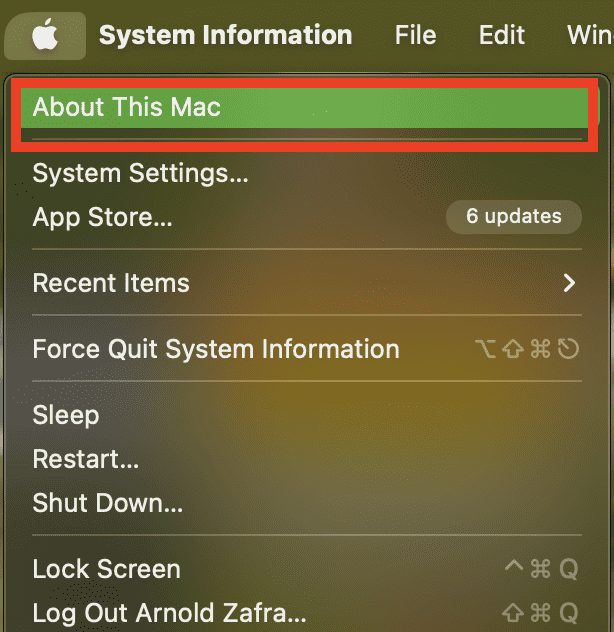
- Click the Apple icon in the top left corner of your Mac.
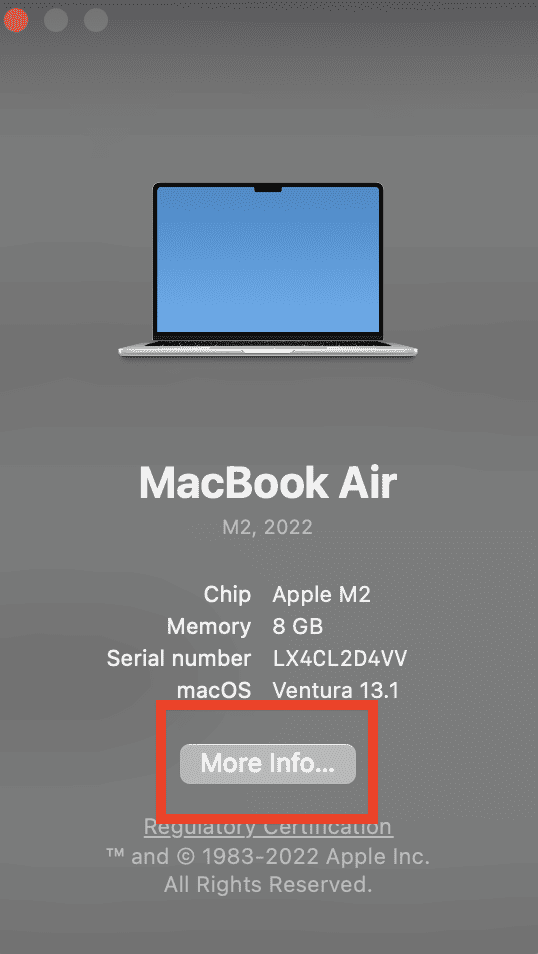
- Click on About This Mac > More Info.
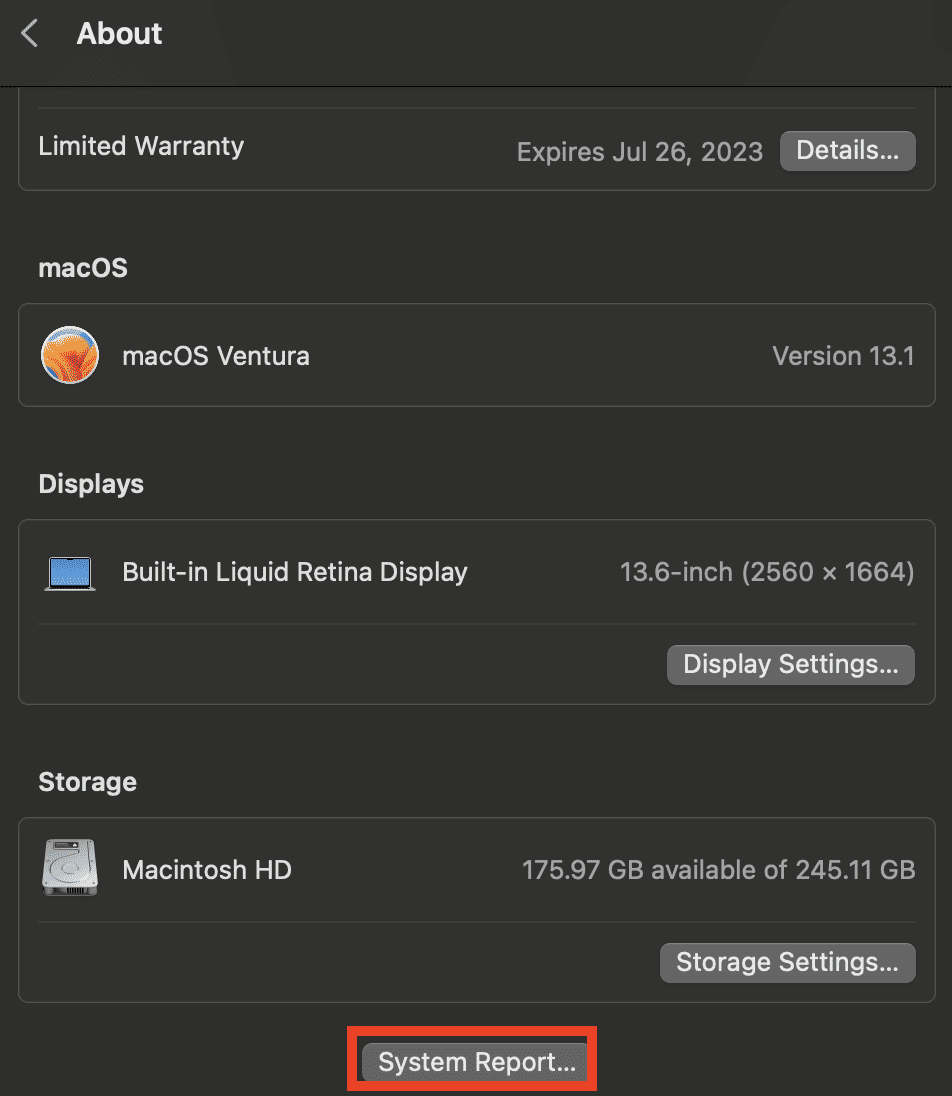
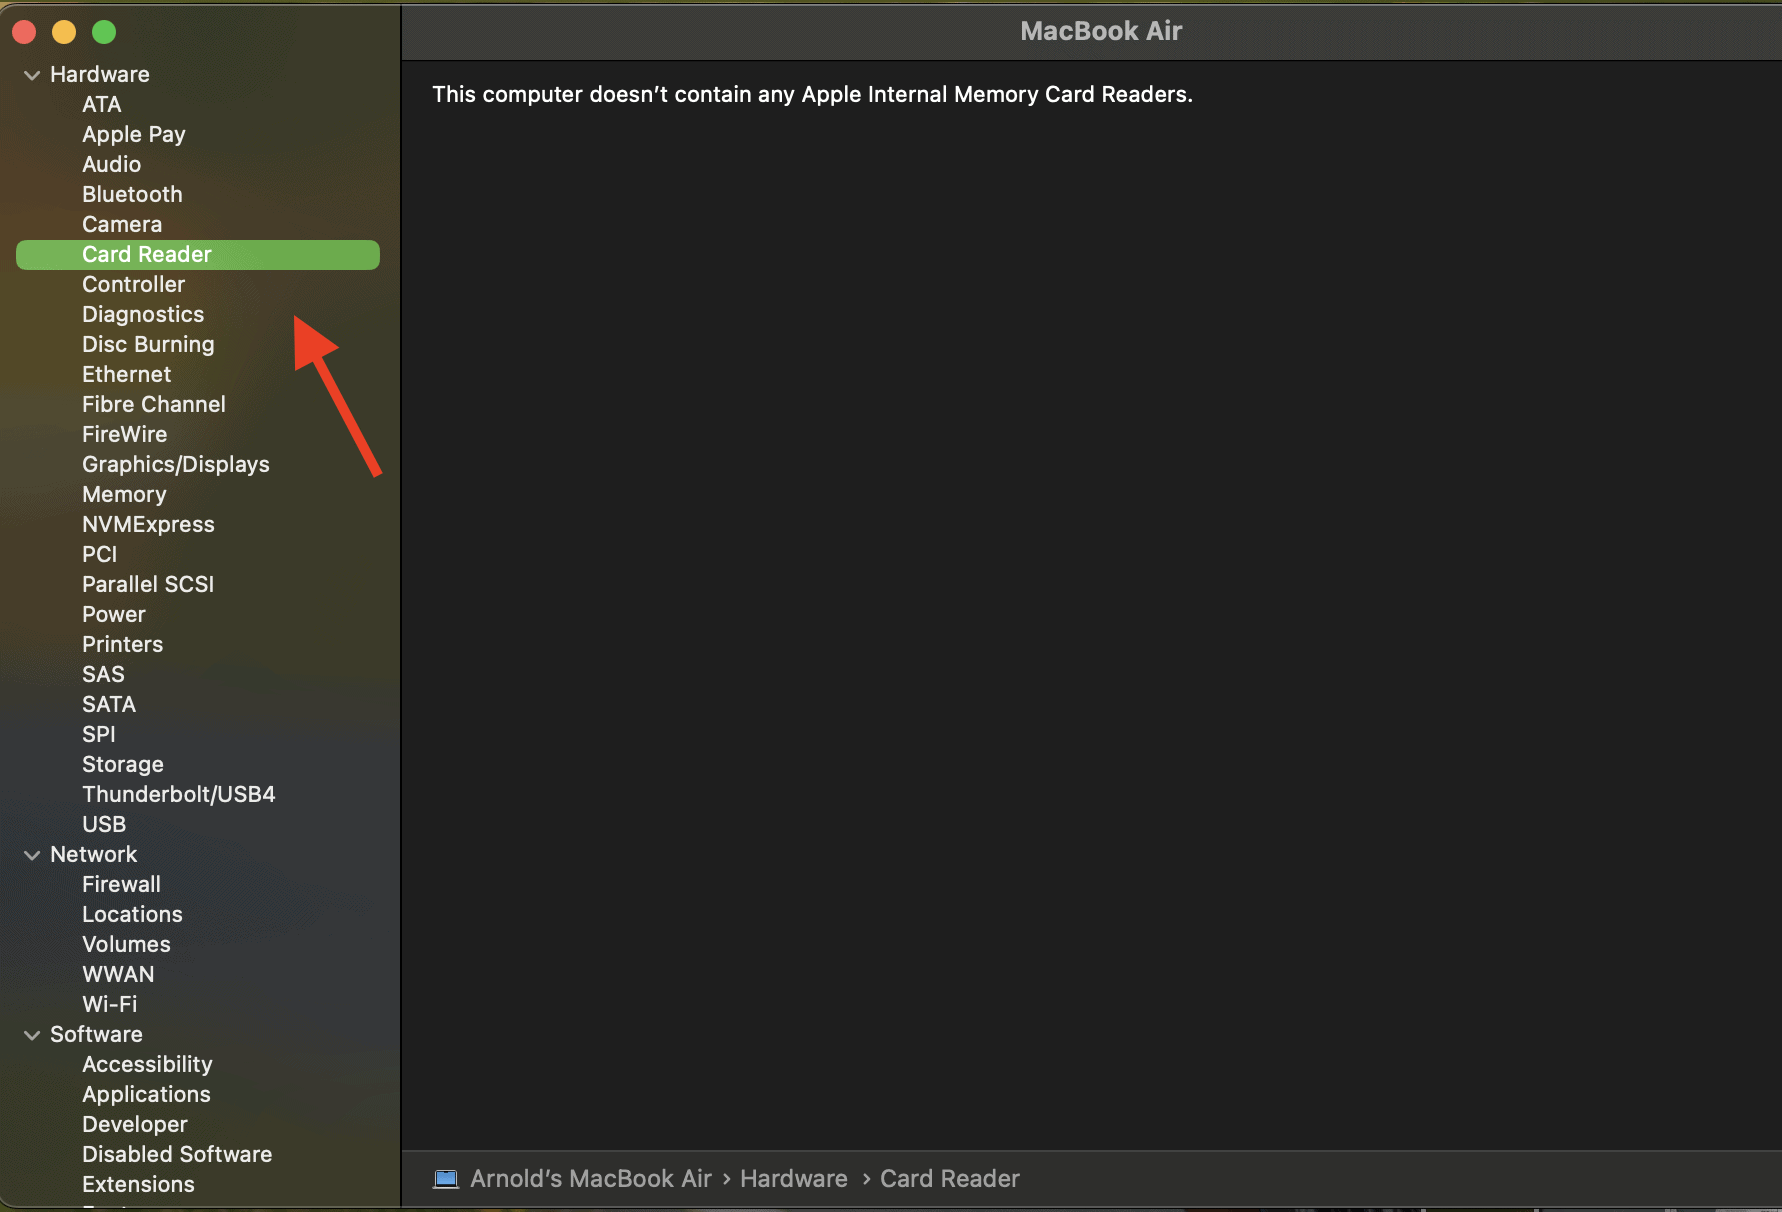
- Click on System Report > Select Card Reader.
- Check if you can see details including Vendor ID and Device ID.
If you can’t see any information, you may need to reset the NVRAM if you’re using an Intel-based Mac. For those who are using Apple Silicon Mac, you simply need to restart your Mac.
Here are the steps to reset Intel-based Mac’s NVRAM.
- Shutdown your Mac
- Turn it on again and then press and hold Command + P + R for 20 seconds.
- When the Apple logo appears for a second, release the keys.
- NVRAM is reset and your Mac will automatically restart.
- Insert the SD card and see if your Mac is now able to recognize it.
Restart USB daemon using the Terminal app
For those who are not familiar, memory card readers pass data through the universal serial bus, or USB. The USB daemon is a background process that controls this interface on the Mac. It is responsible for device mounting, configuration management, and other aspects of transferring data via USB. If the USB daemon stops working, it could affect your Mac’s ability to read your SD Card. If this happens, you need to restart the process. Below are the steps to restart the USB daemon.
- Launch Applications > Utilities > Terminal.
- Enter the terminal command below to restart the USB daemon process
sudo launchctl stop com.apple.usbd; sudo launchctl start com.apple.usbd
- Press Return
You’ll be asked to enter your admin password. Once the USB daemon is restarted, insert the SD card and see if your Mac is reading it.
When All Else Fails, Visit Your Nearest Apple Store
If all the troubleshooting steps provided above don’t fix your issue with the SD card, we suggest that you take your Mac to the nearest Apple Store and have them check if the SD card or reader is damaged. If you are using an external SD card reader, then you might want to consider getting a new one.
Bonus Tip
Here are some other tips on preventing such problems from happening in the future.
- As much as possible, avoid using no-name SD cards. These SD cards are often made with low-quality flash memory chips that can stop working anytime.
- Make it a habit to reject/unmount the SD card before removing it. This habit will not only help prevent errors, but also avoid data corruption.
- If you’re not using the SD card, place it inside its storage container to shield it from moisture, excessive heat, and extreme cold conditions.
There you have it. We hope that following the tips above helps resolve any problems you may have with your Mac not reading SD cards. Feel free to share other tips that we’ve missed by leaving a comment below.
