Is your Mac running slow after making the update to macOS Sonoma? That’s a bummer, but fortunately, that doesn’t necessarily mean your Mac model is no longer supported.
There’s a lot to love about Sonoma, but an underperforming machine isn’t one of them. If your Mac is capable of accepting and installing an update, it should be capable of handling everything that comes along with it. I’m going to take a look at some things you can do to ensure your device is performing the way you want it to.
How To Fix Mac Running Slow After Sonoma Update
1. Wait it Out
While some may not like this answer, my advice would be to wait and see what’s happening with your machine after the update. Considering you’re likely making the jump to a brand-new version of macOS, your machine may be completing a number of processes that it needs to run optimally.
Though this may not be ideal, I would give an update a couple of days to “settle” before actively worrying that something is wrong with your machine.
2. Kill Resource-Intensive Apps with Activity Monitor
Time needed: 5 minutes
If you find your machine running slow, the first thing you should be on the hunt for is any app that may be hogging resources. Whether these app/s are naturally using a lot of resources, or there are simply some hiccups after the update, force closing them through Activity Monitor may alleviate some issues. Follow these steps:
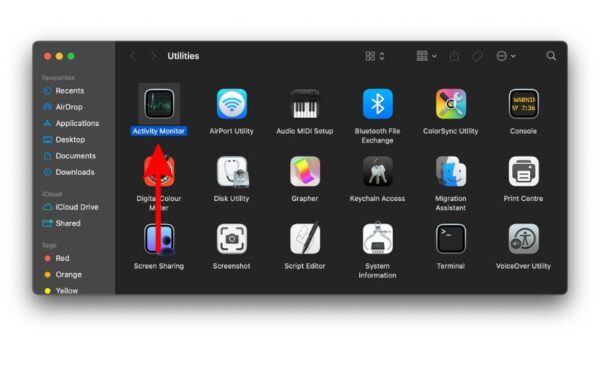
- First, locate Activity Monitor. It can commonly be found via Applications > Utilities, but you can also find it via a Spotlight Search from the menu bar.
- After opening Activity Monitor, click the CPU tab. This organizes your apps by the amount of CPU they’re using. If you spot anything suspicious, click the app, then click the X button near the three dots to force close them.
- Do the same for the Memory column.
3. Clear Storage on Your Mac
I’ve written about ways to clear up space on your Mac before, so I know it can be crucial to ensure that you keep some space free on your machine. While it’s good to keep around 20GB of space free for a macOS update, it’s also a good idea to keep some space free to ensure apps are capable of completing the processes that they need to.
For this one, let’s take a look at your storage to see if we can find anything taking up large amounts of space.
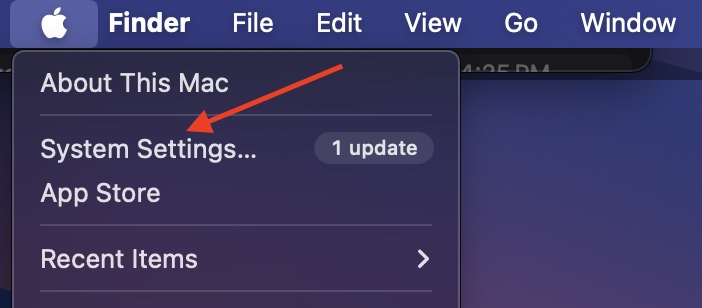
- First, navigate to the Apple Menu and select System Settings.
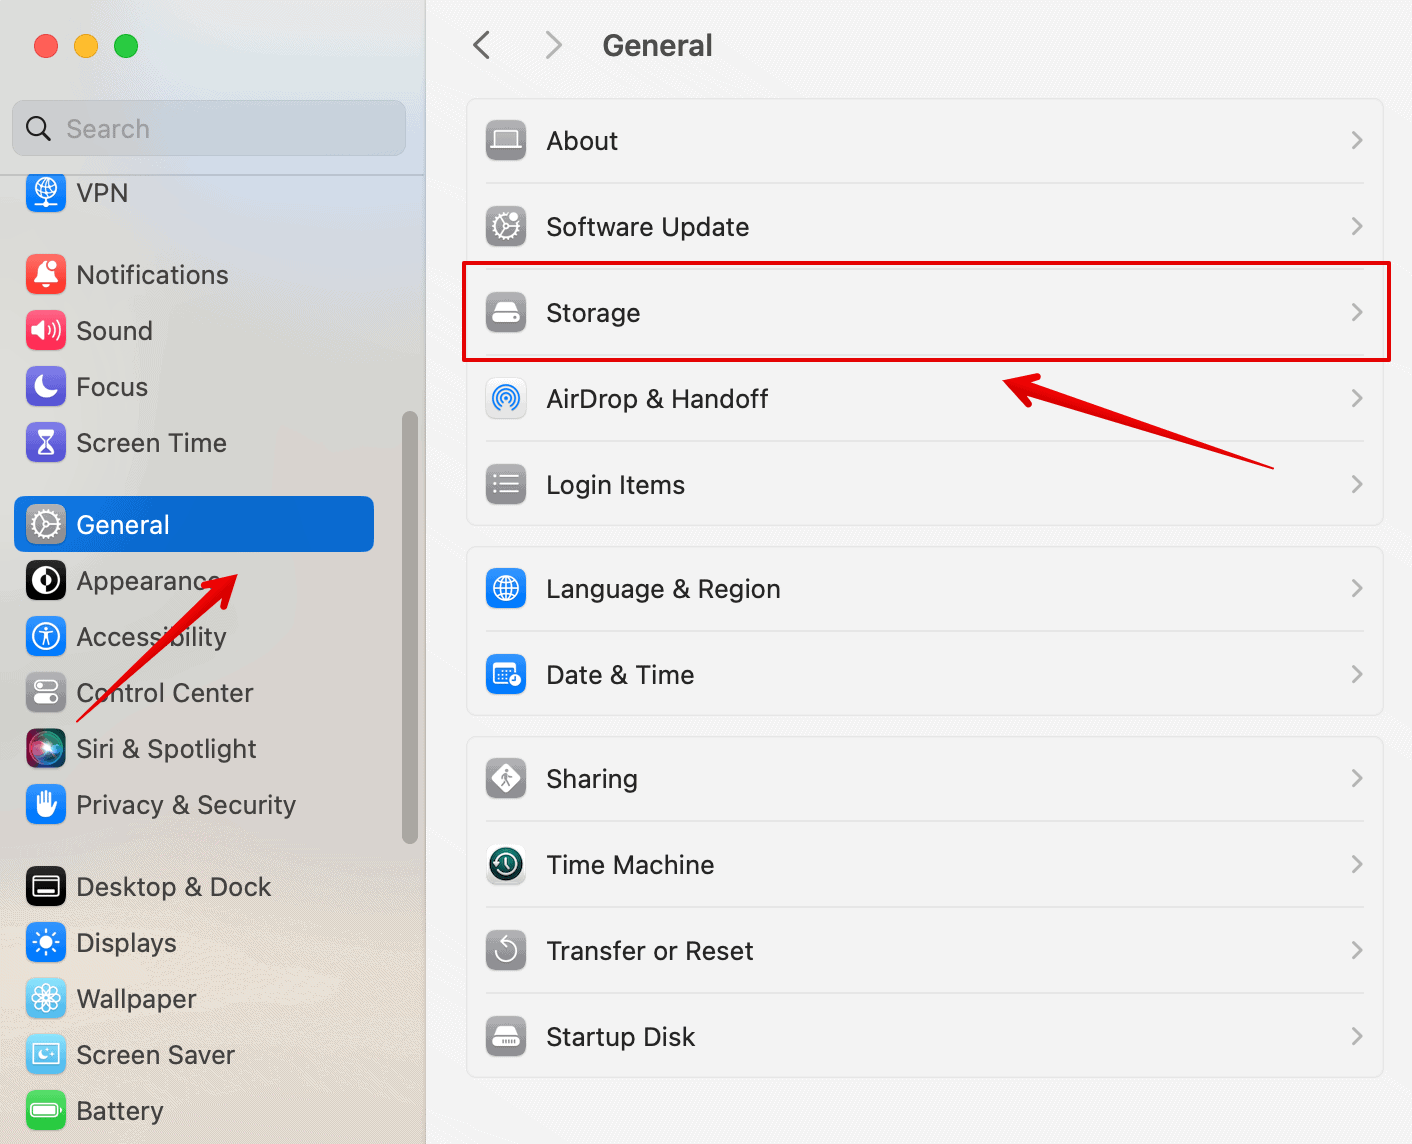
- Tap General.
- Choose Storage.
- Here, take a look at what’s using a lot of space on your device. If any apps need to be removed, uninstall them by dragging the app icon from your Applications folder to the Trash. If it’s photos or other media, delete what you think is appropriate.
Of course, you may also want to consider Intego Washing Machine to handle this problem for you. Using this software can be useful for removing unnecessary files that may be hard to search for on your own.
4. Disable Startup Items
It may be that certain startup items are causing the slowdown. When you boot up your Mac, there is the option to allow certain apps to open upon startup. However, what you actually need and what actually opens are two different things. Let’s fix this.
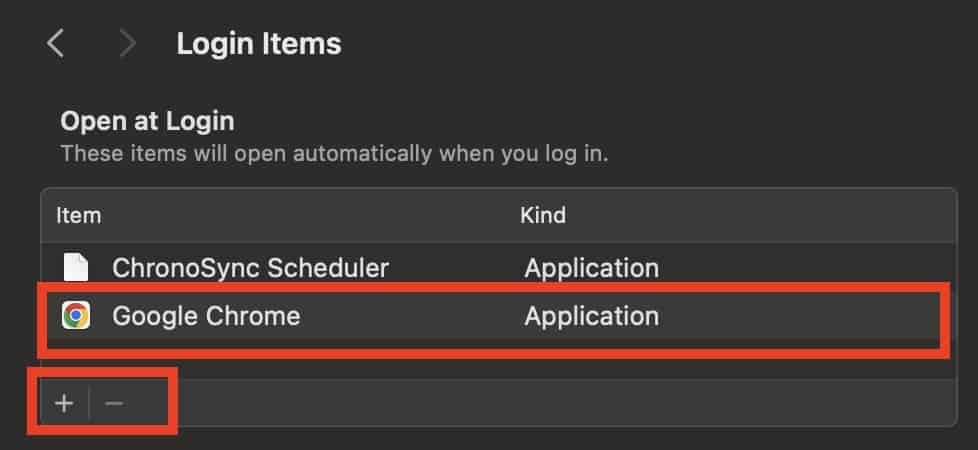
- Navigate back to Apple > System Settings from the menu bar.
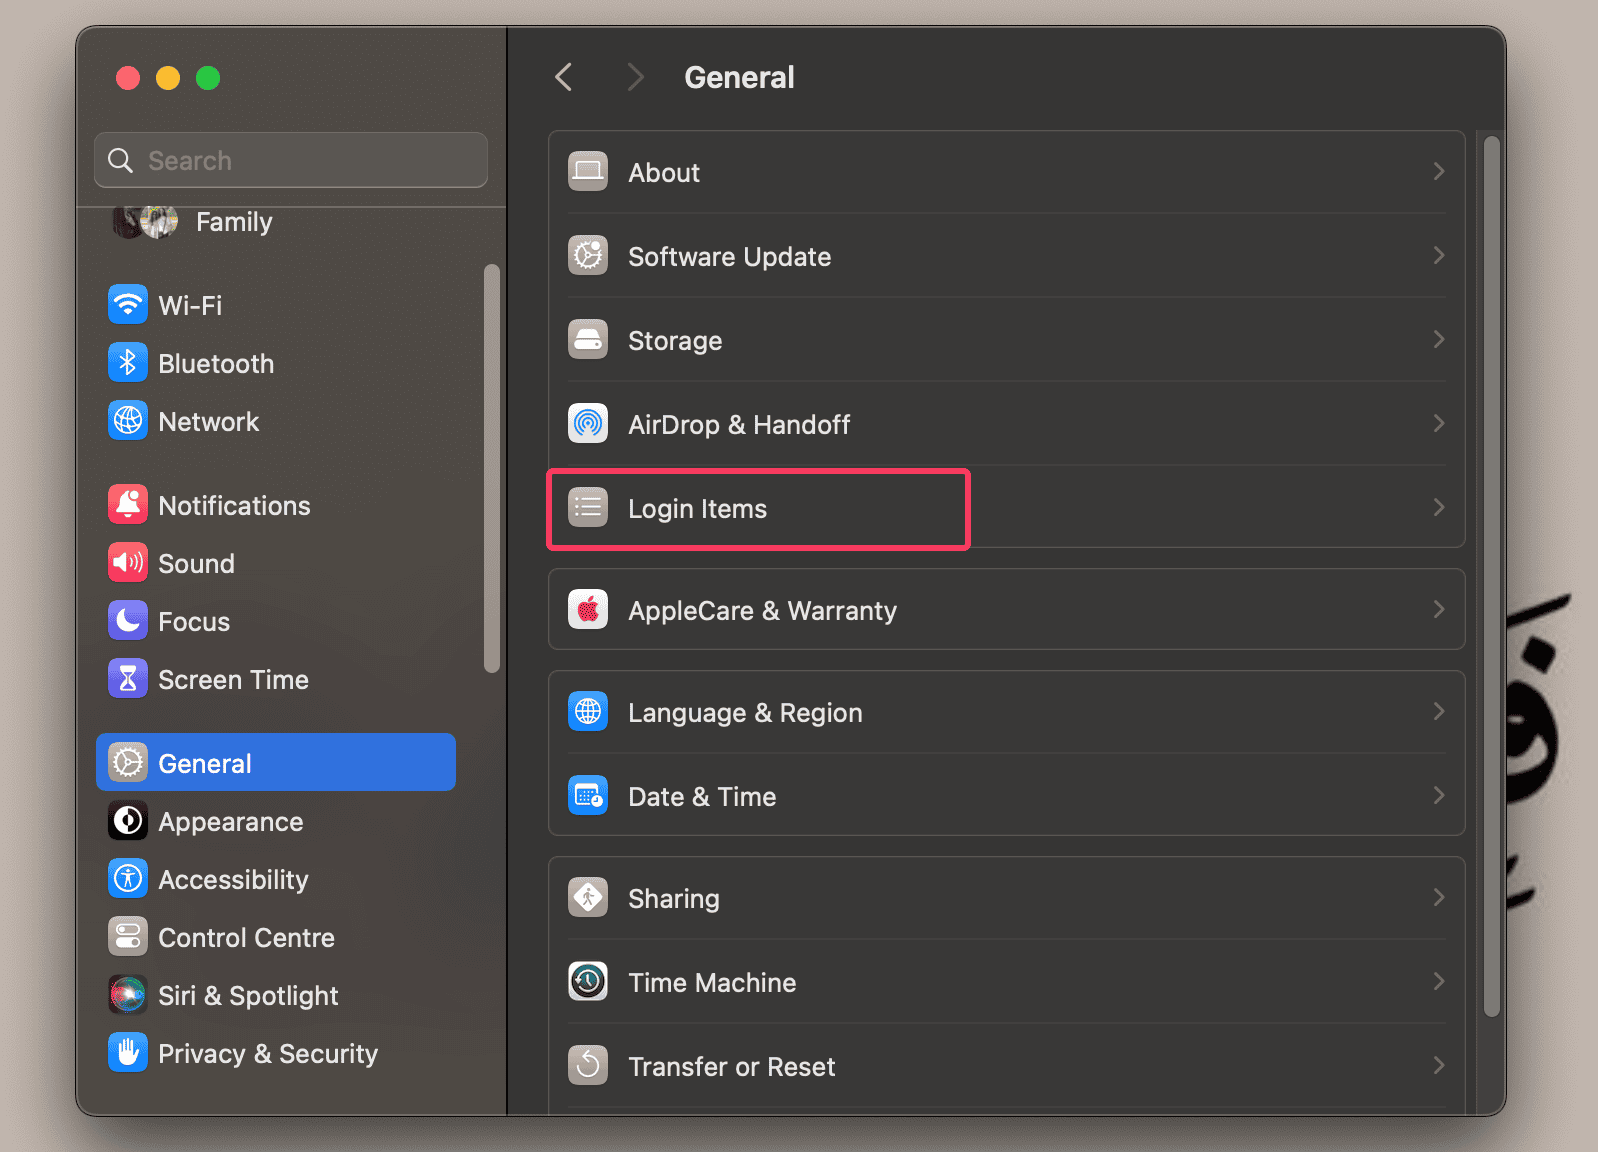
- Select General and then choose Login Items.
- Select any apps that may be unnecessary and then select the minus button (-) to remove them.
5. Disable Certain Sonoma Features
Look, I’m not a fan of this option. Personally, I don’t think Apple would be thrilled with the idea, either. However, if you find that your machine is truly running slow after an update, you may want to consider disabling certain features in Sonoma that may be unnecessary.
I don’t like this option because your Mac should be running fine after an update, even with these features enabled (unless you’re using a Hackintosh, then it’s likely to be expected). But if your machine actually supports the update, then your machine should be running fine after the update.
Suggestions in this category include simply changing your wallpaper to something basic and static, such as an all-black background. Right-clicking or Control-clicking on your desktop and selecting Change Wallpaper is the fastest way to do this.
You can also disable the Genie Effect, which is the visual motion you see whenever you minimize something on your desktop. Change this via System Settings > Desktop & Dock and select Scale Effect under the “Minimize windows using” section. You can also go to Accessibility > Display and ensure Reduce Motion is enabled.
As mentioned, I don’t think this is necessary, but your mileage may vary depending on the age and condition of your device. You may also want to know what to do if you run out of application memory in macOS Sonoma.

