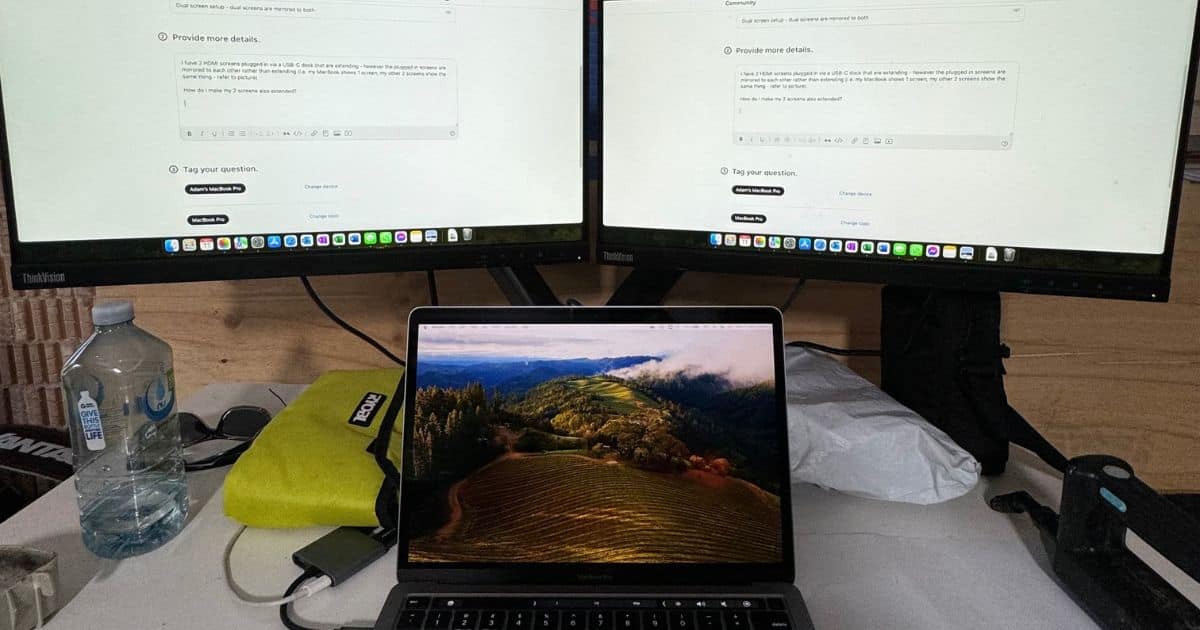
Apple is gradually building a more inclusive ecosystem. Take the MacBook Pro M1 Pro as an example—it made headlines for its highly anticipated Dual Display feature. While the base M1 model only supports one external monitor, you can use up to two third-party output devices on M1 Pro and M1 Max.
The thing about new features, however, is that they’re not without kinks. Dual Display has recently been acting up on macOS 15.1 and 15.2. And troubleshooting is such a hassle because you’ll have to check your MacBook, external monitor, and macOS. To speed up things, start with the most likely causes. Here’s what to do.
How To Fix MacBook Pro M1 Pro Dual Display Issue
1. Force Detect Displays
Time needed: 3 minutes
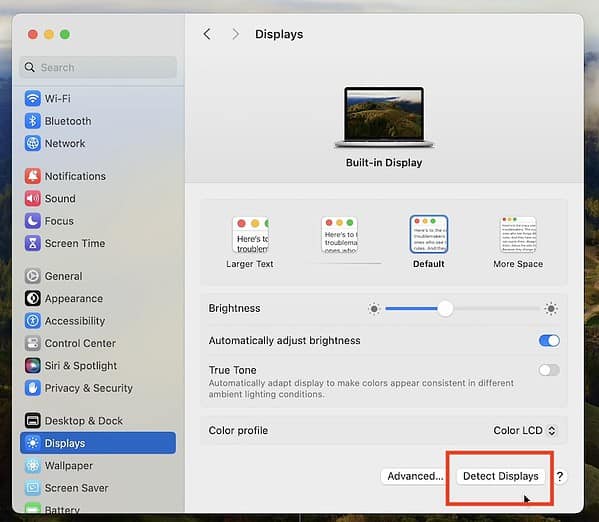
Your MacBook might occasionally overlook the monitor you plugged in. Incompatibility issues often arise when macOS reuses cached settings instead of rechecking the connection. By manually performing Detect Displays, you’re basically telling your Mac to refresh and reinitialize its hardware.
- Click the Apple menu icon and open System Settings.
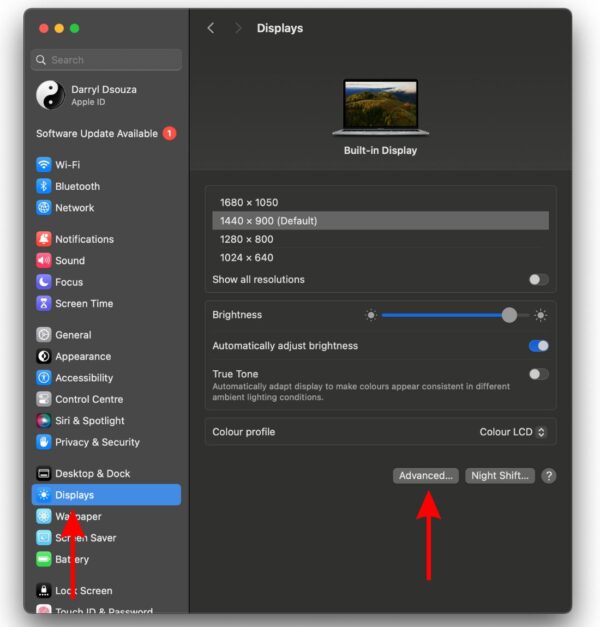
- Go to Displays in the side navigation pane.
- Scroll to the bottom and click Advanced.
- Select Detect Displays to force your Mac to scan for external monitors.
- If your monitor still doesn’t show up, unplug and reconnect it, then repeat this step.
2. Try a Different Port on Your MacBook
Try connecting your monitor to a different port on your Mac. Ports on opposite sides often use separate internal controllers, so switching can resolve minor connectivity issues. And if the port looks dirty, gently blow into it to clear out loose debris.
- Unplug your monitor and reconnect it to a different port on your Mac.
- Try swapping the ports for your external display, too.
- Once connected, head to System Settings > Displays and see if your Mac detects the monitor.
3. Test with Another External Monitor
You have to consider that your Mac might not be the problem. Hardware issues, unsupported resolutions, or firmware problems on your external display can also cause connection failures. Try using another output device to trace the issue. You can set your iPad for Dual Display if you don’t have access to another computer monitor.
- Disconnect your current monitor and try connecting it to another device.
- Use the same cable and port to test for consistency.
- If the new monitor works without issues, the problem likely lies with your original display.
4. Use a Different Cable/Adapter
If both external monitors work, try checking your cables. Damaged cables, or those that don’t support high resolutions and refresh rates, can mess with your display. Even if your cable looks fine, wear and tear can cause invisible issues like incomplete data transfers.
- Inspect your cable for visible damage, like fraying or bent connectors.
- Swap out the cable for a certified Thunderbolt 4 or USB-C cable that supports your monitor’s resolution and refresh rate.
- If you’re using an adapter, verify that it’s compatible with your monitor (e.g., DisplayPort 1.4 or HDMI 2.0).
- Reconnect your setup and test the display.
5. Adjust Display Settings
Your Mac might be set to a resolution or refresh rate that your monitor doesn’t support. Try adjusting these settings manually.
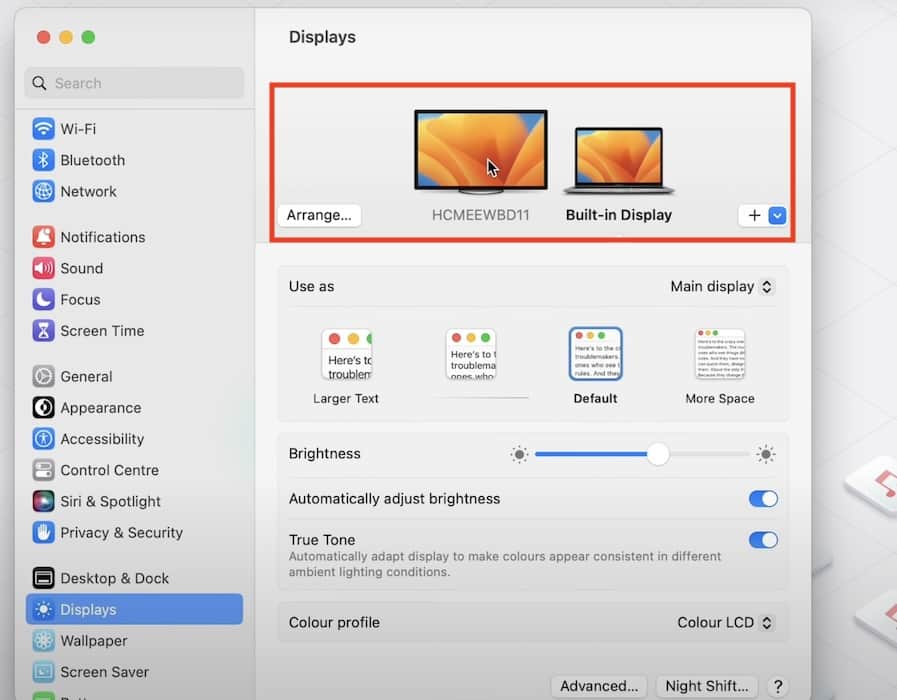
- Go to System Settings > Displays.
- Select your external monitor from the list.
- Click Scaled and choose a resolution your monitor supports (e.g., 1920 x 1080 for Full HD monitors).
- Under Refresh Rate, pick an option compatible with your display (e.g., 60 Hz for most monitors or 120 Hz for gaming screens).
6. Reset macOS Display Preferences
If you can’t fix your display settings manually, reset them altogether. It’s a quick way to clear misconfigurations, although you’ll also have to set your previous preferences from scratch.
- Open Finder and press Command + Shift + G.
- Type
~/Library/Preferences/ByHostinto the search bar and hit Return. - Find files that start with
com.apple.windowserver. - Drag them to the Trash.
- Restart your Mac—it should reset its display configuration.
7. Update macOS to the Latest Version
The problem might not be your fault at all—it could be a macOS bug. Dual Display issues are actually quite common on macOS 15.1 and 15.2, try updating to a more recent stable release. Apple is pretty quick to resolve known bugs.
- Open System Settings > General > Software Update.
- If an update is available, click Download and Install.
- Restart your Mac after the update, reconnect your monitor, and check if the problem is resolved.
8. Factory Reset Your Mac
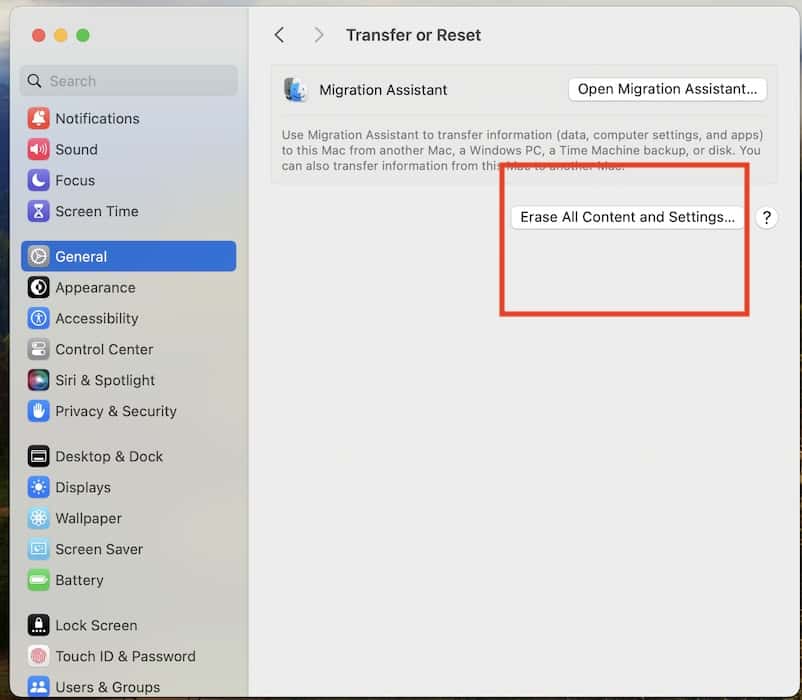
If nothing else works, a factory reset might be your best bet. It’ll wipe your system and restore macOS Sequoia to its original state, clearing software issues or misconfigurations. Just remember to back up your device beforehand.
- Back up your files using Time Machine or a similar tool.
- Open System Settings > General > Transfer or Reset > Erase All Content and Settings.
- Follow the prompts to reset your Mac.
- Reinstall macOS and test your monitor setup before restoring your data.
Contact Apple Support for help with your MacBook if these solutions don’t work. For external monitor problems, reach out to the manufacturer directly. Of course, you could also continue troubleshooting by reconnecting your Mac displays. Your persistence might pay off after a few more force restarts.
