If you’re old enough, you may remember computer displays used to be a lot boxier. They used a 4:3 proportion, similar to TVs — the CRT screen tech was the same too. Next, came widescreen panels (16:9 ratio), and nowadays we have 21:9 and even 32:9 monitors. These last two are called ultrawide, and apparently, macOS doesn’t like them too much.
I say that because reports of people having issues when connecting their Macs to ultrawide displays aren’t uncommon. I have faced this myself a few times, and after trying a few fixes, here’s what I learned.
macOS Issues With Ultrawide Monitors Are Old
Although ultrawide displays were pretty uncommon back then, I found reports from 2013 of issues between different Mac models and these screens. Considering there weren’t many 21:9 or 32:9 monitors at the time, Apple wasn’t that much to blame. However, it says a lot about how old the issue is.
It’s important to mention that it’s not a matter of lacking firepower. The first Mac able to output 2560×1600 (more than a 1080p ultrawide, 2560×1080) was the early 2005 PowerBook G4. To put things into perspective, that was a whole year before the first Intel Mac. All newly-released Mac models supported displaying 2560×1600 on at least one monitor by March 2009.
Being an issue so old, and with hardware limitations so long gone, you’d bet this isn’t something worrisome nowadays, right? Wrong. To this day, you can find reports of people with Macs as recent as 2020 models struggling with ultrawide monitors.
Also, even though some 21:9 and 32:9 monitors support AirPlay, you’ll be limited to the 16:9 ratio on them. And, usually, to 1080p too. At least that’s only for screen mirroring: AirPlay works for 4K videos on devices that support this resolution. Ultrawide videos, however, may display both letterboxing and pillarboxing — more about this below.
Letterboxing and Pillarboxing
If you’ve watched DVDs on old TVs (or most present-day movies on almost any screen), you know letterboxing. It’s the large horizontal bars above and below the video being played.
You may know pillarboxing from doing the opposite: watching old, 4:3 videos on modern screens. Vertical strips will appear on either side of the image. A similar effect happens with incorrectly configured ultrawide monitors — on macOS or otherwise. For instance, if you have a 2560×1080 display, the image output may be limited to a centered 1920×1080.
Letterboxing and pillarboxing are especially harmful for OLED displays, which are prone to burn-in. As the name implies, this issue is characterized by images that are displayed for long being “burnt” into the screen. When you display a single color on the whole panel, the shadows of such images can be seen.
Modern-day OLED displays have implemented technologies that largely overcome burn-ins. However, these only work well for small elements (think the Apple logo on the menu bar). They aren’t effective against letterboxing or pillarboxing, so your monitor may end up with huge chunks of darker images.
Fixing Ultrawide Monitors on macOS
Pillarboxing is not only annoying since you can’t use your whole screen real estate, but it can also harm your display. Here are a few fixes to try if macOS isn’t playing well with your ultrawide monitor.
Try a Different Connector
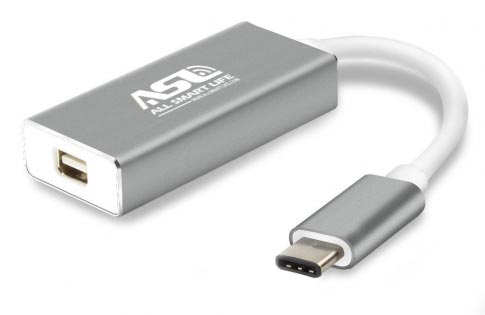
Many people have reported their ultrawide monitors started working correctly after changing the cable type. Many Mac models have HDMI ports, and many USB-C docks and hubs offer HDMI output. Naturally, this is usually the first connection we think of to use external displays.
However, only M2-powered Mac models and later have the HDMI 2.1 connection required for QHD (1440p) ultrawide screens. HDMI 2.0 ports simply don’t offer enough bandwidth for a resolution this high.
Even macOS users with 1080p ultrawide monitors have issues. In theory, any HDMI cable is good enough for this resolution. But sometimes they simply don’t work.
The solution for both cases is simple: try a DisplayPort or a Thunderbolt cable. Obviously, your monitor needs to feature at least one of these connectors. If they don’t, or if using these cables doesn’t work, check the solutions below.
Unlock Hidden macOS Ultrawide Resolutions (Either Natively or Using Apps)
As I sometimes say, the Option key in macOS is kind of magical. Many System Settings panes and menu bar items show additional actions when you hold it. This is true for the Displays preferences as well. Holding Option on the screen resolutions list may reveal an ultrawide mode, depending on your macOS version.
If that doesn’t do the trick, you can try apps like BetterDisplay, RDM, or SwitchResX. I have used, for different reasons, all three of them, and can attest they usually do the job.
SwitchResX specifically may be a bit trickier to set up, since it offers granular control over some advanced settings. That’s precisely why it’s so useful, though, and fixes most issues with ultrawide monitors on macOS.
If Using a Dock or Hub, Try External Power

If you’re using a dock or a hub, the display adapter inside it may not be getting enough power. This sometimes happens when the manufacturer doesn’t consider ultrawide monitors among the regular macOS usage scenarios. Luckily, this can be solved for many docks and hubs by simply supplying more power.
Docks for older Macs (with Thunderbolt 1 and 2 ports) usually ship with their own charging bricks, and won’t work at all without it. Newer models may have USB-C power ports that look just like the data ones and not even be properly labeled. You will need to check your adapter’s manual to confirm it has a power supply port.
Ultrawide on macOS Means More macOS for You
For people wanting as much screen space as possible, monitors with 21:9 or 32:9 ratios are a dream. Considering how productivity-oriented macOS sometimes is, it’s really weird that setting up ultrawide displays can quickly become a nightmare.
If you’d rather have many smaller monitors instead of a large one, though, you can consider using your Mac with multiple displays. And for a more on-the-go solution, there’s always Sidecar to turn your iPad into a secondary screen.