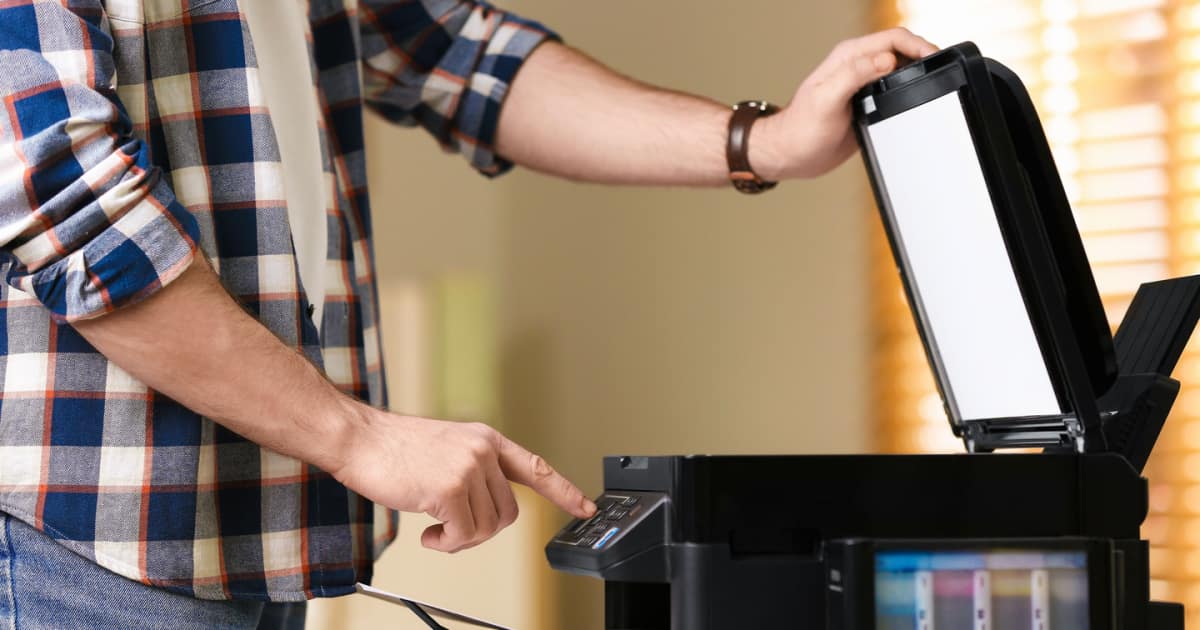
Even in today’s digital age, there could still be times when you need a scanner. So, in this quick guide, I will walk you through the steps to scan images or documents using a scanner and your laptop running macOS Ventura.
The good thing about scanning images or documents on a Mac is that you don’t need special software. All you need is a scanner, or a printer with scan functionality. The procedures for scanning images or documents on macOS Ventura depend on the type of hardware you have. This could either be a flatbed or a document-feeding scanner.
How to Scan Images or Documents Using a Scanner and your Laptop Running macOS Ventura
The first thing you need to do is to install your scanner. Below are the steps to install most scanners.
How to Install Your Scanner
Installing your scanner to use it with your Mac could require different procedures depending on the brand and model that you are using. However, you probably don’t need to install the software that comes with the scanner because macOS Ventura should download it automatically.
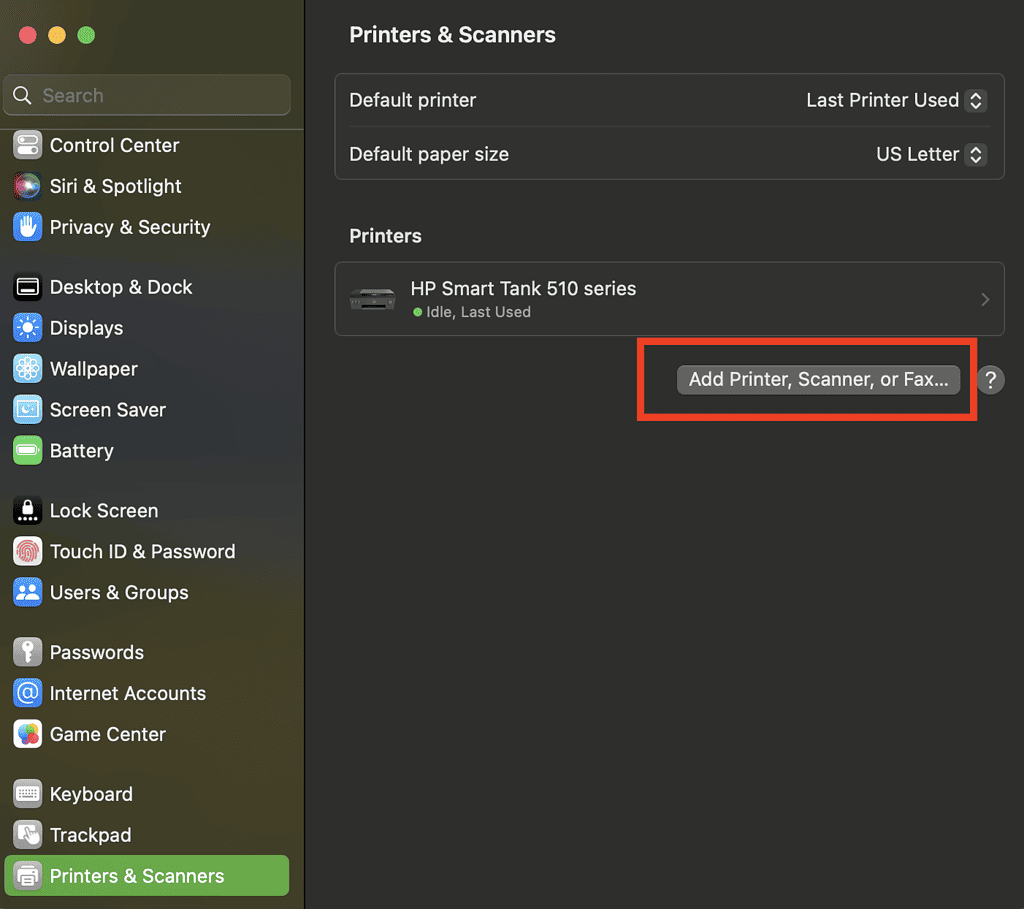
- Go to Systems Settings > Printers & Scanner
- Click the Add Printer, Scanner, or Fax button
- Select your Scanner > Add
How to Open Your Scanner
Next, you’ll open the scanner to start scanning your documents or photographs.
- Go to System Settings > Printers & Scanners
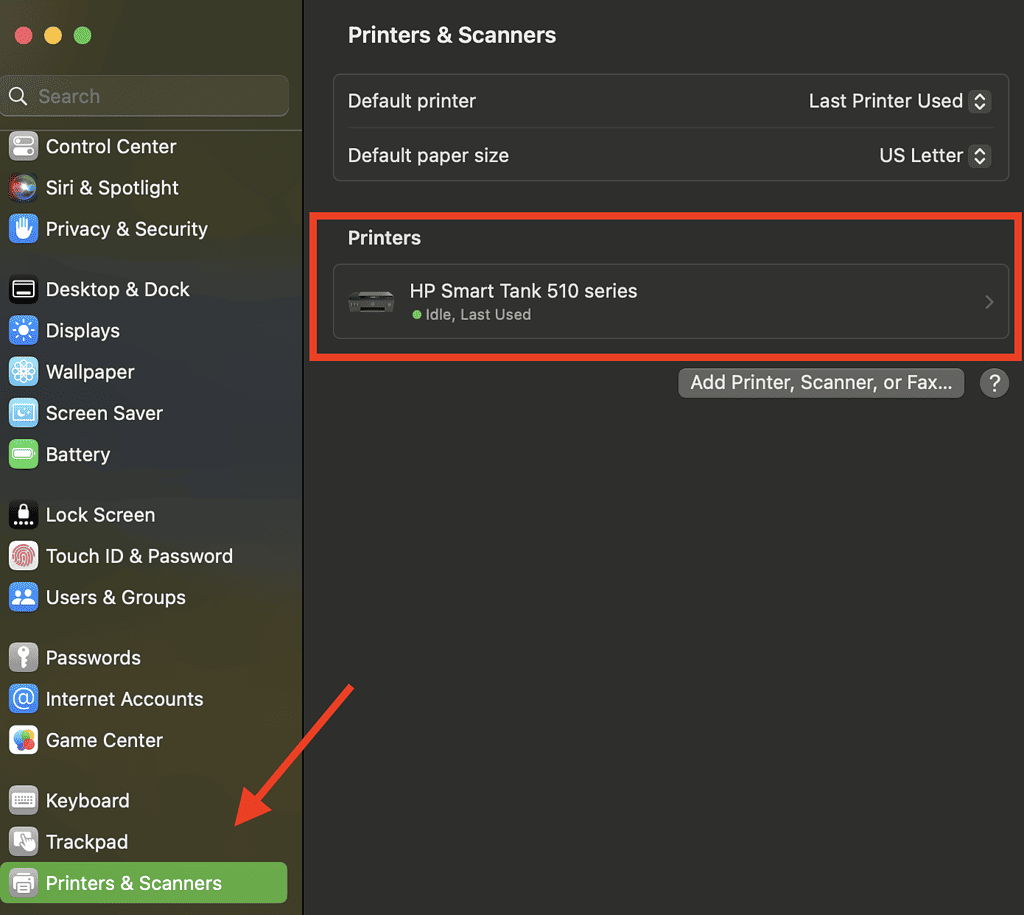
2. Select your printer or scanner from the list > Open Scanner
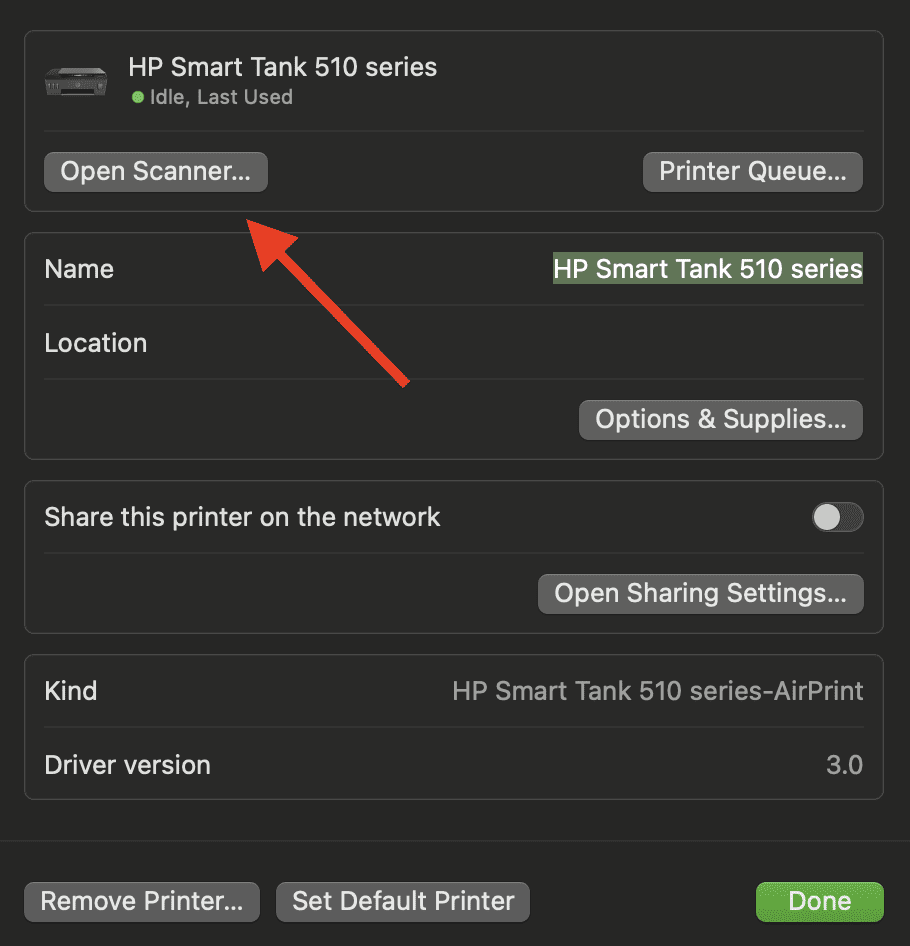
If you don’t see your device in the list, check your scanner’s manual for specific instructions on how to use it.
Once you’ve set up and opened your scanner, you can start to scan images or documents.
macOS Ventura: How to Scan Images or Documents Using a Document-Feeding Scanner
Time needed: 2 minutes
- Place the pages in the scanner’s document feeder
- Go to System Settings > Printers & Scanners
- Select Printer or Scanner > Open Scanner
- Select Use Document Feeder > Click Scan
Before clicking Scan, you may need to select several scanning options. These could include:
- Type of Scanner
- Type of Images Being scanned
- Scanning resolution
- Duplex scanning
- Size of scanned items
- Set a rotation angle to align the scanned images properly
- Where to save the scanned items
- Name of the scanned files
- File format for the scanned files
- Colors of Exposure
- Preview the items being scanned
Once you’ve specified those details, you may proceed to click the “Scan” button and the scanning process will begin.
Scan Using a Flatbed Scanner
If you are using a flatbed scanner, follow the steps below.
- Place the item on the scanner bed
- Go to System Settings > Printers & Scanners
- Select Printer or Scanner > Open Scanner
- Deselect Document Feeder if present
- Click Show Details
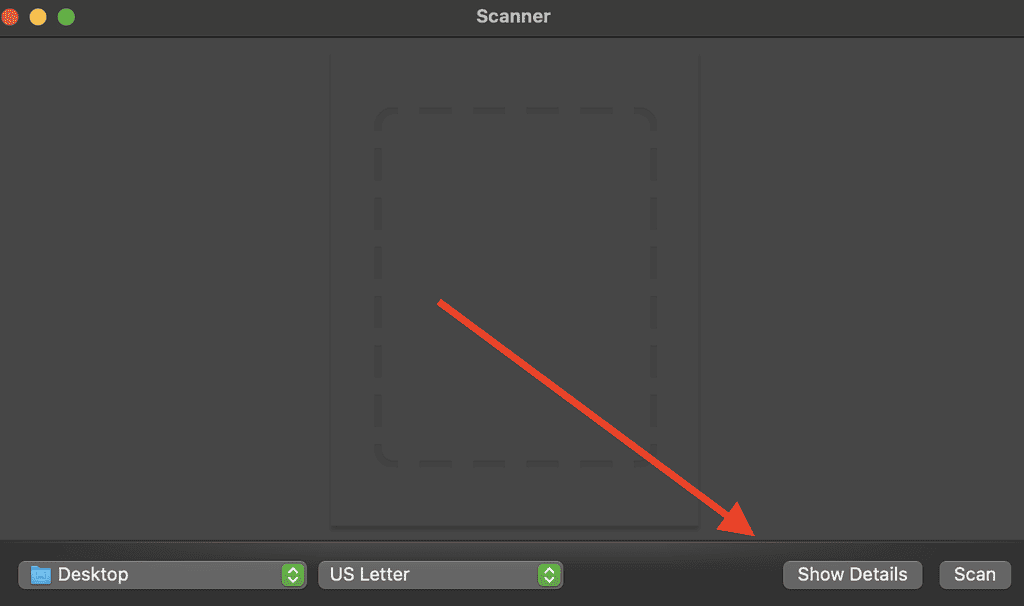
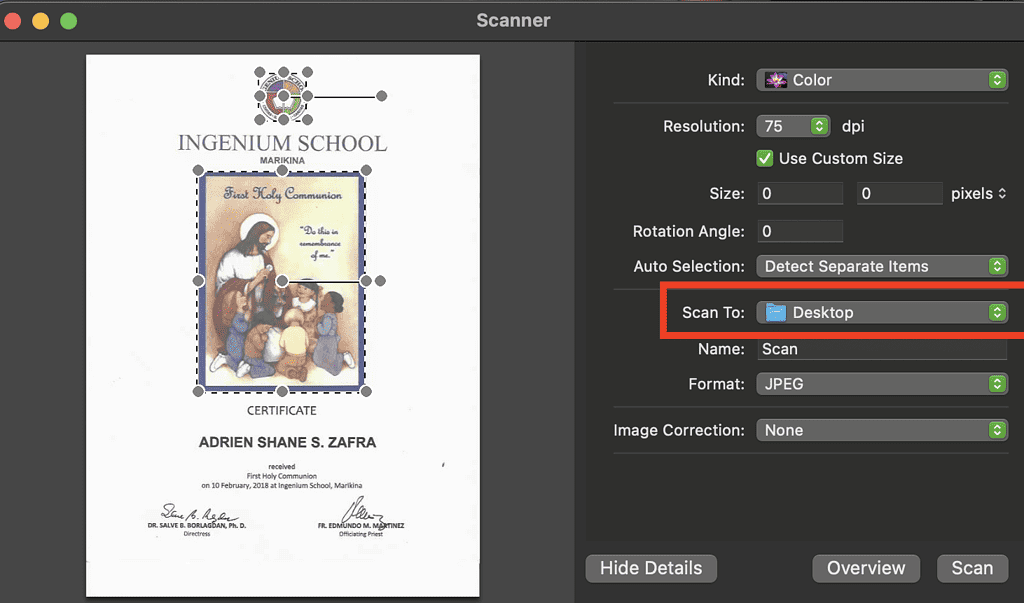
6. Choose where to save the scanned items from the Scan To pop-up menu
6. Choose the size of the image or document from the Size pop-up menu
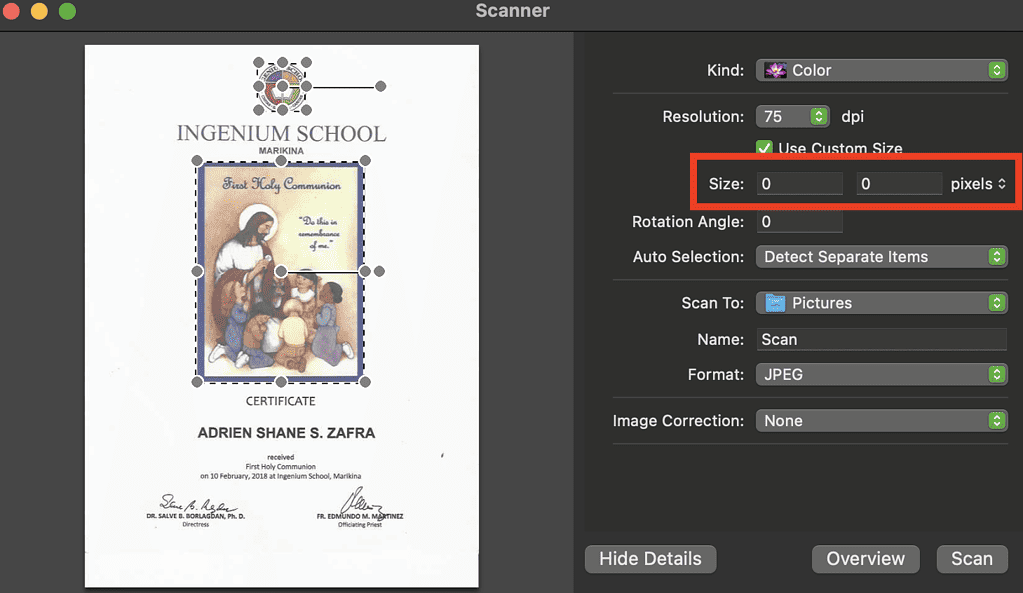
7. If needed, click Show details for more scanning options that you can specify depending on your needs.
8. Click Scan
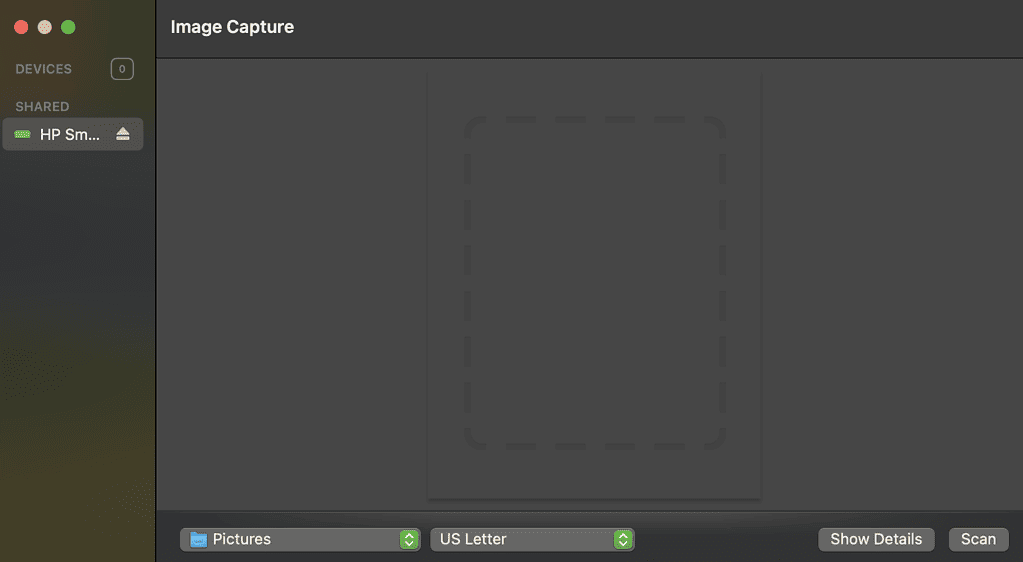
One other way to scan images and documents is to open the Image Capture app. If your printer or scanner is connected to your Mac (wired or wireless), you can see it in the Shared List. Simply follow the steps mentioned above and click Scan.
For further reading, check out how to directly paste screenshots into documents on Mac.
