Using a VPN, or Virtual Private Network, has been proven to be the easiest and most effective way of protecting internet traffic and keeping identities private. For most people who live in countries where location-specific restrictions apply to accessing online services, VPN is an even more useful tool.
If after updating to macOS Ventura you find your VPN not working properly, don’t worry too much. As with any other technical problems, fixing a VPN that stops working after the macOS Ventura update has several possible solutions.
Usual Troubleshooting Methods Don’t Solve macOS Ventura VPN Not Working Problem
Users who recently upgraded to macOS Ventura sometimes report their VPN not working properly. They found that their internal business sites, RDP connections, and network SMB folders wouldn’t resolve after connecting to their VPN. There may be several troubleshooting methods to fix such issues. These include rebooting the home router, rebooting the Mac, recreating the VPN connection, using different browsers, logging into a different VPN account, clearing the macOS DNS cache, and switching to a mobile data connection.
If you’ve tried those methods and still your VPN isn’t working under macOS Ventura, you may need to manually edit the macOS host file. This will allow you to specify certain DNS addresses and stay connected with your VPN client in macOS Ventura. You should contact your VPN provider’s support team for assistance with these troubleshooting steps.
Aside from manually editing the macOS Ventura host file, there are some methods that you can try to make your VPN work properly under macOS Ventura.
How To Fix macOS Ventura Not Working Properly
1. Restart macOS Ventura If VPN is Not Working
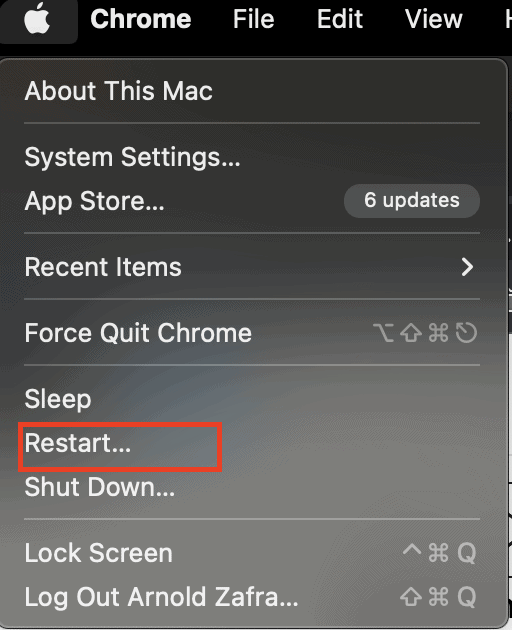
The most common troubleshooting method when a VPN connection isn’t working under macOS Ventura is to restart the system. Most VPN problems can be resolved by simply restarting your Mac. To restart your Mac, simply click on the Apple menu and tap on restart.

2. Update Your VPN Client
VPN clients, just like any other system applications, need to be updated from time to time. For VPN clients, updates are issued to make sure that the service works well with the user’s computer software. If you notice that your VPN client doesn’t issue updates regularly or at all, it may be time to change your VPN provider.
VPN clients normally notify users of pending updates. To manually check for updates, follow the steps below.
- Launch the VPN client on your Mac
- Go to Settings > Updates
- Download and install updates
3. Reinstall VPN Client
Finally, if the two previously mentioned methods don’t resolve your problems with your VPN connection not working under macOS Ventura, you might try reinstalling the VPN client. This is especially true if the VPN software encountered any errors during the installation process. These errors could have created loopholes that are causing your VPN client to crash.
During set up, the client installer needs to enter configuration details that you can request from your VPN provider. You can easily set up a VPN connection if your receive the VPN settings file from your network administrator or VPN service provider. Or, you can enter the VPN settings manually. Before reinstalling your VPN client, remove the existing VPN client. To do so, follow the steps enumerated below.
Remove Existing VPN Client Profile
- Go to System Settings > VPN
- Tap on the small i or info button
- Click on Remove Configuration > Confirm
Then you can proceed to reinstall the VPN client.
Reinstall VPN Client
- Go to System Settings > VPN
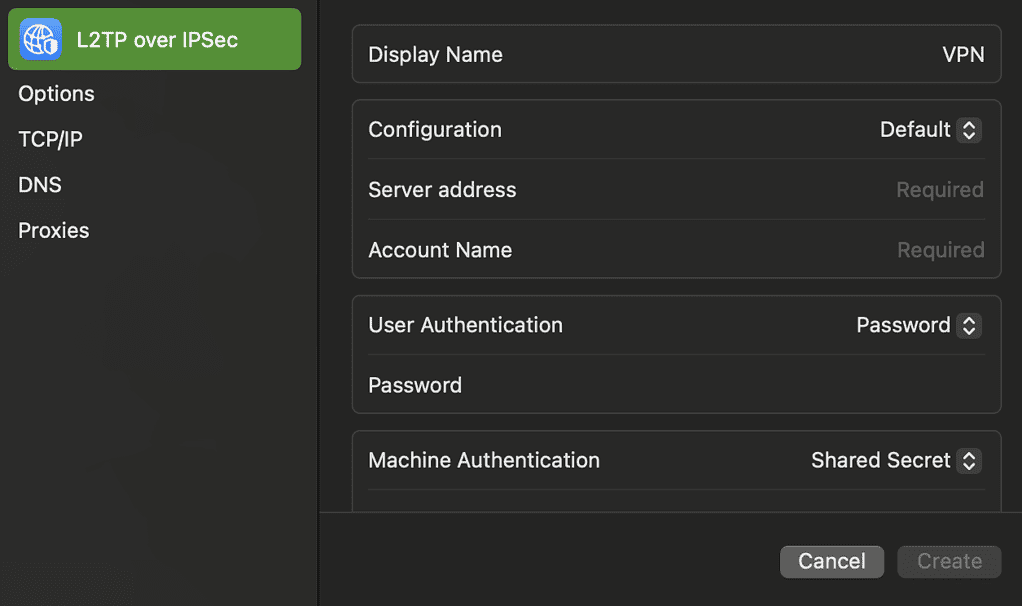
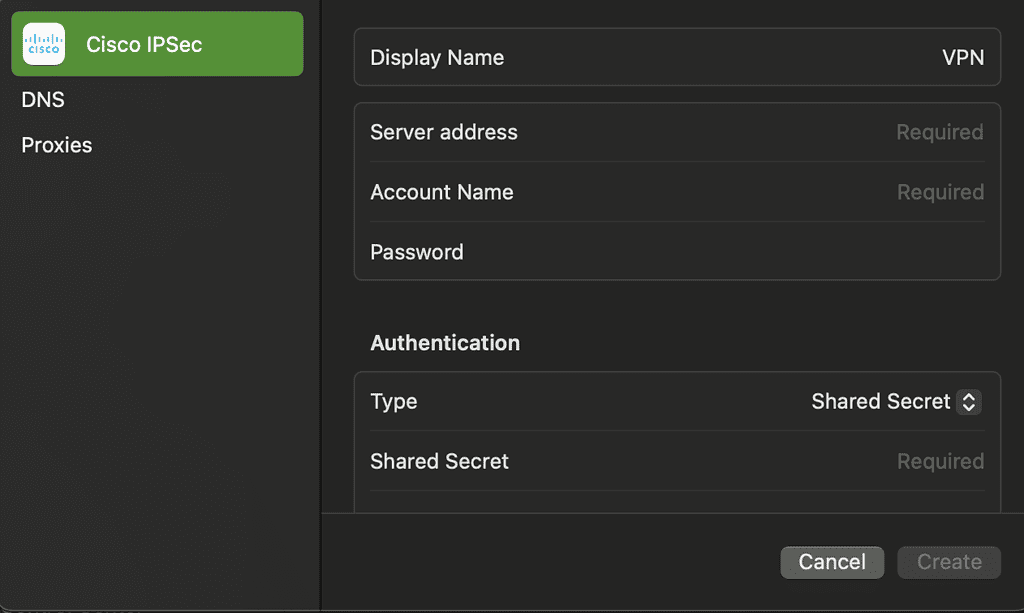
- Tap Add VPN > Select VPN connection type
- Type VPN name on display name field
- Tap the configuration pop-up menu
- Choose configuration
- Enter VPN settings
- If required, click on:
L2TP over IPSec: enter settings for options, TCP/IP, DNS and proxies.
Cisco IPSec or IKEv2: Enter settings for DNS and Proxies. - Tap Create


And that’s it. One of these methods may help your resolve the issue of your VPN not working under macOS Ventura. Aside from doing any of these methods, you may also consider switching to another VPN provider.
Whichever option you choose, make sure it is a modern VPN with client software that has been shown to work properly with macOS Ventura, like ExpressVPN. I personally recommend this VPN service since I’ve been using it in the past 2 years and always felt safe, moreover it has great deals in this period, so make sure to give it a try!
