
A warm summer afternoon, the hum of your favorite console booting up, and the smell of pie wafting from the kitchen. Ah, the good old days. Although you can’t go back to being a kid, you can take a trip down memory lane by reliving some of your favorite titles. MAME is the go-to emulator for arcade classics, but getting it to run on an Apple Silicon Mac isn’t plug-and-play. It’s not on the App Store, and installing it manually requires running a series of command lines.
Do you want an easier approach? Homebrew. It’s a package manager that simplifies software installations, especially for tools that macOS doesn’t natively support, e.g., MAME. Instead of dealing with complex configurations, you just have to copy-paste a few Terminal commands. Here’s how to do it.
How To Install MAME on M-Series Mac Using Homebrew
Time needed: 5 minutes
MAME built distribution is available on the official MAME development website. However, you’ll have to navigate multiple command line binaries, which can honestly get a bit confusing. Here’s an easier alternative if you already have Homebrew:
- Open Terminal and input brew install mame into the window.
- Press Return and wait for the installation to complete. Homebrew will automatically download and install all required dependencies.
- Once finished, confirm the installation by running mame –version into Terminal.

- If successful, it will return the installed MAME version.
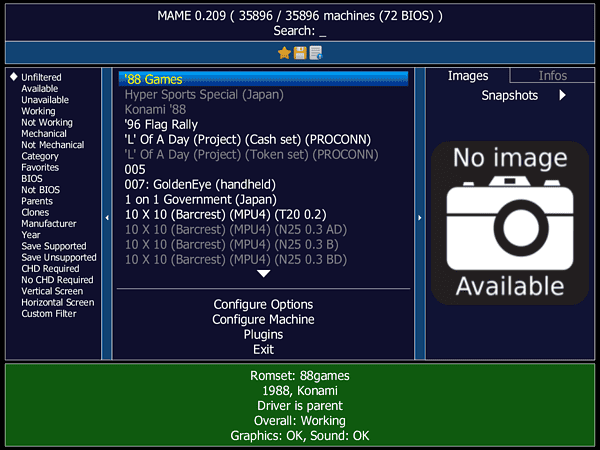
- Type mame in Terminal to run MAME.
- Hit Return—if everything is set up correctly, MAME will launch.


How To Install Homebrew on M-Series Mac
If you don’t have Homebrew yet, here’s how to install it on your M-Series Mac.
- Go to Finder > Applications > Utilities > Terminal.
- Paste
/bin/bash -c "$(curl -fsSL https://raw.githubusercontent.com/Homebrew/install/HEAD/install.sh)"into the window and press Return.
- Wait for the installation to complete. You may be prompted to enter your Mac login password.
- Once installed, run
brew --versionto verify Homebrew. - If Homebrew is installed correctly, it will return a version number.
Additional Homebrew Tools for MAME
If you want better ROM management, metadata handling, or advanced configuration options, Homebrew also provides extra tools that enhance your MAME experience. These tools help organize game files, verify ROM integrity, and manage large collections more efficiently.
Advancescan ROM Manager
Advancescan is useful for checking and organizing ROM files. It scans your MAME directory and helps identify missing or corrupted game files.
- Input
brew install advancescaninto Terminal. - This command will display available commands for scanning and fixing your ROM collection.
MAME ROM Tools
ROM Tools is a collection of utilities for managing ROM sets, rename files, and sort them into proper directories. It’s helpful if you have a large collection and need better organization.
- Run
brew install rom-toolsin Terminal. - Once installed, type
rom-tools --helpto access various ROM management functions.
SDL2 for Improved Graphics & Performance
MAME uses SDL2 (Simple DirectMedia Layer 2) for graphics and input handling. While Homebrew automatically installs it as a dependency, you can manually update it for the latest features and optimizations.
- Input
brew install sdl2into Terminal. - MAME will automatically use it for smoother performance after you run the command line.
I like how Homebrew and MAME let you bring back classic games without dealing with complex command lines. And if you’re managing a large ROM collection, Homebrew tools like Advancescan and SDL2 can streamline the process.
That said, emulation isn’t just for arcade classics—iOS devices now support a growing list of emulators for retro consoles. Check out our guide on emulation on iOS to see what’s possible.