When trying to open a file through the terminal, many people encounter the “zsh: permission denied” error on Mac. It is a common error that occurs due to multiple reasons. But rest assured, you can easily fix this error.
This guide will help you understand the reasons for the “zsh: permission denied” error in the terminal. And, also help fix this “zsh: permission denied” error by following a few simple troubleshooting methods.
Why Does My Mac Terminal Say Zsh Permission Denied?
Are you encountering the “zsh: permission denied” error in the Terminal? Is it happening when you’re trying to open a file through the Terminal? You’re not alone.
Some of the common reasons for the “zsh: permission denied” error on Mac are,
- The command is incorrect or incomplete.
- You do not have the necessary/sufficient permissions to access the file.
- The file is locked.
Apart from the above-listed points, there might be other factors that are causing the “zsh: permission denied” error on your Mac. Regardless of what is causing the issue, we will help you fix this error on your Mac.
How Can I Fix Zsh Permission Denied on My Mac?
1. Recheck the Command
The very first thing you should do if you encounter the “zsh: permission denied” error is to check the command. Often, we tend to make mistakes when we are in a hurry. You may have made a typo or have written an incorrect or incomplete command in the Terminal. The best course of action is to recheck the command and ensure there’s no mistake from your end.
2. Check the File Permissions
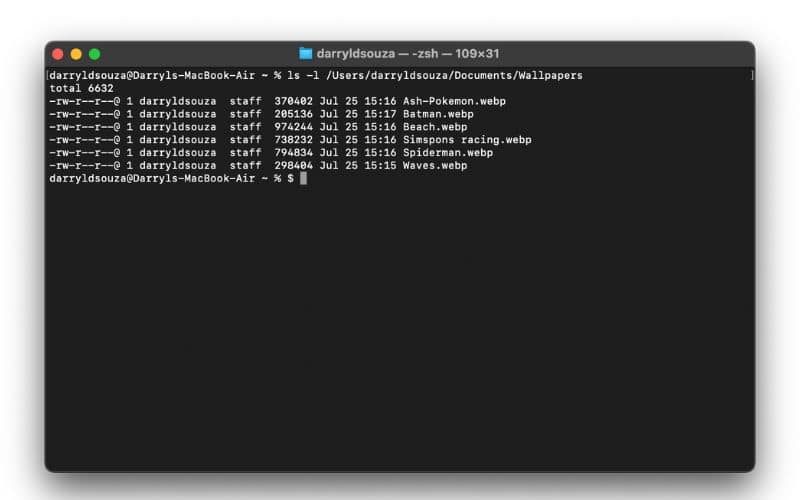
If you do not have the required permissions to access the file, you will encounter the “zsh: permission denied” error. Since you’re facing this issue in the Terminal, here’s how to check whether you have the required file permissions.
Time needed: 3 minutes
Check File Permissions through Terminal on Mac
- Open Terminal on your Mac.
- Type in the following command but do not press the Return/Enter key: ls -l
- Now, click Spacebar to add a space after the command.
- Navigate to the file you want to check the permissions for in the Finder.
- Drag this file from the Finder and drop it in the Terminal. Doing so, the accurate path of the file will be pasted in the Terminal.
- Click the Return/Enter key.
- Once the command finishes running, you will see the results. If you see the RWXR beside your username, it means you have the required permissions. If you see R beside your username, it means you only have the read permission.
3. Grant the Necessary Permissions
If you’re facing the “zsh: permission denied” error, because you’re missing required permissions, you can change that. Once you grant the necessary permissions, it should fix this issue. Here’s how to change the read & write permissions of files and folders on Mac.
1. Navigate to the file or folder in the Finder.
2. Control-click the file/folder and click the Get Info option from the list.
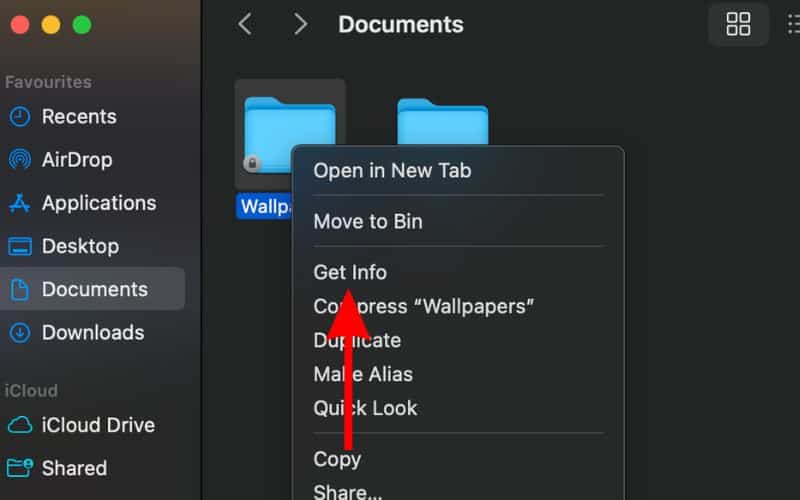
3. Click “Sharing & Permissions:” option to expand the menu.
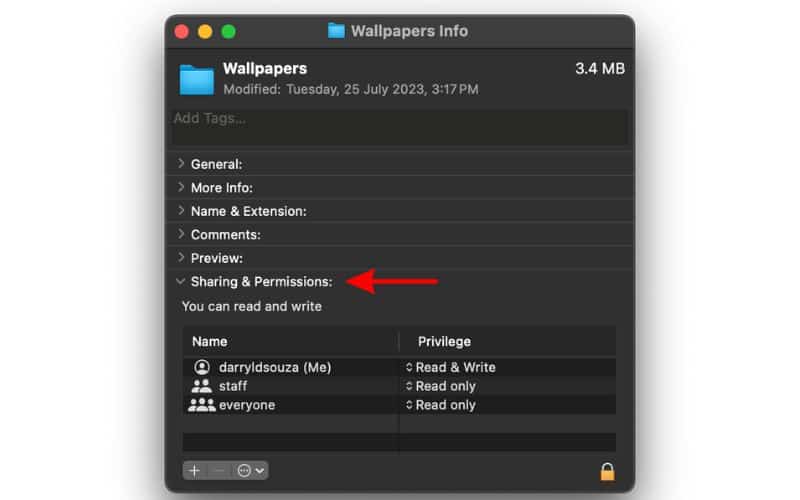
4. Here, navigate to the Name of the user and click the Read only or Read & Write option under the Privilege tab.

5. Next, select the required permission from the list of available options.
4. Unlock the File or Folder
Another scenario where you will encounter the “zsh: permission denied” error is if the file you’re trying to access is locked. A locked folder will have a lock icon beside it. Don’t worry; you can easily unlock a file or folder on your Mac by following the below steps.
1. Navigate to the file or folder in the Finder.
2. Control-click the file/folder and click the Get Info option from the list.
3. Now, head to General and click the checkbox beside the Locked option. Doing so will unlock the file or folder.
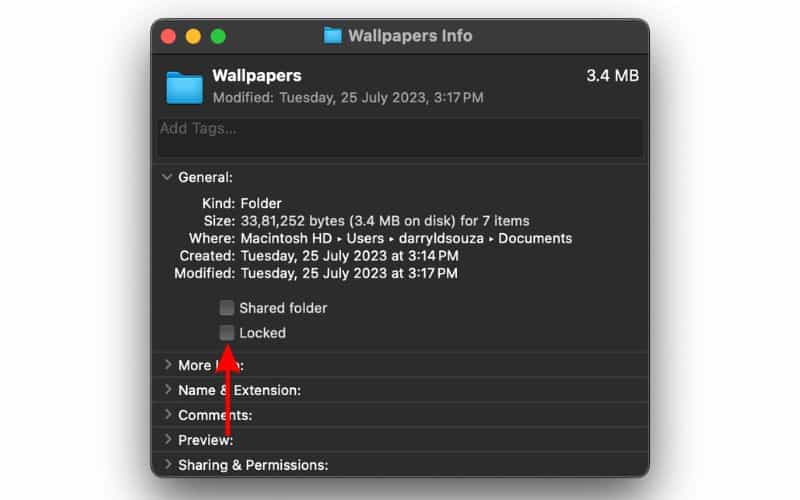
Once the file/folder is unlocked, you should be able to access the file in the Terminal without running into any errors. If you still ensounter the “zsh: permission denied” error, move on to the next steps.
5. Change the Directory Ownership
If changing file permissions or unlocking the file doesn’t fetch any results, we suggest you change the directory’s ownership.Changing the ownership to your username should fix the “zsh: permission denied” error on your Mac. Here’s how to change directory ownership on Mac.
1. Open the Terminal on your Mac.
2. Type in the following command:
-R <username>:<username> <directorypath>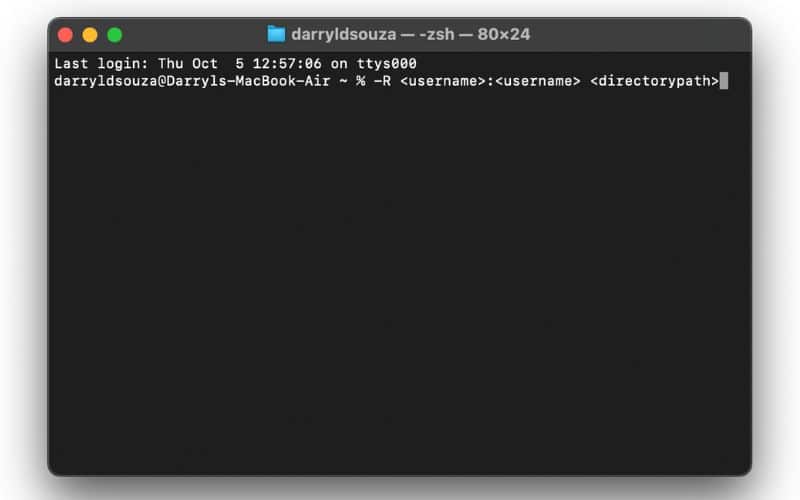
3. Before you hit enter, replace the <username> with your actual username and the <directorypath> with the path of the directory of which you want to change ownership.
4. Once you’ve made these changes to the command, press return/enter.
After the command finishes running and is applied, it should hopefully fix the “zsh: permission denied” error on your Mac.
6. Use the SUDO Command
SUDO stands for superuser do and this command grants users with superuser privileges. If the “zsh: permission denied” error is occurring due to privilege issues, running this command should fix it.
1. Open the Terminal on your Mac.
2. Type in the following command and hit return:
sudo chmod 755 ~/Themes/ObsidianCode.xccolortheme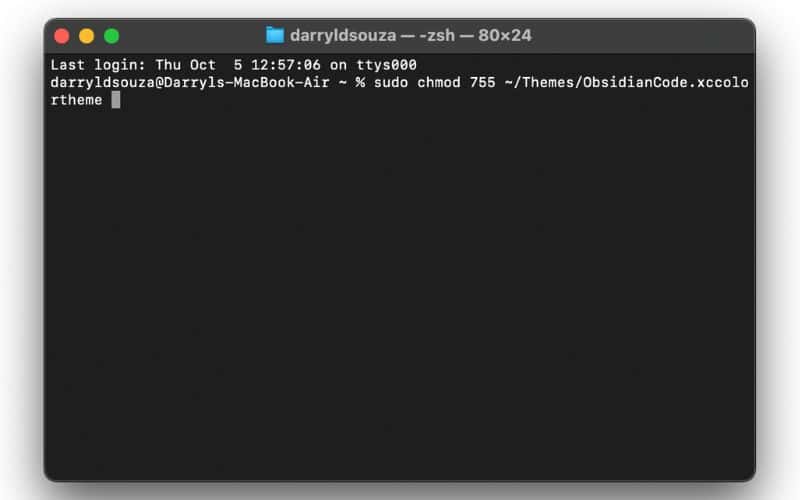
3. Next, type in this command and hit return:
sudo chmod 755 /dvtcolorconvert.rb4. In case you’re using the SUDO command for the first time, you will be asked to enter your passcode. Please do the needful.
5. Once the command is successfully applied, it should fix the error message.
7. Allow Terminal Full Disk Access
Have you granted Terminal full access to the disk? Because, if the Terminal doesn’t have access to all the files on the disk, you won’t be able to open files from the Terminal. Consequently, it will display the “zsh: permission denied” error on your Mac. We suggest you grant Terminal Full Disk Access, which hopefully eliminates the “zsh: permission denied” error on your Mac.
1. Click the Apple logo at the top right corner and select the System Settings option from the list.
2. In System Settings, select the Privacy & Security option from the sidebar.
3. Click the Full Disk Access option on the right.
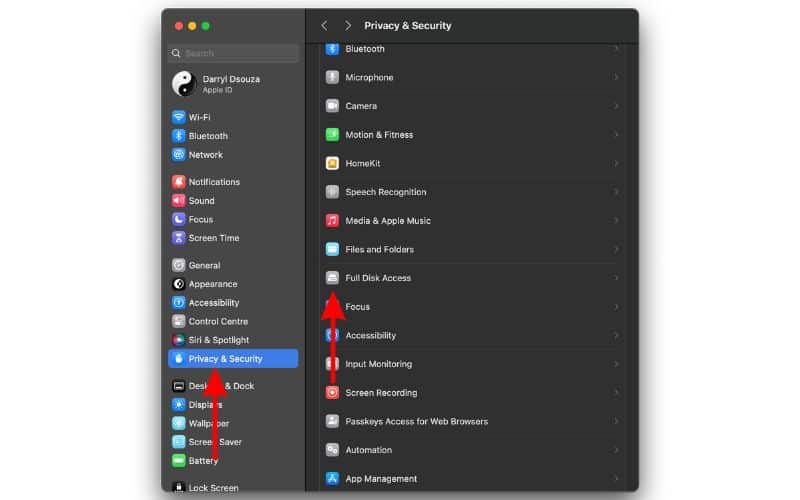
4. On the next page, click the + (Add) button.
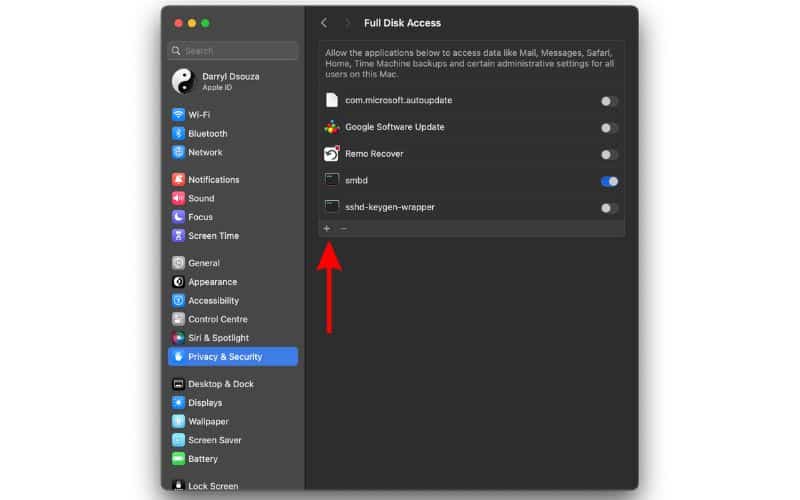
5. Click the Applications option in the Finder.
6. Search for Terminal, click on it, and click the Open button.
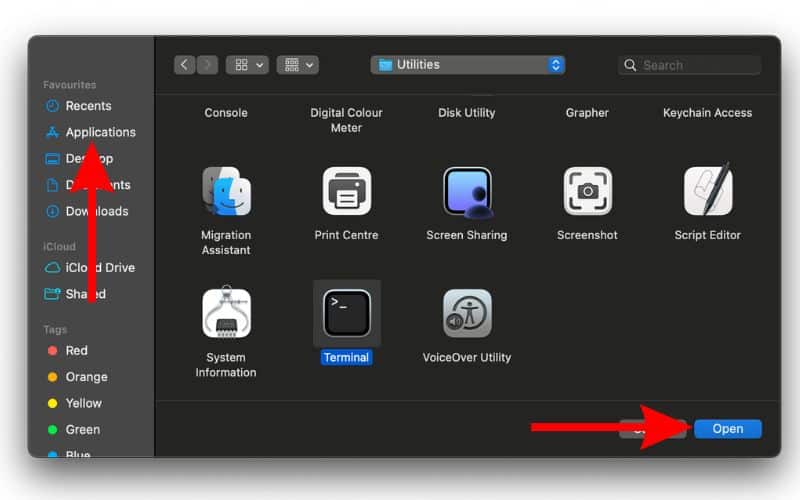
7. Enter your passcode, if asked, to confirm your selection.
Conclusion
The “zsh: permission denied” error on Mac is quite common. However, it is very annoying every time it happens. Also, while we’ve tried our best to provide the best troubleshooting method, in case we’ve missed any, please share them in the comments which will benefit other readers. Please let us know in the comments if you have any doubts regarding the “zsh: permission denied” error.

