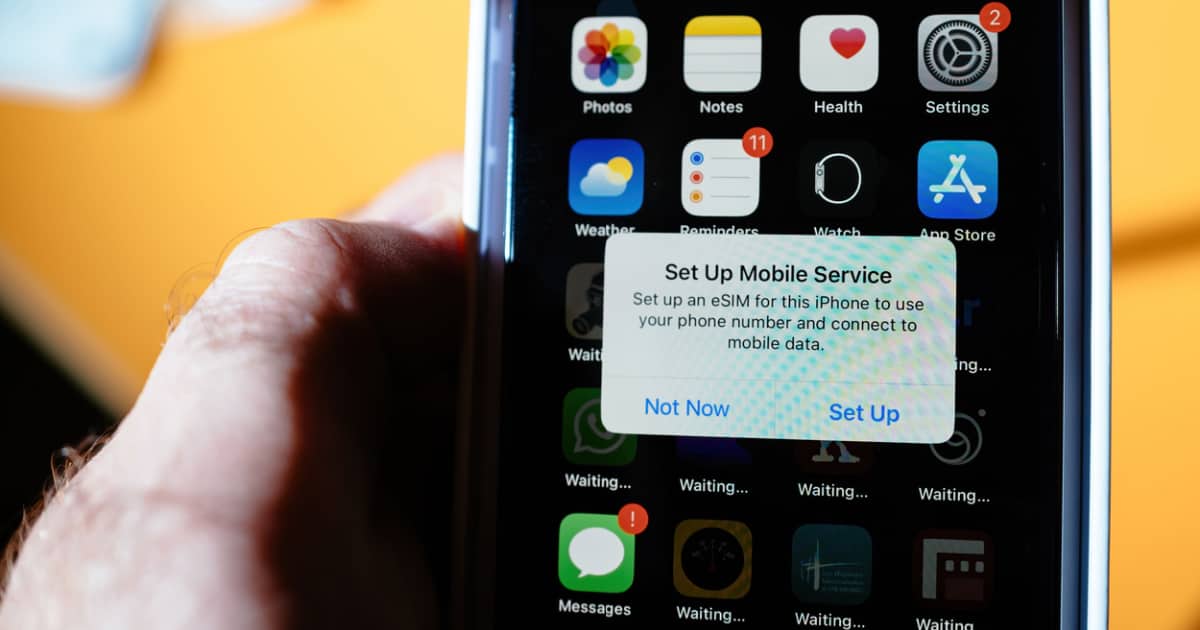
In the rapidly evolving world of smartphones, eSIMs have revolutionized how we connect to cellular networks. Gone are the days when physical SIM cards were indispensable, as electronic SIMs offer greater flexibility. However, like any technological innovation, eSIMs can sometimes present challenges. Why does the “Unsupported eSIM Error” occur? Is there a way to resolve this issue? Let’s dive in to find answers and get your eSIM running smoothly!
Why Do You Get the Unsupported eSIM Error Message?
The “eSIM not supported” error message typically appears when your iPhone cannot detect or activate the eSIM correctly. There can be several reasons, ranging from compatibility issues to carrier restrictions. However, with the proper troubleshooting steps, you can overcome these obstacles and enjoy the benefits of eSIM technology.
How Do You Fix The Unsupported eSIM Error?
Here’s a simple step-by-step guide to help you resolve the unsupported eSIM error on your iPhone:
1. Ensure Compatible iPhone Model
First and foremost, ensure that your iPhone model supports eSIMs. iPhones in the list below are compatible with eSIMs, while some earlier models may not.
- iPhone X
- iPhone 11
- iPhone 12
- iPhone 13
- iPhone 14
Additionally, iPhones purchased in mainland China do not support eSIMs. Models purchased in Hong Kong and Macao allow you to use eSIM, such as the iPhone XS, iPhone 12 mini, iPhone 13 mini, and the iPhone 14 series. Refer to Apple’s official documentation or contact Apple Support to confirm if your iPhone model supports eSIM technology.
2. Check Carrier Support
Verify whether your carrier supports eSIMs. While many carriers have embraced eSIM technology, some have not. Visit your carrier’s website or contact customer support to confirm its compatibility with eSIMs. If your carrier does not support eSIM technology, don’t worry; we’ll discuss a workaround in the next section.
3. Check Your WiFi Connection
To activate eSIM on your iPhone, you need to be connected to a Wi-Fi network unless you have an iPhone 14 series, in which case you can activate eSIM without a Wi-Fi connection. If your eSIM is not activating, confirm that your Wi-Fi connection works correctly.
4. Activate eSIM
If your iPhone model and carrier both support eSIMs, proceed with activating the eSIM. If your carrier offers eSIM Carrier Activation or eSIM Quick Transfer, you can activate your eSIM during the setup process of your iPhone. Turn on your iPhone and follow the instructions.
You can also use these options to add an eSIM to your iPhone later. If you’ve set up eSIM Carrier Activation, you’ll receive a notification that says, “Carrier Cellular Plan Ready to Be Installed.” Open the notification and select Continue at the bottom of the page.
Time needed: 1 minute
To transfer an eSIM to your iPhone after setting it up, follow these steps.
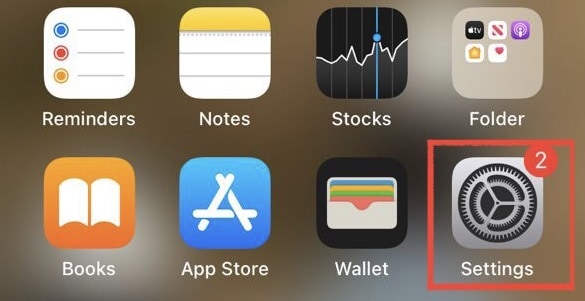
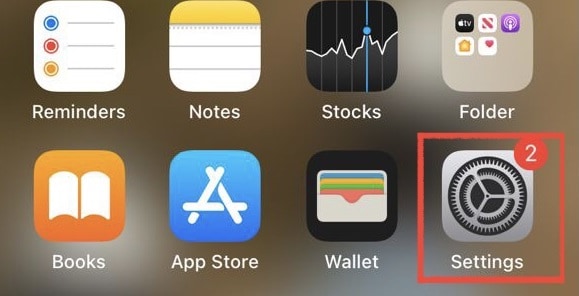
- Open the Settings app on your iPhone.
- Tap on Cellular.
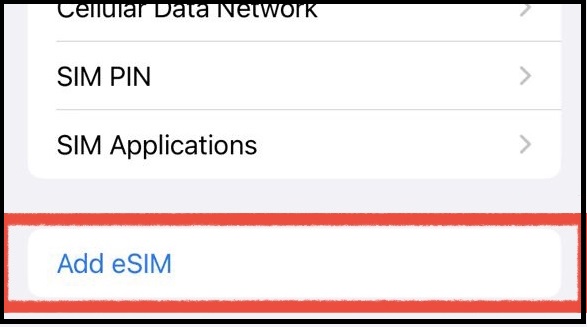
- Select Add Cellular Plan or Add eSIM.
- Select Transfer From Nearby iPhone.
You may need to enter your passcode to confirm the transfer on your old iPhone and activate your eSIM. Both phones must be on iOS 16 or later. Also, ensure you have a stable internet connection during this process.
If your carrier doesn’t support eSIM Carrier Activation or eSIM Quick Transfer, you can scan a QR code from your carrier or use a carrier app. Open the Camera app and scan the QR code provided by your carrier, or go to Settings > Cellular > Add eSIM > Use QR Code and tap the Cellular Plan Detected notification that appears. Follow the instructions afterward to add a cellular plan.
If the carrier app is the way you want to go and your carrier supports it, download your carrier’s app from the App Store and follow the instructions.
5. Restart Your iPhone
If you have completed the steps above to activate your eSIM correctly and the number you’re trying to activate is not appearing in Settings > Cellular. Your carrier is not showing up in the status bar, follow these steps:
- Turn on Airplane Mode
- Turn off Airplane Mode
If the issue persists, restart your iPhone and check again. Contact Apple Support if you still need help setting up your eSIM despite trying all the steps outlined above.
Why Is My iPhone Not Supporting eSIM?
1. Incompatibility
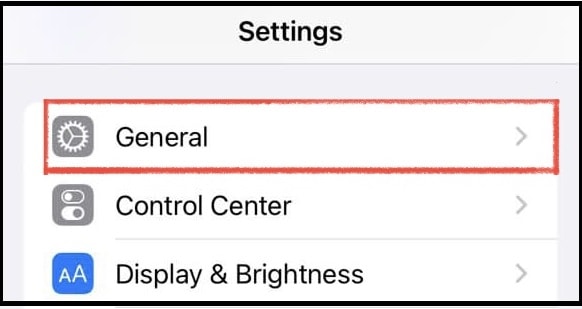
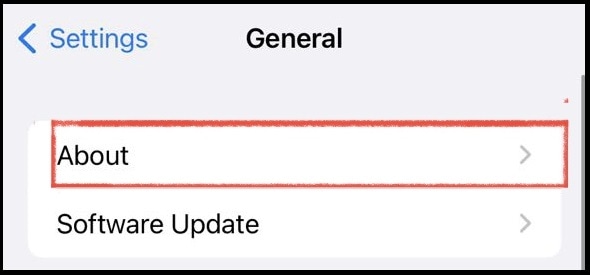
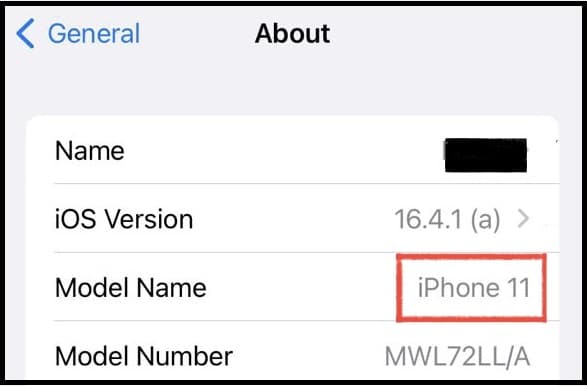
Some older iPhone models may need more hardware to support eSIMs. To determine if your device supports eSIM technology, check the specifications of your iPhone model. If your iPhone model is incompatible, eSIM usage will not be possible. You can find your iPhone model with the steps below.
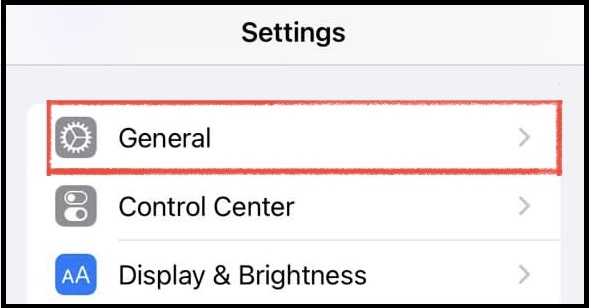
- Go to the Settings App.
- Tap on General.
- Tap on About
- Check the Model Name to find out your iPhone model.
2. Software Update
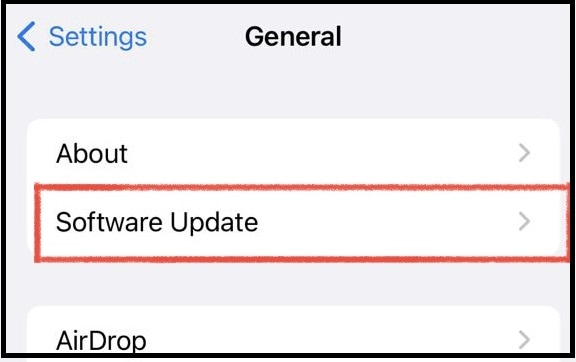
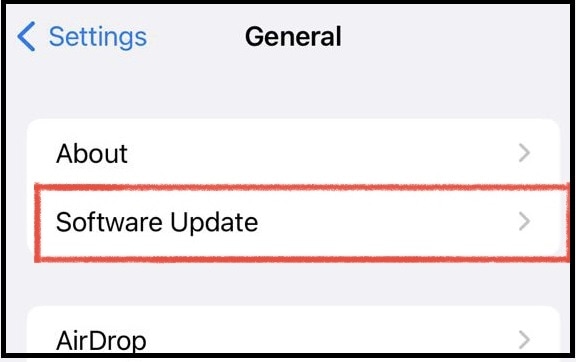
Ensure that your iPhone has the latest iOS version installed. Apple releases software updates that include bug fixes and improvements, which may resolve eSIM-related issues. To check for available updates follow the steps below.
- Go to Settings.
- Tap on General.
- Tap on Software Updates.
3. Carrier Restrictions
Certain carriers may impose restrictions on eSIM usage, limiting its availability to specific plans or regions. Confirm with your carrier’s support team if they support eSIMs for your account, or consider switching to a carrier that offers eSIM compatibility.
Why Is My iPhone 14 Pro Showing Unsupported eSim Error?
The iPhone 14 series, including the iPhone 14, iPhone 14 Mini, iPhone 14 Pro, and iPhone 14 Pro Max, supports eSIMs. If you’re experiencing eSIM issues on your iPhone 14, follow the troubleshooting steps outlined above to resolve them.
How To Use iPhone 14 if Carrier Doesn’t Support eSIM
If your carrier does not support eSIMs, you can still use your iPhone 14 with a physical SIM card. Apple devices typically support dual SIM functionality, allowing you to use both an eSIM and a physical SIM simultaneously. Follow these steps to set up a physical SIM card:
- Locate the SIM Card Slot: Find the SIM card slot. The location may vary depending on your specific iPhone model, but it is usually on the device’s side.
- Eject the SIM Card Tray: Use a SIM card ejector tool (or a paperclip) to gently push into the small hole next to the SIM card slot. Apply slight pressure until the SIM card tray pops out.
- Insert the SIM Card: Take the SIM card tray out of the iPhone and place your physical SIM card into the designated slot on the tray. Ensure that the SIM card is correctly aligned with the contacts.
- Reinsert the SIM Card Tray: Carefully insert the SIM card tray back into the iPhone until it clicks into place. Make sure it sits flush with the device’s frame.
- Set Up the SIM Card: Turn on your iPhone and follow the on-screen prompts to set up the physical SIM card. This typically involves selecting your language, connecting to a WiFi network, and entering your carrier’s information.
Why Doesn’t My iPhone 11 Support eSIM?
The iPhone 11 series comes with eSIM capabilities by default, except for devices purchased in mainland China, Hong Kong, or Macao. To check if your iPhone 11 model supports eSIMs, refer to Apple’s official documentation or contact Apple Support.
Why Doesn’t My iPhone 12 Support eSIM?
The iPhone 12 series, including the iPhone 12, iPhone 12 mini, iPhone 12 Pro, and iPhone 12 Pro Max, support eSIMs. However, eSIM functionality is not supported on iPhone 12 series devices purchased in mainland China, Hong Kong, and Macao, except for the iPhone 12 mini, which only supports eSIM in Hong Kong and Macao. If you’re experiencing issues with the eSIM on your iPhone 12, refer to the troubleshooting steps mentioned earlier.
Why Doesn’t My iPhone 13 Support eSIM?
Rest assured, the entire iPhone 13 series, including the iPhone 13, iPhone 13 mini, iPhone 13 Pro, and iPhone 13 Pro Max, supports eSIMs, except for devices purchased in mainland China, Hong Kong, or Macao. If you’re encountering eSIM issues on your iPhone 13, follow the troubleshooting steps outlined earlier to resolve them.
Frequently Asked Questions
I have answered some commonly asked questions regarding eSIM activation on the iPhone. I know some of these questions may be on your mind as well, so here they are:
An eSIM, short for embedded SIM, is a digital SIM card embedded directly into the hardware of your iPhone. It eliminates the need for a physical SIM card and lets you switch between carriers and digitally activate cellular plans.
The iPhone 11, iPhone 12, and iPhone 13 series support eSIMs. However, it’s essential to check the compatibility of your specific iPhone model.
The Unsupported eSIM Error may occur if your iPhone model doesn’t support eSIMs, your carrier doesn’t offer eSIM support, or if there are software or compatibility issues.
To activate an eSIM, open the Settings app, tap Cellular, and select Add Cellular Plan. Follow the on-screen instructions provided by your carrier to complete the activation process.
Yes, many iPhone models offer dual SIM functionality, allowing you to use both an eSIM and a physical SIM card simultaneously.
Visit your carrier’s website or contact customer support to inquire about their eSIM compatibility.
One of the advantages of eSIMs is the ability to switch between carriers or plans easily. Follow the activation process for the new eSIM plan, or contact your carrier for assistance.
More FAQs
If your carrier doesn’t support eSIMs, you can use a physical SIM card instead. Insert the SIM card into your iPhone’s SIM card slot and follow the setup process.
eSIMs are particularly useful when traveling internationally as they allow you to quickly activate local plans without needing physical SIM cards.
You can transfer your eSIM to another compatible iPhone by following the activation process while setting up the new device. Alternatively, go to Settings > Cellular > Add Cellular Plan and follow the on-screen instructions.
Yes, some iPhone models support the storage of multiple eSIMs. Check your iPhone’s specifications to see if it offers this capability.
The impact on battery life due to using an eSIM is generally minimal and comparable to using a physical SIM card.
Yes, many carriers offer eSIM support for prepaid plans. Contact your carrier to check if they provide eSIM options for prepaid services.
You can remove an eSIM by going to the Settings app, selecting Cellular, and tapping on the eSIM you want to remove. Choose the option to remove or delete the eSIM.
Yes, eSIMs are designed with security measures to protect your cellular connections, similar to physical SIM cards. They utilize encryption and authentication protocols to ensure secure communication with the carrier.
Final Thoughts
Embracing eSIM technology brings us closer to a future where the hassles of physical SIM cards are a thing of the past. Stay calm if you encounter an unsupported eSIM error on your iPhone. By ensuring compatibility, verifying carrier support, and following the activation process correctly, you can enjoy the seamless benefits of eSIMs and avoid the Unsupported eSIM Error.
Remember, if your carrier does not support eSIM, you can still use your iPhone with a physical SIM card. Stay informed, stay persistent, and you’ll be connected with ease. Happy eSIM usage! Why not learn about the T-Mobile eSIM App in the article we have here?
