Git is a version control system that manages and keeps track of your code. It gives you the ability to record the changes you make to your files and to revert to any previous version, amongst other things. Millions of developers use Git and GitHub in order to optimize their software development, so why not try it yourself?
In this article, I will show you how to set up and install Git on your Mac, so you can experiment with new features, fix bugs, or try different ideas without risking breaking your code.
Do I Have to Install Git on Mac?
Installing Git is possible on all of today’s most popular operating systems, including macOS, Windows, and Linux. In fact, Git is pre-installed and ready to go on the majority of Linux and Mac computers.
To find out whether your Mac already has Git, launch the Terminal and type git version. The result will either inform you of the version of Git installed on your computer or signal you that git is an unknown command.

The pre-installed version of Git might not be the most recent or the one that best suits your needs. In that case, or if the system isn’t installed at all, you have a few options for installing Git on your Mac, which you can read about in the following section.
Does GitHub Desktop Include Git?
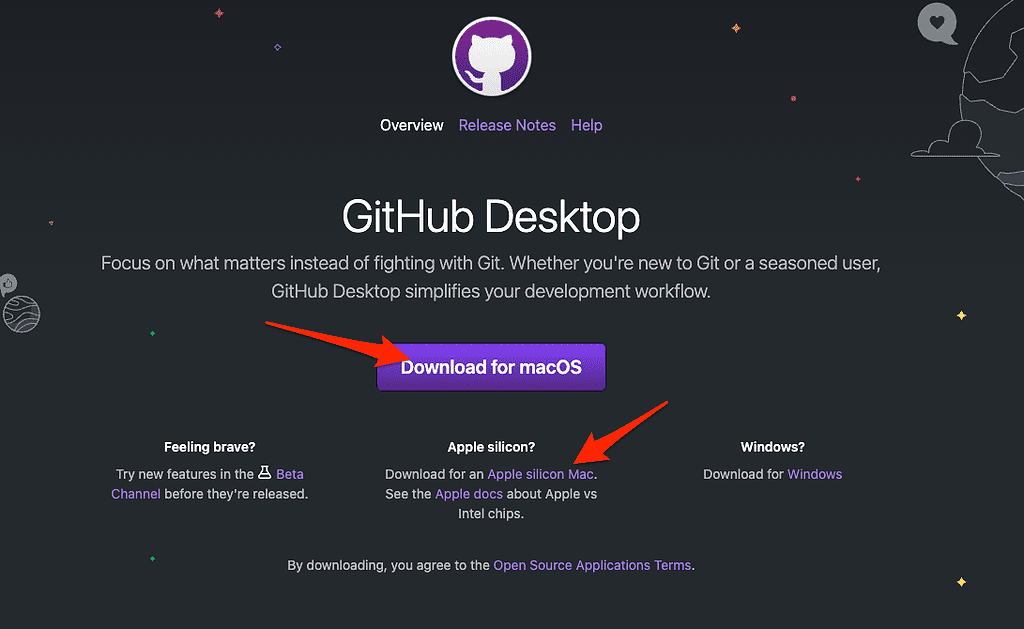
If you do not already have Git installed on your Mac, installing GitHub Desktop will also install the most recent version of Git. GitHub Desktop will get you a command line version of Git together with a powerful graphical user interface.
Thus, go to the official website for GitHub Desktop and click the Download for macOS button. If you have an Apple Silicon-based Mac, you can click on the dedicated link. This will allow you to install Git on M1 Mac.
Where to Download Git on Mac?
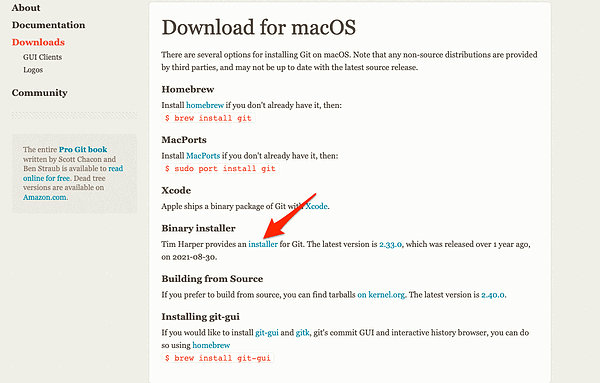
Besides GitHub Desktop, you also have the option of installing Git itself via a binary installer. There is a Git installer for macOS that is kept up to date and can be downloaded from git-scm.
Time needed: 2 minutes
To install Git using a binary installer, follow these steps.
- Go to git-scm and click the link under Binary installer.
- From the newly opened page, click the Download button.
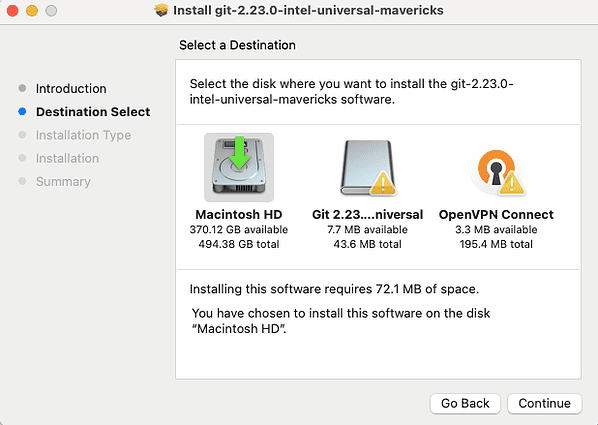
- Open the downloaded file and start the installation process.
- To check if it was installed successfully, type
git versionin your Terminal. If a version shows up, then Git is installed.
How to Install Git on macOS Monterey?
Another way to download and install Git on macOS Monterey, and other versions, is to use a package manager such as Homebrew. If you don’t have it on your Mac, make sure to install it using our detailed guide.
Homebrew is praised by many Mac users as an excellent package manager because of its user-friendliness and efficient Terminal commands that reduce the amount of time and effort required to install different programs. Just look how simple using brew makes it to install Git on Mac via Terminal:
- Press Command + Space then type Terminal and open the first result.
- Install Git using the following command:
brew install git - Once the process is done, you can verify the installation with the following command:
git version
It is important to keep in mind that whenever you use Homebrew, the program will gather information about your system and send it to the developers. They include the Homebrew user agent, the Google analytics version, a Homebrew Analytics tracking ID, and a Homebrew Analytics user ID.
You have the option to prevent it from occurring by typing the following command: brew analytics off
For more related information, we recommend that you check out our article on the best Terminal emulator for Mac.
How to Set Git Configuration?
Just installing Git does not grant you the ability to push, pull, commit, and use other Git actions directly from your Git Version Control repository.
You have to configure your Git environment with the git config command before you can start working with Git. Here’s how to do this:
- Once you have installed Git, type the following commands, one by one, in your Terminal, and make sure to replace username and email with your own username and email address:
git config --global user.name "username"git config --global user.email "email" - You can also check your configuration by typing the following command in your Terminal:
git config --global --list
How to Install Git on Mac VSCode?
- First off, you need to install and configure Git, as we have shown above.
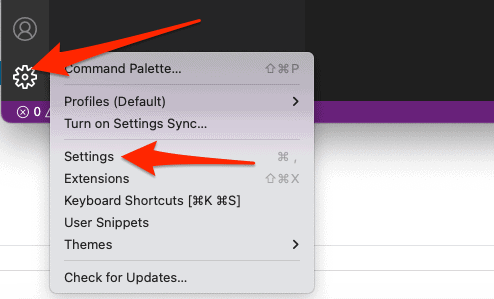
- Access VSCode and click the gear icon from the bottom-left corner then select Settings.
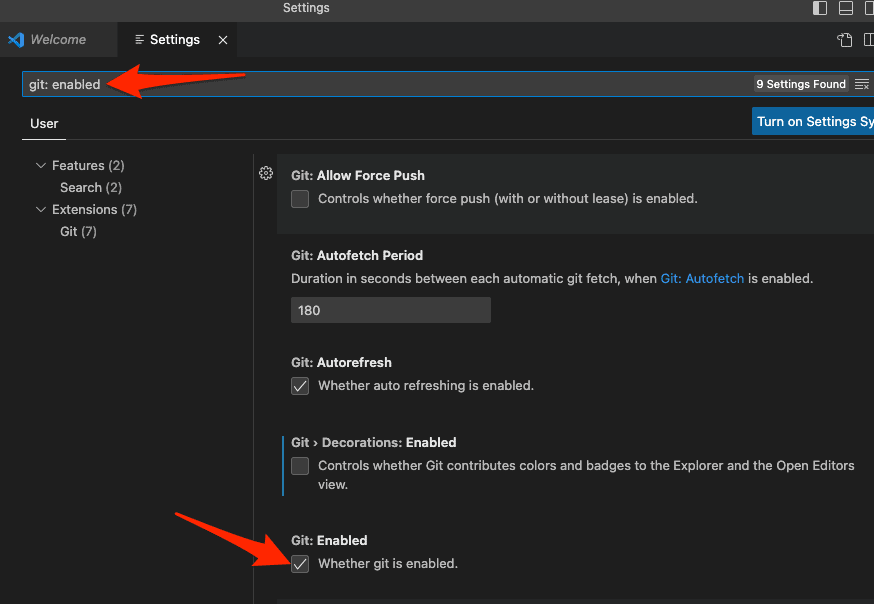
- Next, type git:enabled in the search bar and make sure the box under Git: Enabled is checked.
Now you can use Git with VSCode. You can view all Git changes in your Source Control tab on the left side of VSCode. You can also use various Git commands from the context menu of your files.
Do I Need both Git and GitHub?
Using Git does not require you to have GitHub. However, having GitHub requires you to have Git as well. GitHub is a service that lets you host, share, and manage your code files on the internet. GitHub uses Git underneath and lets you manage your Git repositories or folders easily on its platform. You can also use GitHub to collaborate with other developers on open-source projects, or on your own projects.
How to Use Git in Terminal Mac?
If you prefer to use Git in Mac’s Terminal instead of a graphical user interface, you can do so by using various commands. You need to have Git installed on your Mac first, using any of the methods mentioned above.
It takes some time to become proficient in Git because there are so many different commands that you may use. Yet, there are several commands that are used more frequently than others.
One of the best online learning platforms is FreeCodeCamp, and we recommend it to future developers because it offers an outstanding Git commands cheat sheet as well as a tutorial that walks you through the process of creating your first project. What are you waiting for?

