Setting up an OpenVPN server and client on macOS is a straightforward process that can provide you with a secure and private connection to the Internet. It can seem like a daunting task, but with the right tools and instructions, it can be done easily and quickly.
In recent years, the use of virtual private networks (VPNs) has grown increasingly common as more and more individuals have become worried about the privacy and security of their online activity. Some can experience option paralysis due to the large number of VPNs out there. However, for others, it is pretty clear that OpenVPN is the best product that suits their needs.
Quick Tip:
As a friendly suggestion before you dig into our solutions, we think a VPN service like ExpressVPN would work better because this VPN works seamlessly on all Mac versions with an installation that takes less than 5 minutes and you’ll have your IP address hidden, enhanced data protection, and lightning speeds as well.
Does OpenVPN Work on Mac?
Yes, it does! OpenVPN Connect v3 is the recommended official software for OpenVPN Access Server and OpenVPN Cloud. The client software supports macOS, iOS, Windows, and Android.
As stated on its website, the most recent version of the OpenVPN Connect Client for macOS is compatible with the following versions of macOS:
- OS X 10.8 Mountain Lion
- OS X 10.9 Mavericks
- OS X 10.10 Yosemite
- OS X 10.11 El Capitan
- macOS 10.12 Sierra
- macOS 10.13 High Sierra
- macOS 10.14 Mojave
- macOS 10.15 Catalina
- macOS 11.0 Big Sur
Does OpenVPN Support the M1 and M2 Mac?
OpenVPN has tested its current version of OpenVPN Connect Client software and found that it works completely fine on M1 Macs and has close to no performance loss. This should be the case on all Apple Silicon Macs, whether M1 or M2.
How To Set Up OpenVPN on Mac
In order to connect to an OpenVPN Access Server, every Mac has to have a client program installed. You should use OpenVPN Connect because it already comes pre-configured to establish a connection with an OpenVPN Access Server.
Alternatively, you can use other third-party clients that support the OpenVPN protocol, such as Tunnelblick or Viscosity. However, you may need to manually configure them with the server address, port, protocol, and encryption settings, amongst other things.
Time needed: 2 minutes
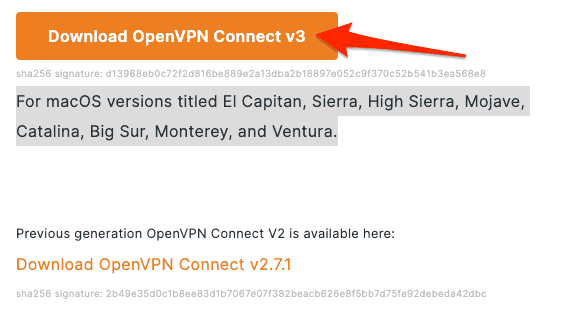
- Go to the official website for the OpenVPN Connect Client for macOS and click Download OpenVPN Connect 3.
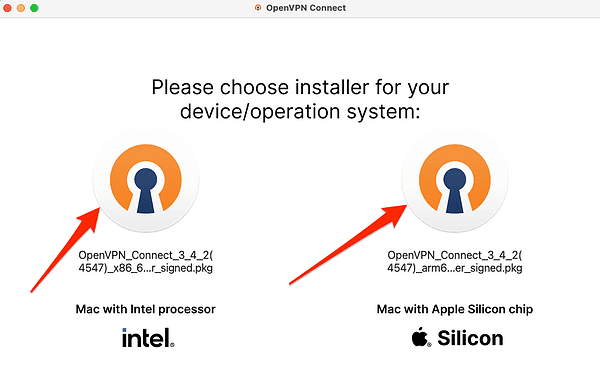
- Open the downloaded file and select whether you have an Intel-based Mac or Apple Silicon chip.
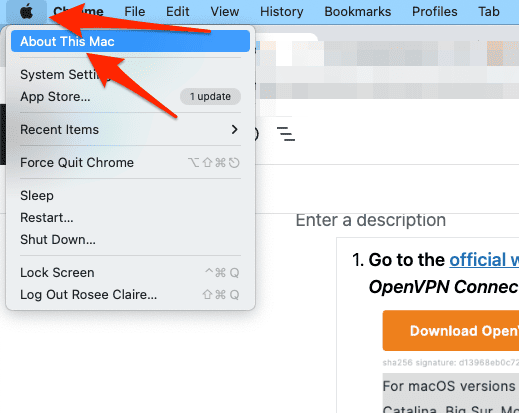
- If you don’t know which one you have, go to Apple > About This Mac and check which Chip you have. If the chip name begins with “Apple,” it’s an Apple Silicon system-on-a-chip.
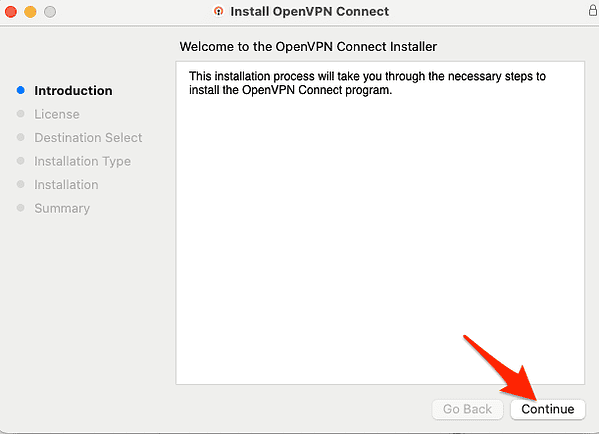
- Click the Continue button.
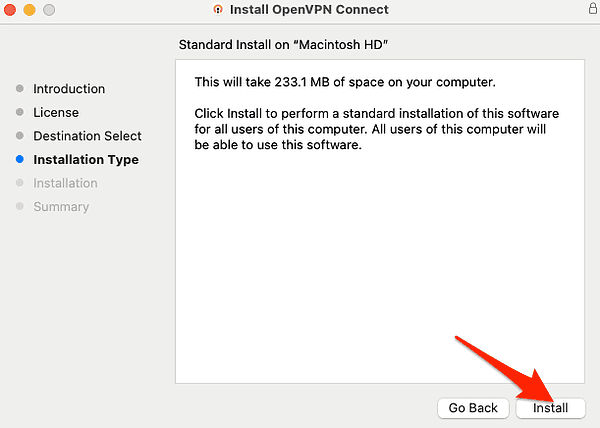
- Agree to the terms and conditions, then click the Install button.
- You will be asked to enter your user’s password, then to move the installer to the trash.
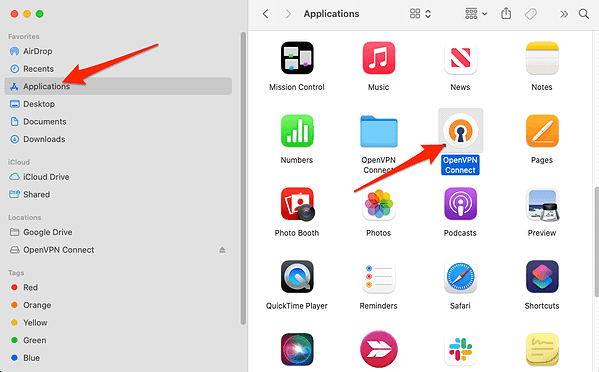
- Once installed, you will be able to find the OpenVPN Connect app in Finder > Applications.
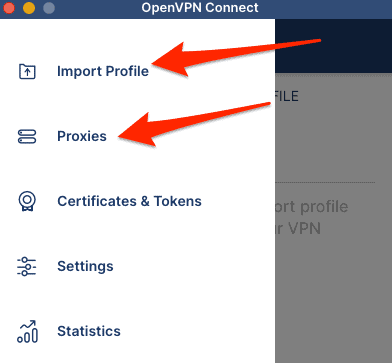
- After you open the app, you will be able to import your profile and add proxies
How Do I Run OpenVPN on Mac Terminal?
Before you begin, you need to have a valid OpenVPN configuration file (.ovpn) that contains the server credentials. You can obtain this file from your VPN provider or your own OpenVPN Access Server. Moreover, you also need to have a Mac with administrator privileges and Homebrew installed.
- Press Command + Space then type Terminal and open the first result.
- Next, type the following command:
brew install openvpn - Locate your OpenVPN configuration file (.ovpn) and copy it to the following directory:
/usr/local/etc/openvpn/ - Rename your configuration file to have a .conf extension instead of .ovpn.
- Enter the following command to start OpenVPN:
sudo openvpn --config /usr/local/etc/openvpn/client.conf - Enter your password when prompted and wait for the connection to be established. You should see a message like this:
Initialization Sequence Completed - To disconnect from the VPN server, press Ctrl + C in the terminal window.
OpenVPN is a well-known and trustworthy virtual private network, which enables users to set up encrypted tunnels between their own devices and remote servers. Installing a client program on your Mac that is compatible with the OpenVPN protocol, such as OpenVPN Connect or Tunnelblick, is required in order to use OpenVPN.
But, if you would rather use the terminal instead of a graphical user interface, you may also run OpenVPN from the Mac terminal by following a few more steps. For more related information we recommend that you check out our guide on how to use Terminal on Mac.
What Is the Difference between OpenVPN Client and OpenVPN Server?
An OpenVPN client is a program that runs on your device and connects to an OpenVPN server. This means that the client initiates and maintains the VPN connection, encrypts and decrypts the data, and handles the authentication process.
On the other hand, an OpenVPN server is a program that runs on a remote device and accepts connections from clients. The server verifies the identity of the clients, assigns them IP addresses, and routes their traffic, amongst other things.
OpenVPN Access Server is a powerful and flexible VPN solution that enables secure and private communication over public networks. It leverages the proven OpenVPN protocol and offers a user-friendly interface and management tools. Read further to find out how to install and use it on your macOS.
How Do I Set Up and Configure OpenVPN Server?
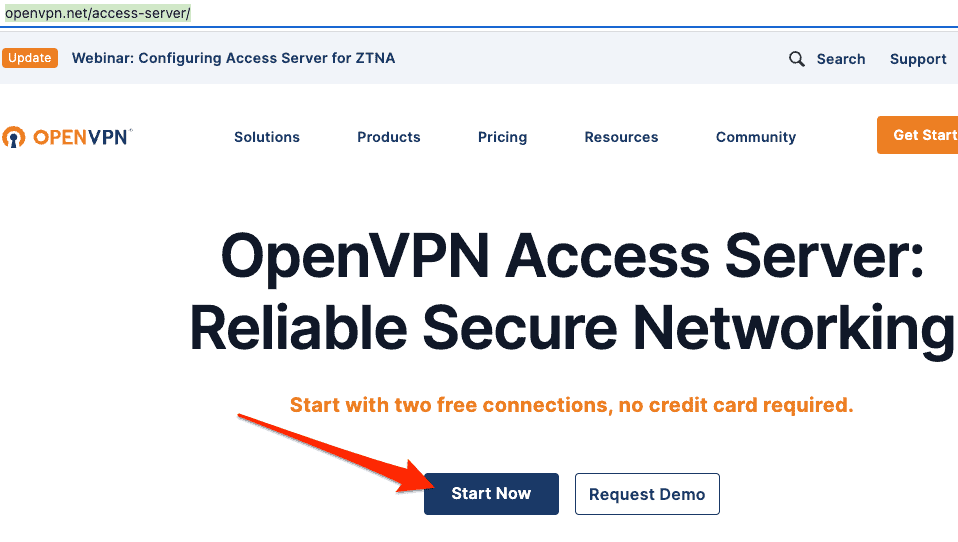
- Go to the official website for OpenVPN Access Server and click Start Now.
- Next, enter your credentials in order to create a new account and click Sign Up.
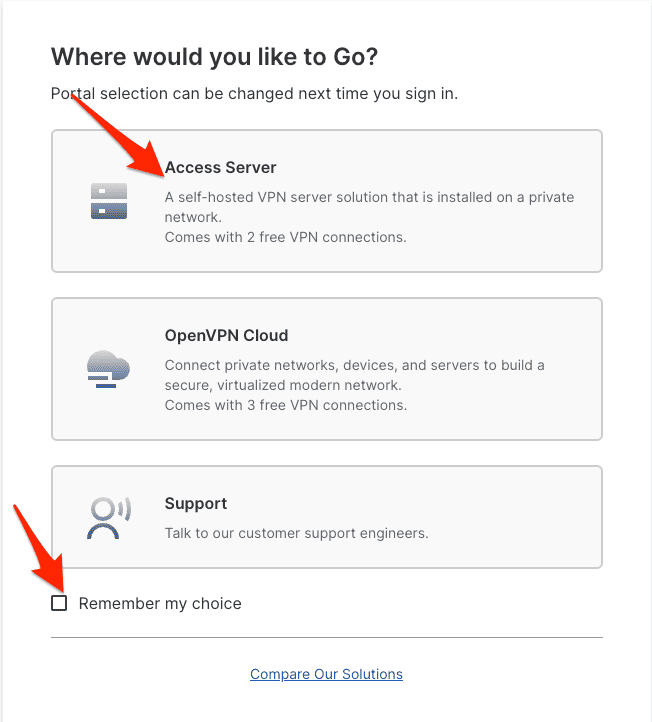
- Select the Access Server option and tick the box next to Remember my choice.
- Enter more details if you are asked to then click Continue.
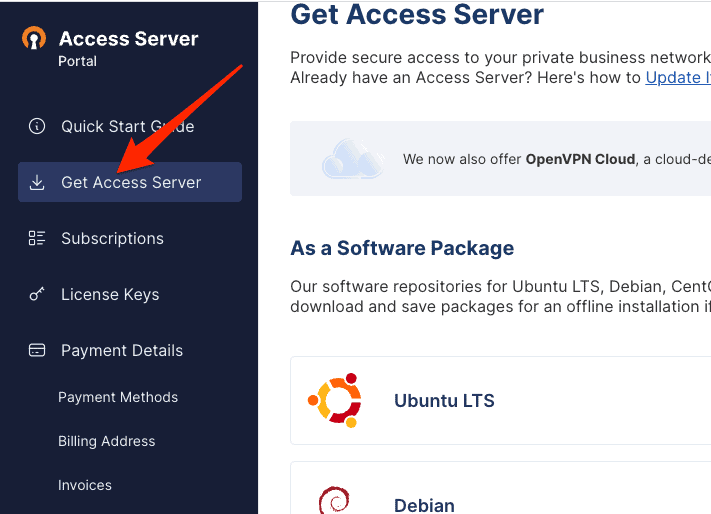
- Next, go to Get Access Server and select one of the three ways to get it: as a software package, cloud image, or virtual appliance. Note that you will need to buy a subscription to be able to use it.
OpenVPN Access Server is a powerful and flexible VPN solution that enables secure and private communication over public networks. It is based on the proven OpenVPN protocol and offers a user-friendly interface and management tools. As the company states, it is suitable for organizations of all sizes and industries that need to provide secure remote access to their private business network, in the cloud or on-premise.
We recommend that you further read about the five things to consider when evaluating a VPN’s privacy because no one wants to lose their data due to a minor oversight.

