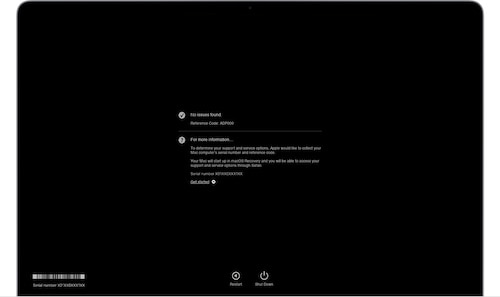
This guide will show you how to use Apple Diagnostics to test your Mac. Running Apple Diagnostics can be a great way to check if your device is experiencing a hardware issue. Completing this test can help determine if a specific hardware component is giving you problems.
Running an Apple Diagnostics can also be helpful, as the program will suggest solutions for your issue, while also helping users contact Apple Support should they need further assistance.
Before beginning, you will need to complete a couple of steps.
How to Determine Your Device Processor
The first thing you will need to do is determine whether or not you have an Apple silicone or Intel-based processor. Here’s how to determine what processor you are using.
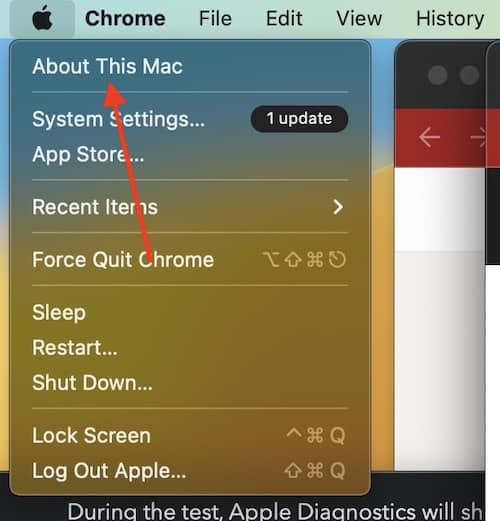
- To determine this, go to the Apple menu and select About This Mac.
- If you are using Apple silicon, the About This Mac page will show an item labelled Chip, and it will show the name of the chip.
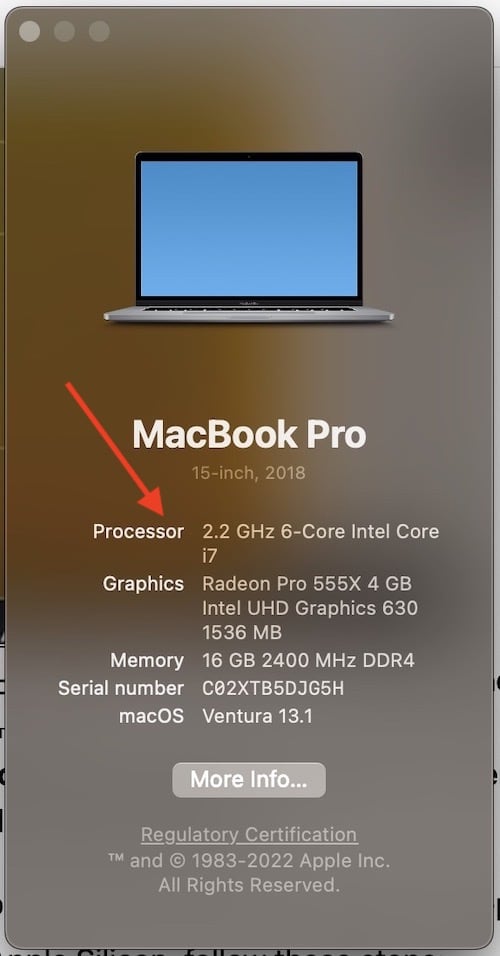
- If you have an Intel processor, About This Mac will show an item labeled Processor, which will show the name of your Intel-based processor.
Once you have determined your processor, follow the appropriate steps.
What to Do Before Running an Apple Diagnostics
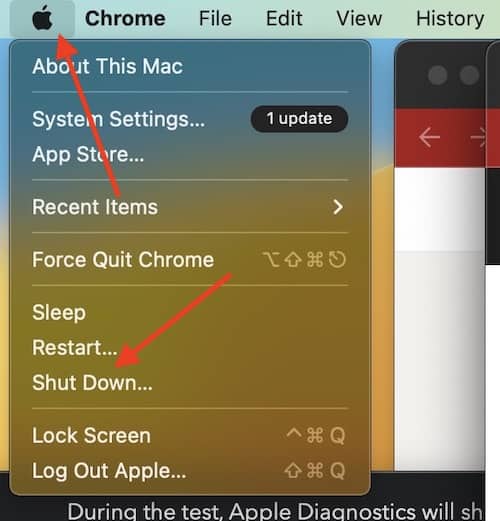
- Shut down your Mac. Go to the Apple menu and select Shut Down.
- When your device is shut down, disconnect all external devices, except your keyboard, mouse, display, Ethernet connection (if you have one) and your connection to AC power.
- Ensure the device is on a flat, hard and stable surface and has proper ventilation for your device.
How to Begin an Apple Diagnostics Test
To begin Apple Diagnostics with Apple Silicon, follow these steps:
- Turn on your Mac, and continue to hold the Power button while your Mac is starting up.
- Release the power button when you see the startup options window.
This will include a gear icon that is labeled Options. - Press Command (⌘) and D on your keyboard.
To begin Apple Diagnostics with an Intel processor, follow these steps:
- Turn on your Mac. While the Mac is starting up, press and hold the D key.
- Release the D key when you see the progress bar or if you are asked to choose a language.
- If you want to connect your Intel-based device to the internet, press and hold Option-D at startup.
Running an Apple Diagnostics Test
Time needed: 30 minutes
How to Run an Apple Diagnostic Test
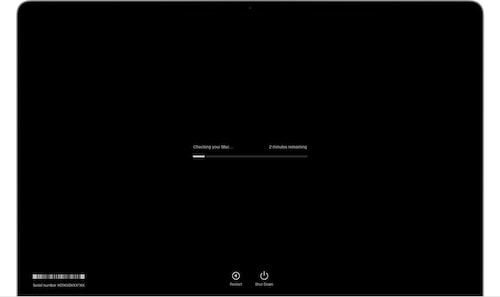
- During the test, Apple Diagnostics will show a progress bar while it is doing a sweep of your device.
- When testing is complete, you will be shown the results by Apple Diagnostics.
You will be given a reference code. To view a list of reference codes and the action you should take, you can view them on Apple’s official site here.
- If you want to run the test again, either click “Run the test again” or press Command-R.
- Click Restart or press R to restart your device.
- Clicking Shut Down or pressing S will restart your device.
- Apple will also provide you with service or support options.
Ensure that your device has an internet connection, and click “Get Started” or press Command-G. This will restart your Mac, and take you to a webpage that will provide more information. You are then able to Restart or Shut Down your device from the Apple menu.
Using Apple Diagnostics can be a great way to determine if there are any hardware issues with your device. If you feel your device is experiencing issues, be sure to run a an Apple Diagnostics test to see what the underlying conditions may be for your Mac.

