
The latest macOS Sequoia 15.4 Beta 4 is packed with exciting new features and improvements, including a redesigned Mail experience, fresh emoji characters, and a range of performance tweaks. While the update promises a lot of enhancements, some issues have also cropped up in the installation process. If you’re also facing those hiccups, here are some tried and tested ways to fix the issue and get the update installed smoothly.
5 Ways to Fix macOS 15.4 Beta 4 Installation Failed Error
1. Disable Find My Mac and Find My Network
Time needed: 3 minutes
If you see the “Installation Failed” error while installing macOS 15.4 Beta 4, turn off the Find My Mac and Find My network in iCloud Settings, then try again. Here’s how:
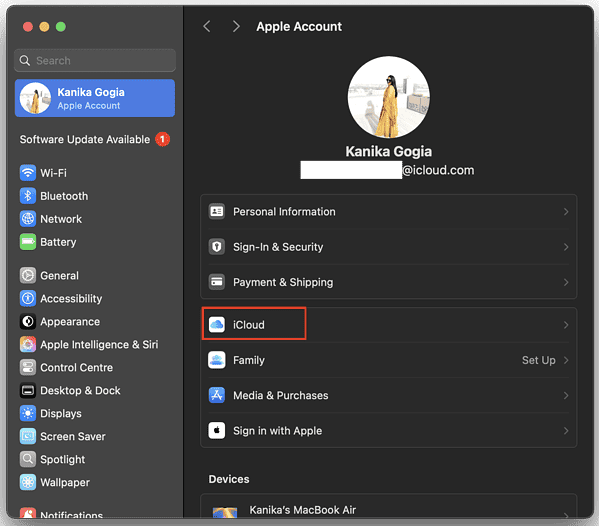
- Open the System Settings app and go to your Apple Account from the left sidebar.
- Click on iCloud.
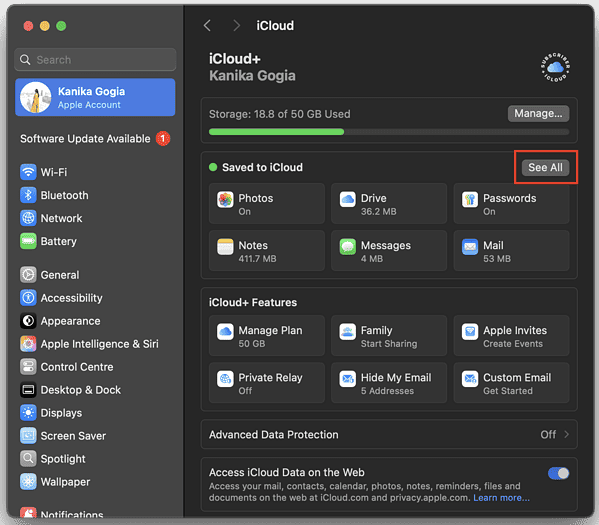
- Click on the See All option.

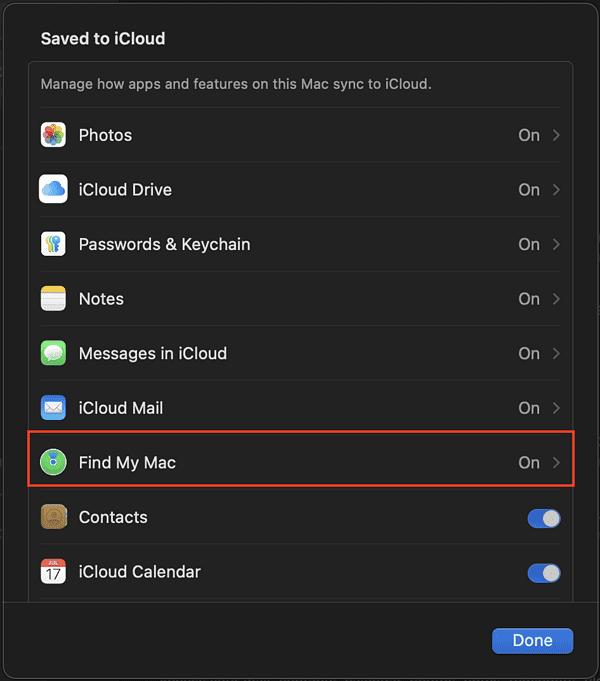
- Next, select Find My Mac.

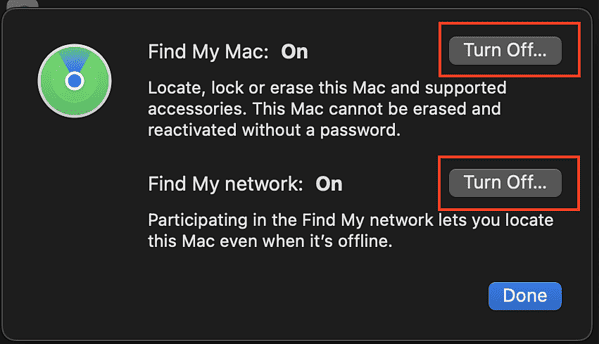
- Here, Turn Off Find My Mac and Find My network options.

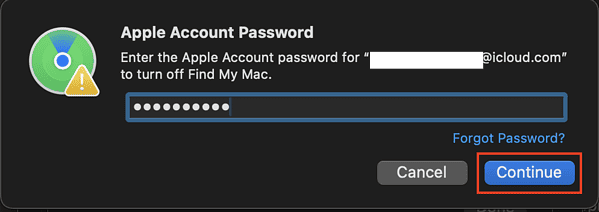
- You will be prompted to enter your Apple Account password to disable Find My Mac.
- Enter the password and click the Continue button to make the changes.

- Once you’ve done this, restart your Mac and then try to install the beta update.

2. Boot Mac in Safe Mode
The next method is to boot your Mac in Safe mode and then try to install the update. This will help you identify if the issue is due to the software that loads as your Mac turns on. Follow the below steps to boot any Apple Silicon Mac in safe mode:
- On your Mac, go to the Apple menu and choose Shut Down. You know your Mac is fully shut down when the screen goes black and all lights are off.
- Press and hold the Power button until you see “Loading startup options“.
- Select a volume.
- Press and hold the Shift key, then click Continue in Safe Mode.
- Your Mac should now restart automatically.
- When the login window appears, you should see “Safe Boot” in the top menu bar, indicating the success.
- Now, go ahead and try installing macOS 15.4 beta 4 and see if this works.
3. Toggle Beta Updates Off/On
If the above steps didn’t help, you can toggle the beta updates off and back on to rule out any temporary glitches. Here’s how to do it:
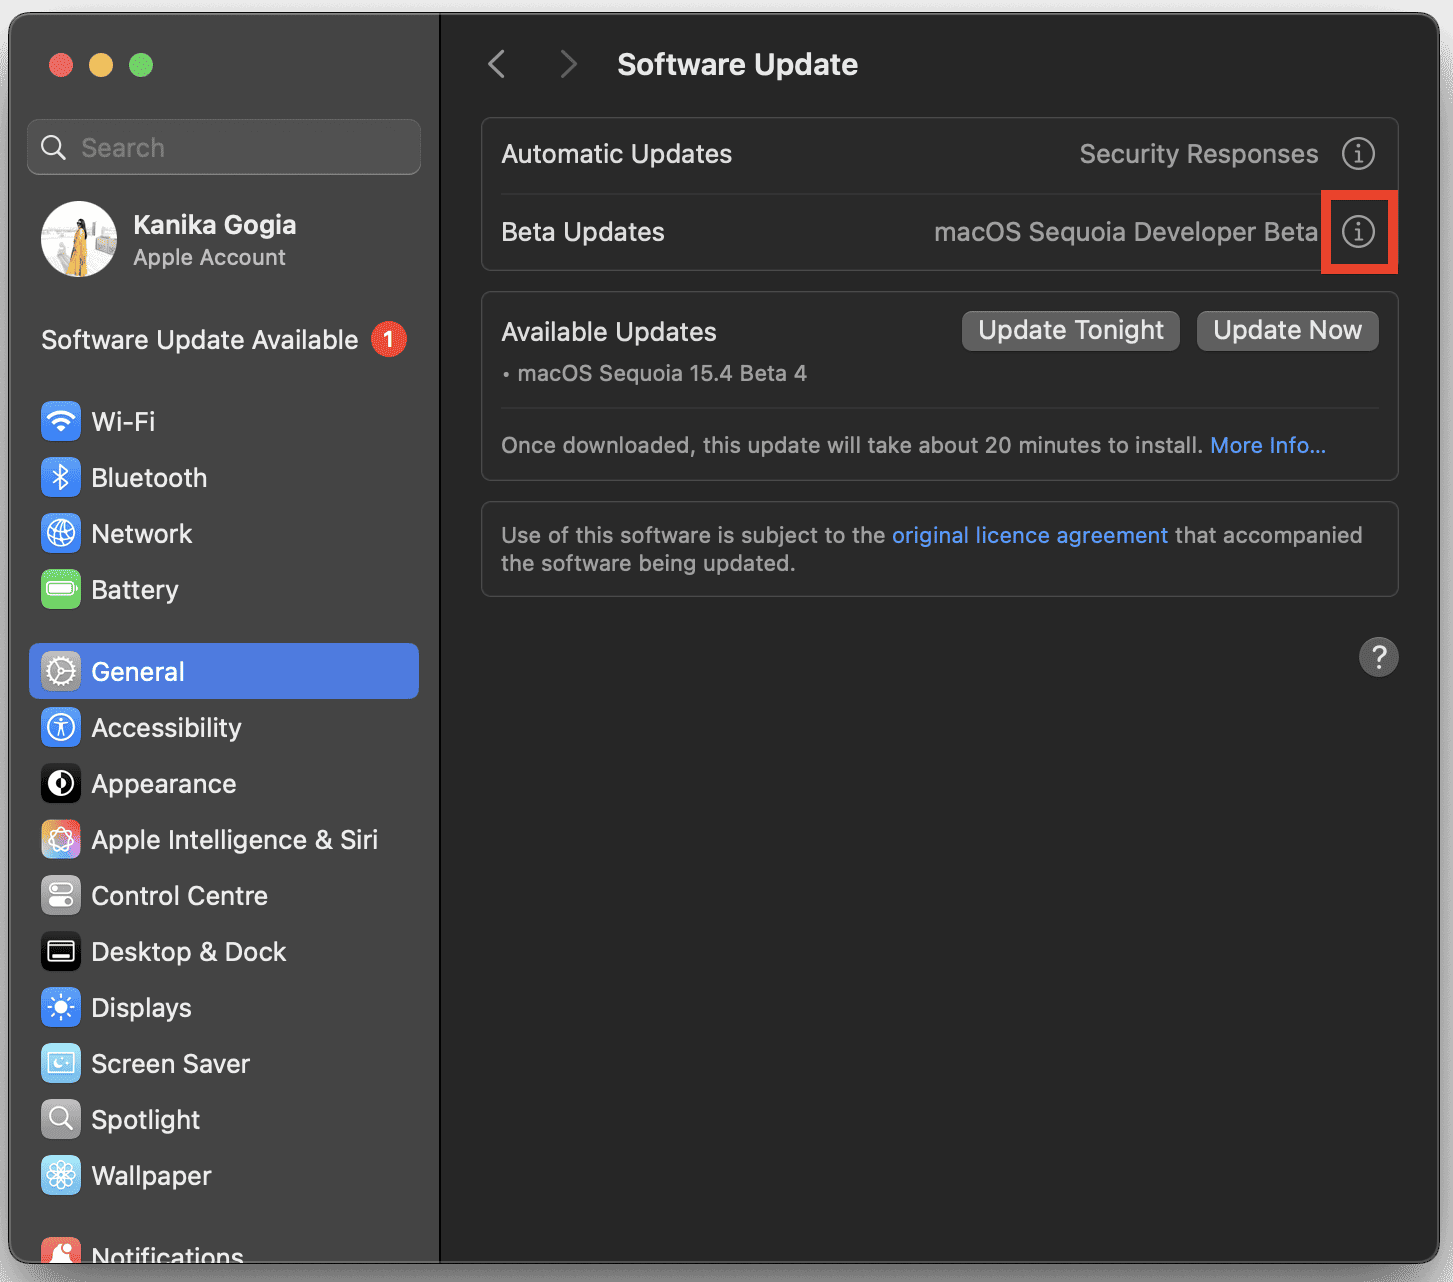
- Go to System Settings > General > Software Update.
- Here, click the Info (i) button next to Beta Updates.

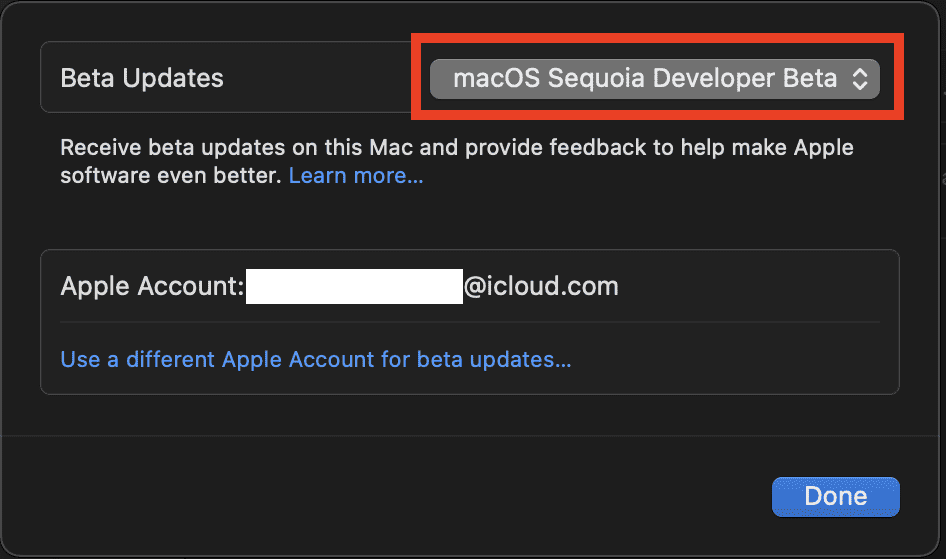
- Click on the drop-down menu.

- From the list of available options, select Off.

- Hit the Done button.
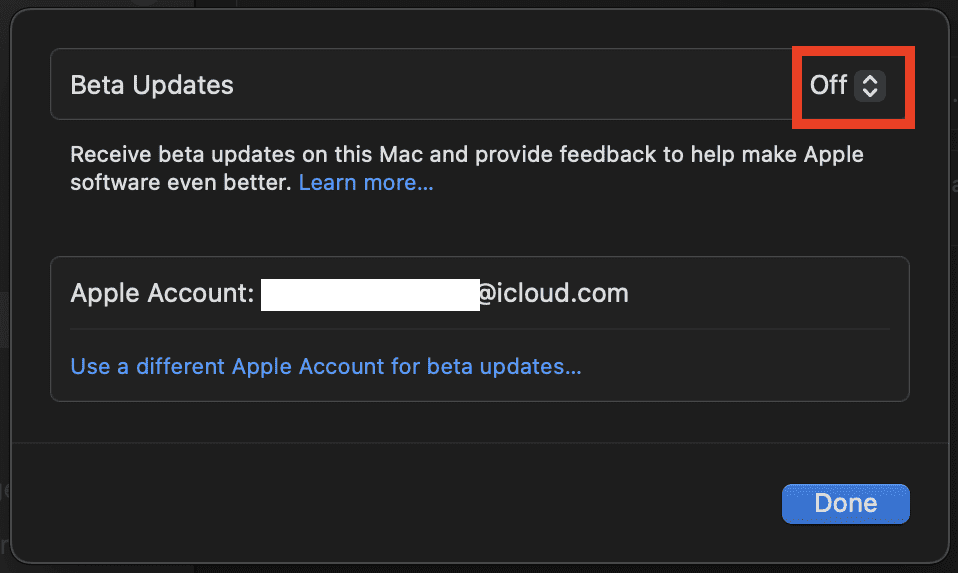
- Now, wait for a few seconds and click the drop-down menu again.
- Select macOS Sequoia Developer Beta or macOS Sequoia Public Beta, depending on the profile you’re using.
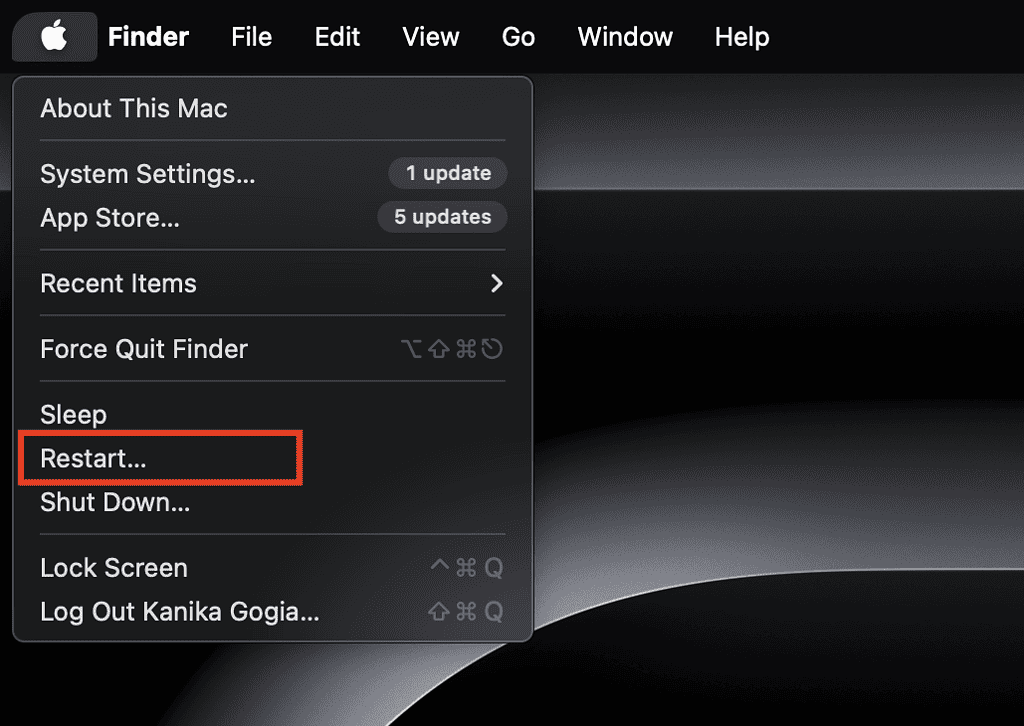
4. Restart your Mac
One of the simplest and most effective ways to resolve common issues on a Mac—or any device—is by restarting it. It may sound cliche but a reboot can clear out random bugs or glitches that might disrupt the performance of your machine. It gives a fresh start to the system and fixes common problems. So, it’s worth giving it a try.
To do this, click on the Apple menu from the top-left corner and choose Restart.
5. Check Internet Connection
And last but not least, make sure to check your Wi-Fi connection. The installer needs a stable internet connection to get firmware and other important information specific to your Mac. In case there’s a network issue, you won’t be able to install macOS beta updates.
To rule out any Wi-Fi-related issues, you can run a quick speed test, reboot the router, forget and reconnect to the Wi-Fi, or switch to a different network if one is available.