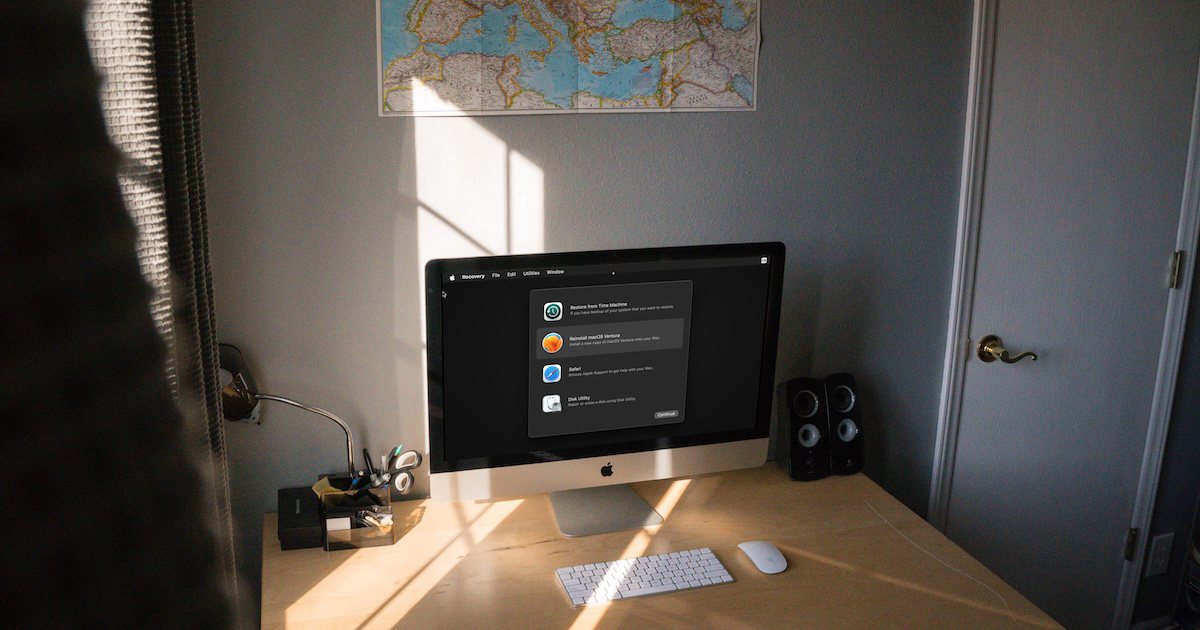
Apple’s annual release of beta versions of its forthcoming operating systems is a strategic move, offering developers an opportunity to get their apps ready, while beta testers provide their crucial feedback and identify any hitches. Among these, the macOS Sonoma developer beta is a freebie, allowing Mac aficionados early access to a plethora of innovations, even before they hit the mainstream market.
Nonetheless, some who have taken the leap and tested the macOS Sonoma beta on their Mac might want to downgrade to Ventura. There is, fortunately, a simple method to achieve this. Unfortunately, it will require erasing your storage device.
The Perils of Operating System Betas
When diving into the world of beta versions, one must brace for a potential whirlwind of instability. There’s a likelihood of encountering disruptive macOS glitches that can tarnish the otherwise pristine Mac user experience. These bug-related hurdles can impede your workflow, leading you to want to downgrade from the macOS Sonoma beta.
A consensus in the tech community says you should only install Apple’s beta software on a secondary Mac, a device that isn’t pivotal to your day-to-day operations. That being said, if you’ve already taken the plunge and now want out of the dangerous waters, we’ve got your back.
Things To Be Aware of Before You Downgrade
To uninstall the macOS Sonoma beta, you’ll need to put your Mac into macOS Recovery mode. Make no mistake, though: this journey purges your Mac of its data.
Before you installed the beta, Apple and others highlighted the need for a Time Machine backup of your data. This will be vital to restoring your Mac to the previous, stable version of macOS without losing your important files.
If you’ve worked on important files since installing the beta, it will be crucial that you copy them to an external drive. Otherwise, they’ll be lost in the downgrade. After the downgrade from the beta, any files you’ve saved to an external drive can be conveniently retrieved. Bear in mind that any unsecured data faces the guillotine, resulting in permanent loss.
Using Recovery Mode to Uninstall the macOS Sonoma Beta
Once you’re ready to uninstall the macOS Sonoma beta, you’ll need to boot your Mac into its Recovery Mode. Remember, too, that an active Wi-Fi connection is a prerequisite, necessary to retrieve the older macOS version via Internet Recovery.
To boot into macOS Recovery, follow this sequence:
- Shut down your Mac by accessing the Apple menu and choosing Shut Down > Shut Down. Wait for the shutdown process to complete.
- For Apple Silicon Macs, press and hold the power button until you see the startup options.
- For Intel Macs, power up the machine, keeping Cmd + R pressed.
- Proceed by clicking Options > Continue.
- Choose your user account, key in your password, and you’ll soon be in macOS Recovery Mode .
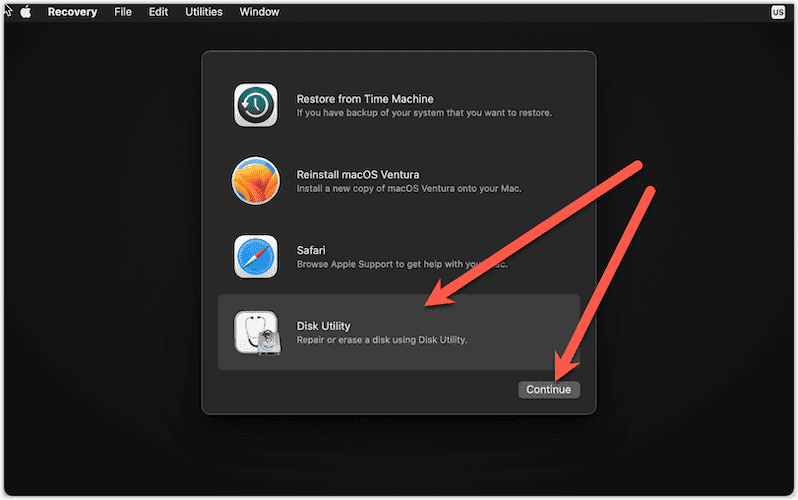
Once you’ve booted into Recovery Mode, you’ll use Disk Utility to uninstall the beta.
To uninstall the macOS Sonoma beta, follow these steps.
- Click on Disk Utility > Continue.
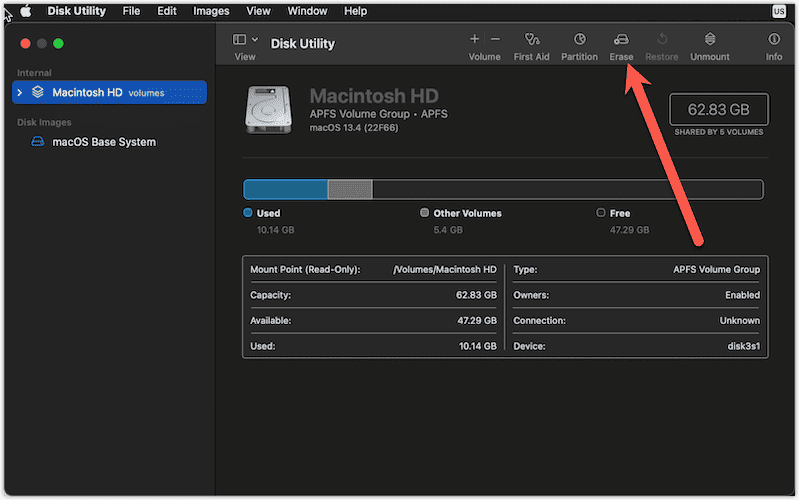
- Select Macintosh HD from the sidebar, followed by clicking Erase twice.
- Confirm by clicking Erase Mac and Restart.
- After your Mac reboots, you’ll enter Recovery Assistant.
- Follow the on-screen instructions to connect to your network and activate your Mac.
- Next, choose Exit to Recovery.
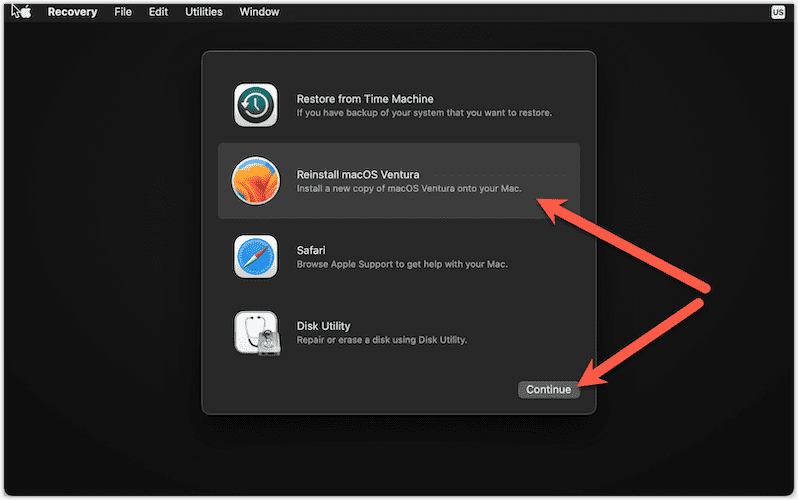
- Finally, click Reinstall macOS Ventura, and follow the on-screen instructions to download and install macOS Ventura.
Once your Mac completes the installation, the Setup Assistant will take over. You’ll have the option to restore from your Time Machine backup now.
Out With the New, Back In With the Old
The macOS Sonoma is definitely a robust enhancement, with its beta version offering users an exclusive sneak peek while enabling them to identify any teething issues. However, Apple’s beta version might not suit all, particularly those who lean heavily on specific apps’ flawless functioning.
Cheer up, though! The process to strip away the macOS Sonoma beta from your Mac isn’t as daunting as you might think. Essentially, it’s all about wiping your Mac clean and restoring it to its former glory. And if you’ve been a fan of Time Machine backups or utilize iCloud, this task will feel like a walk in the park.


