Are you receiving an “Update Requested” error while trying to install iOS 18/18.3? Though getting this notification may cause the urge to smash your iPhone into itty-bitty pieces, there are easier solutions. I recently experienced this problem on a friend’s device, and I had them enjoying all the benefits of iOS 18/18.3 in no time. Let’s take a look.
1. Force Quit Settings and Force Restart iPhone
One of the first things you should try is force quitting your Settings app and then force restarting your iPhone to try the update again. This is the simplest task to perform, and it will not harm your device.
First, force quit Settings.
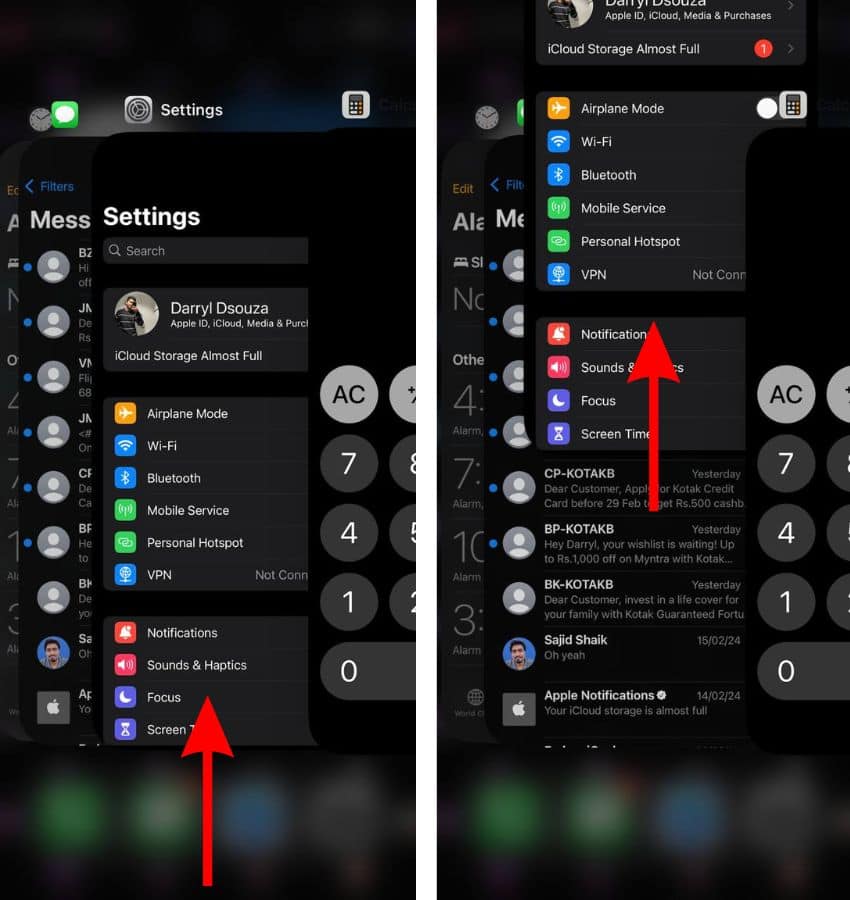
- Open the Settings app if it isn’t already. Then, swipe up from the bottom of your screen or double-tap your Home button to bring up the App Carousel.
- With the App Carousal open, swipe up on the Settings app to remove it from your Recent Apps list.
Now, let’s force restart your iPhone.
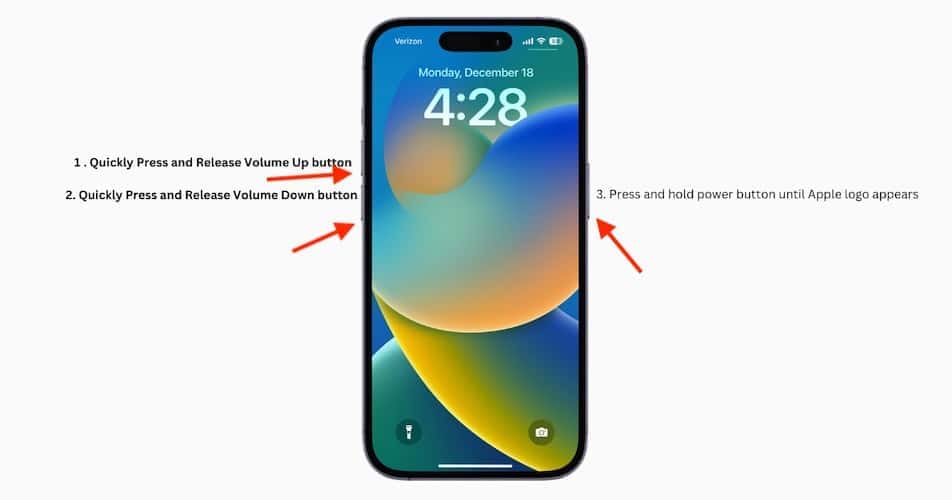
- First, press and quickly release the Volume Up button.
- Now, press and quickly release the Volume Down button.
- Press and hold the Side Button until the Apple logo appears. Check here if you’re using an older model iPhone.
- Try the update again.
2. Check Your Connection
The most likely reason you are receiving this error is that your iPhone is having a difficult time connecting to Apple’s servers. Ensure your iPhone has a good Wi-Fi connection by checking Settings > Wi-Fi. You can also find these settings in the Control Center by dragging them down from the top-right corner of your screen. The Wi-Fi network you’re using might also be experiencing issues; you may need to check the connection or your router.
You can also check Apple’s official System Status page to see if any servers are currently offline.
2.1 Connection Check: Disable VPN
While we’re talking connections, you may need to disable your VPN. This may be the reason your iPhone isn’t making a complete connection with Apple’s servers.
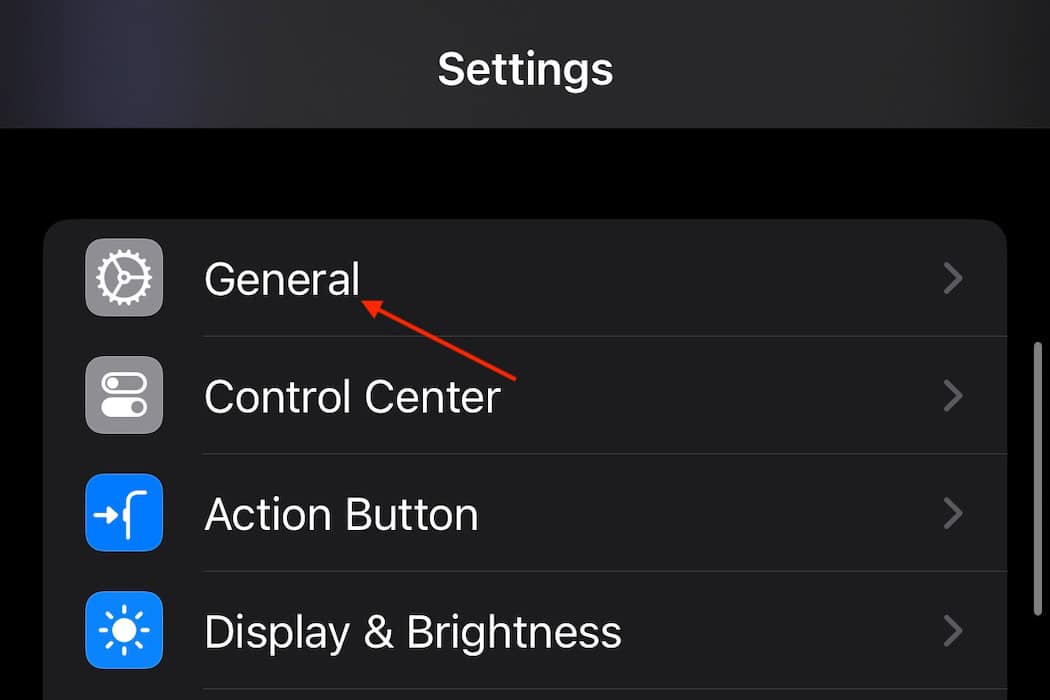
- Go to Settings.
- Select General.
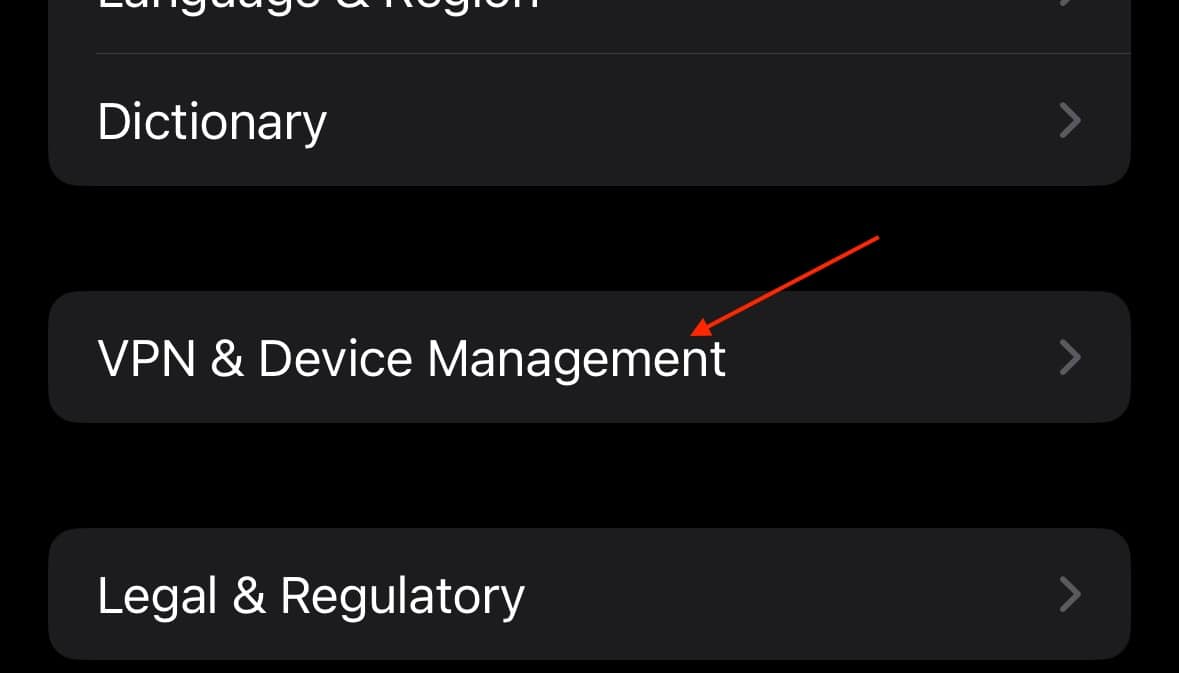
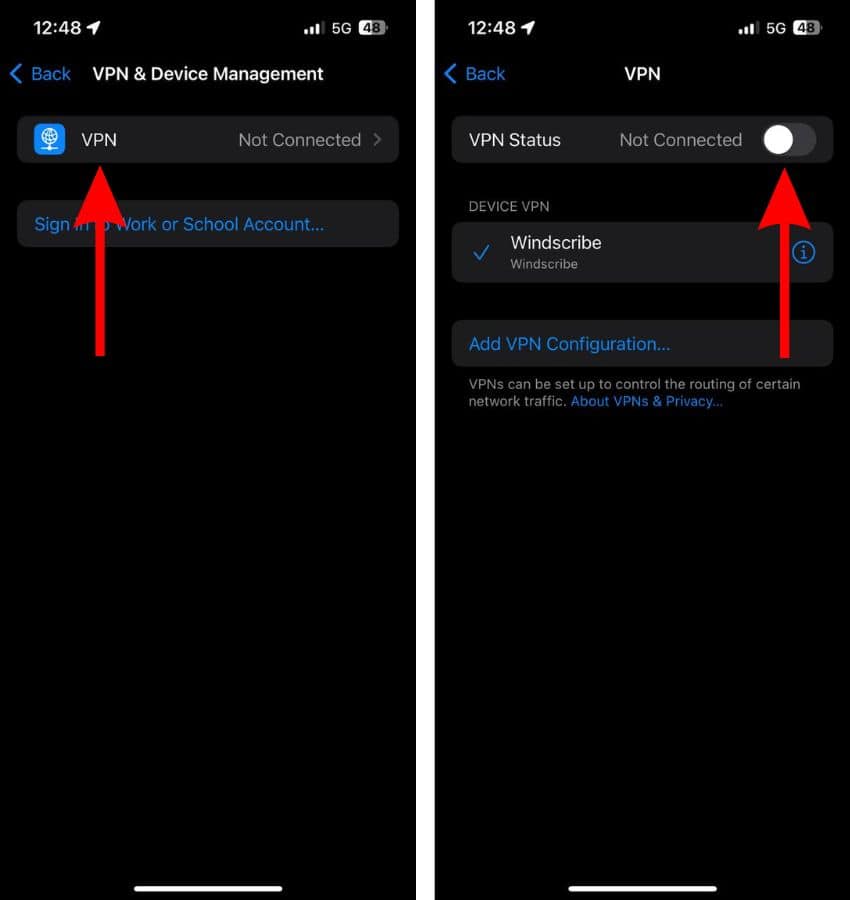
- Tap VPN & Device Management.
- Select your VPN and then disable it on the next screen.
2.2 Connection Check: Disable Low Data Mode
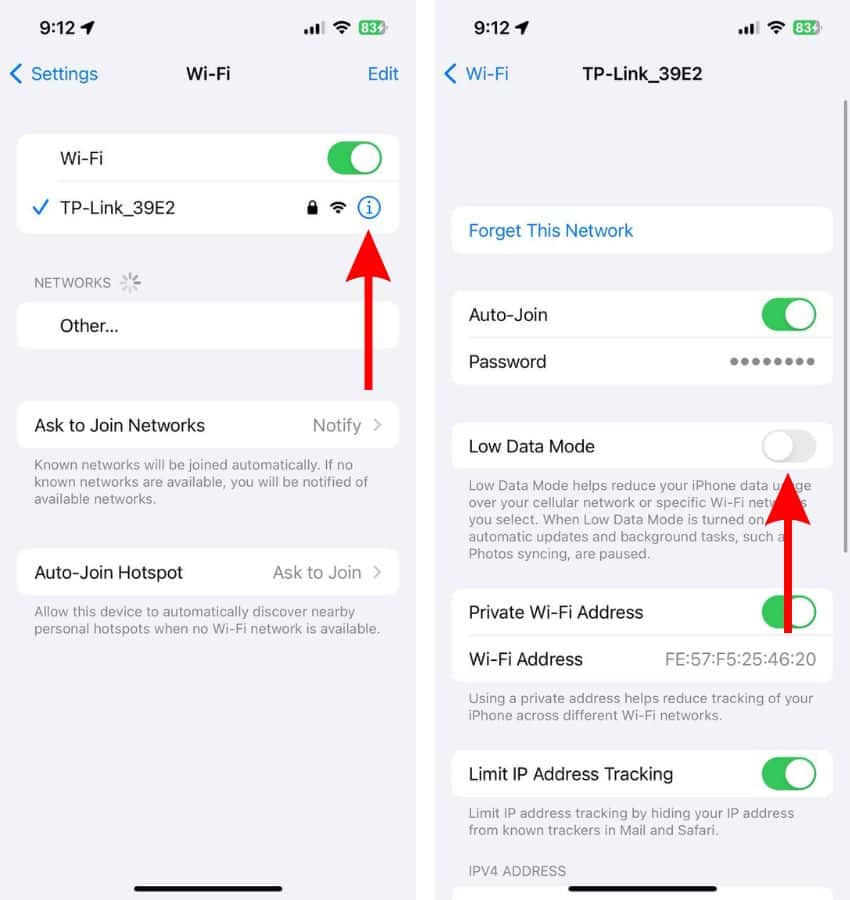
Your Wi-Fi may be using Low Data Mode, a feature that pauses automatic updates and background tasks so as to not use too much data. Checking and disabling this feature is rather straightforward.
- First, navigate to Settings > Wi-Fi on your iPhone.
- Select the Information icon next to the name of your Wi-Fi.
- On the next screen, ensure Low Data Mode is disabled.
- You can check your cellular data via Settings > Mobile/Cellular Data > Mobile/Cellular Data Options > Data Mode. Make sure it is set to Standard.
3. Try to Update with a Mac or PC
If you have a PC or Mac available, then requesting the update through iTunes/Finder is likely the best approach to take. Unfortunately, this does require a computer, so if you don’t have one, you will need to try the next solution.
Time needed: 15 minutes
To check for an iPhone update using a Mac or PC, follow these steps:
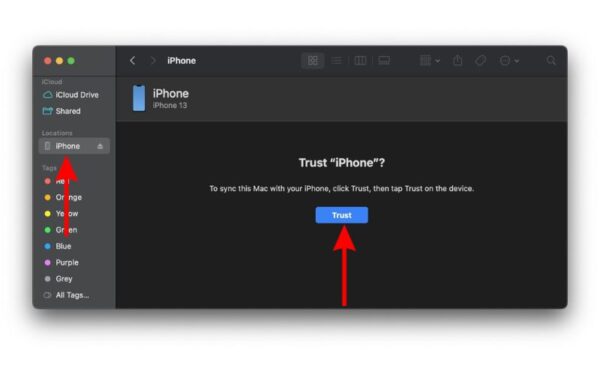
- First, connect your iPhone to the computer. Then, open iTunes or a Finder window. If using Windows or anything prior to macOS Catalina, you’ll be using iTunes. If using macOS Catalina or later, you’ll be using a Finder window. Either way, the steps will be the same from here.
- In iTunes or a Finder window, locate your iPhone in the left-hand column. You may need to have your iPhone “trust” your computer. Click Trust on your PC/Mac and then enter your passcode on your iPhone and select Trust.
- Once the iPhone options appear, select Check for Update. Follow the on-screen instructions.
4. Delete the Old iOS Update File
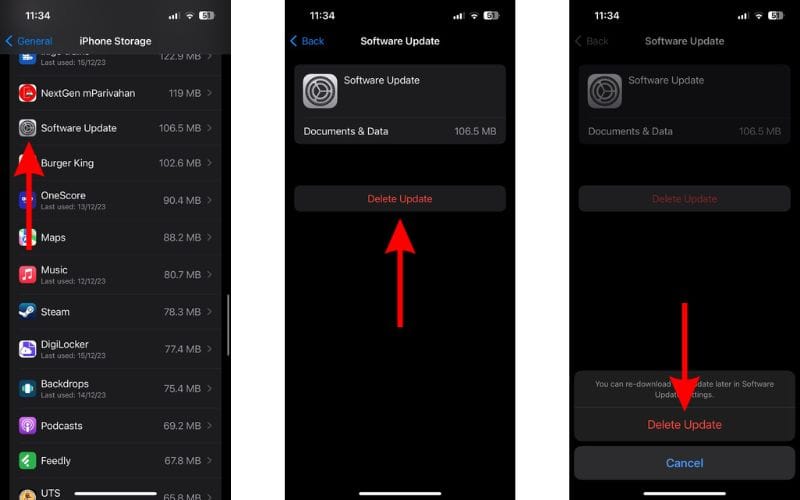
If you’re having issues downloading and installing the update, then you may want to delete the partially downloaded update from your device and try again.
- First, navigate to Settings on your iPhone.
- Select General.
- Tap iPhone Storage.
- Scroll down and look for Software Update. Select it.
- Now, tap Delete Update and confirm your decision.
5. Free Up iPhone Storage
While it’s more than likely a network/connection error causing you problems, you should ensure that you have the proper amount of storage on your device as well. Since an update can require several gigabytes of space, it’s important to ensure you have enough storage. Fortunately, this guide on freeing up iPhone storage can help move you along.
6. Reset Network Settings
While this one does involve your Wi-Fi and cellular connections, I’m listing it last because it should be performed last. If none of the above solutions worked, one of the last things you can try is resetting your network settings. This will erase all settings, including known Wi-Fi networks and VPNs. You should perform a force restart after completing this step.
- Head to Settings on your iPhone.
- Select General.
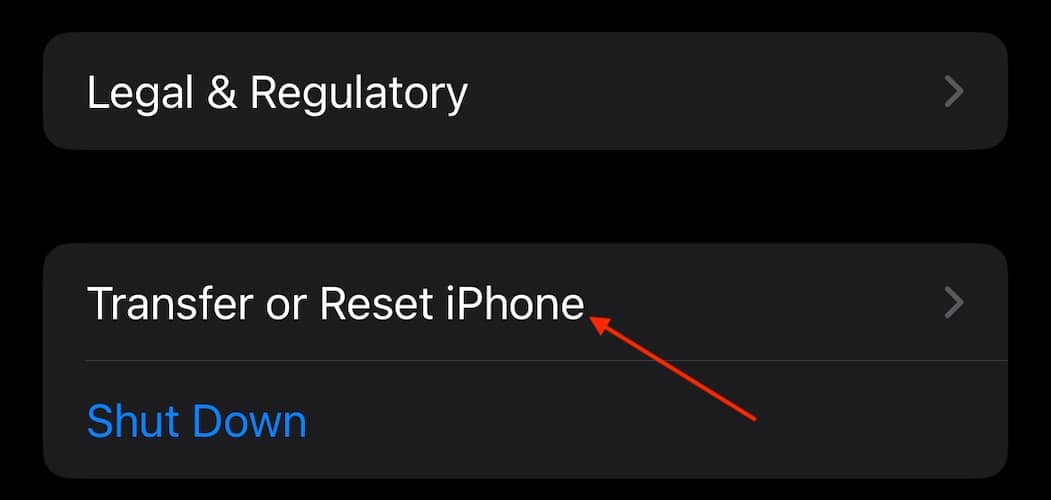
- Scroll to the bottom and tap Transfer or Reset iPhone.
- Select Reset.
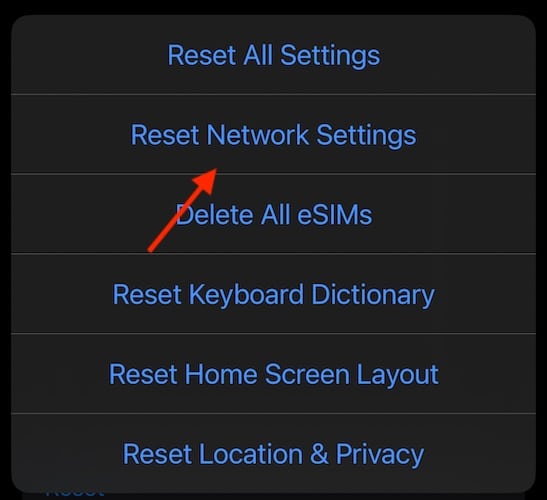
- Tap Reset Network Settings and follow the on-screen instructions.
Hopefully, one of these solutions works for you. If not, you may want to contact Apple Support. You may also want to know what to do if iOS 18/18.3 is stuck on Preparing Update.

