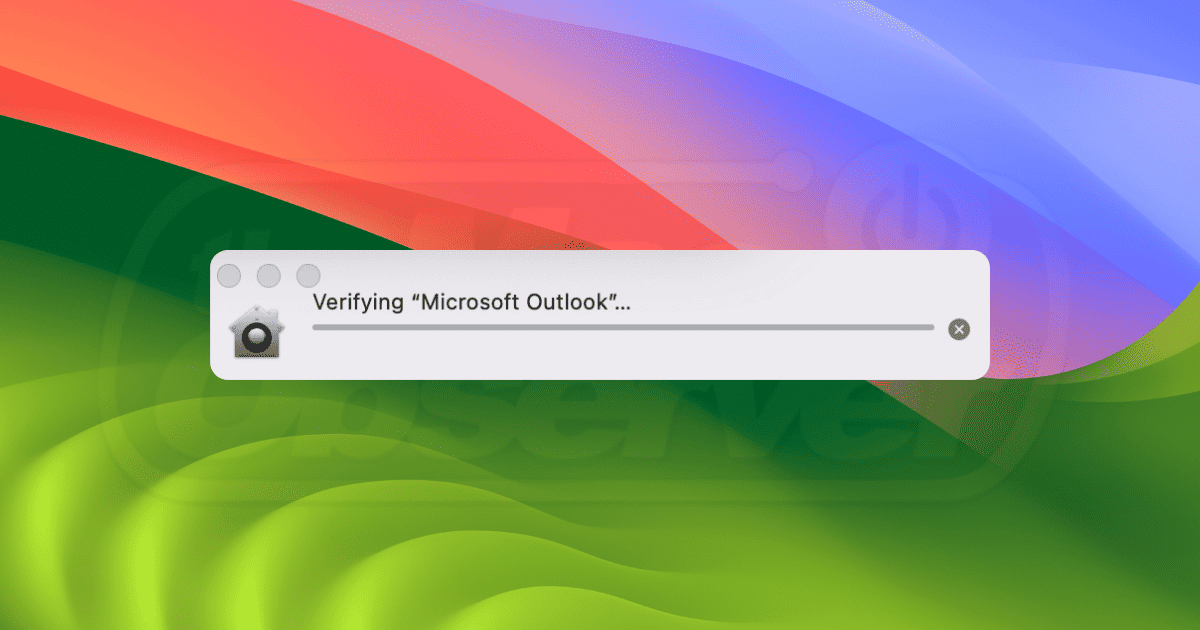
If you have been stuck verifying the Microsoft Outlook dialog box for hours now, you are not alone. It has been an error for years now faced by hundreds of Mac users, including me. It’s frustrating, but we found some solutions that work. Keep reading.
How to Get Rid of Verifying Microsoft Outlook Message on Mac?
1. Force Quit Microsoft Outlook
You can start by quitting the application on your Mac. However, that may not always work, and you might need to force quit it.
Time needed: 1 minute
Here’s how to do it:
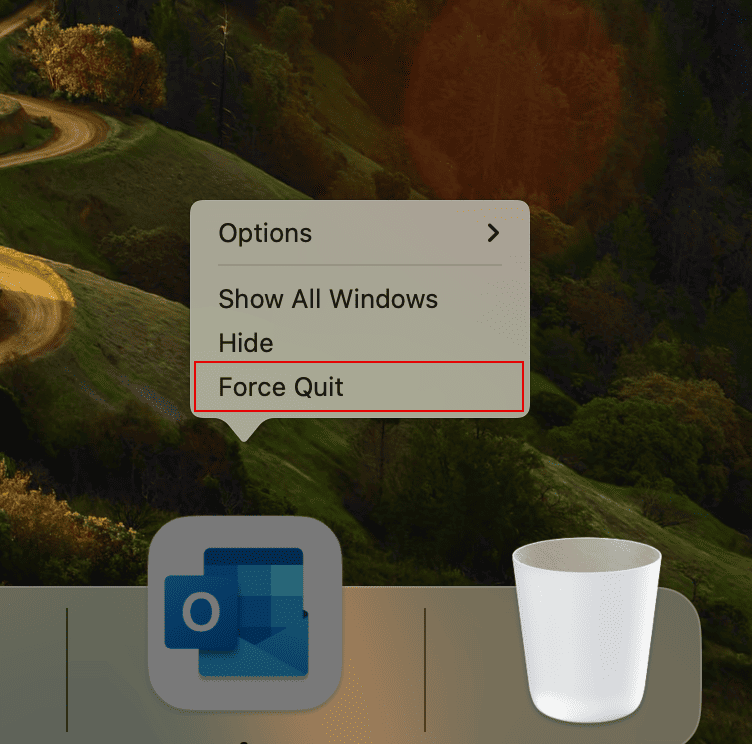
- Right-click on the Outlook icon in the Dock.
- Click on Force Quit.
If the above method does not work, try this alternate method.
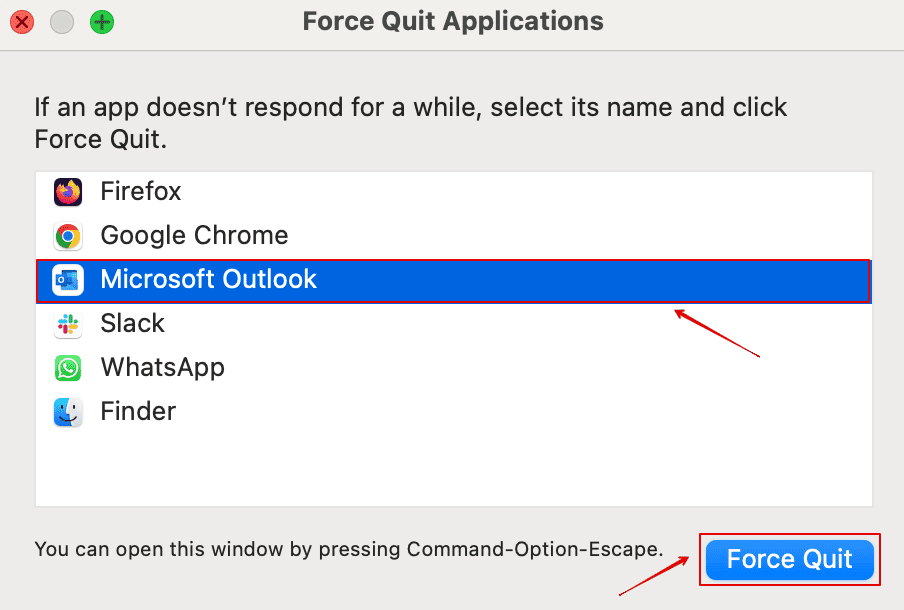
- Press Command+Option+Esc to open the Force Quit Applications window.
- Select Microsoft Outlook and click Force Quit.
- Click Force Quit again to confirm.
2. Check Your Internet Connection
You need a stable internet connection to allow Outlook to verify your email address. Hence, check the Wi-Fi on your Mac to see if it’s working. Or else you can also try checking your router and restart it to be on the safer side.
3. Update Microsoft Outlook
Sometimes, your current version has minor bugs that could lead to such errors. Here is how you can do it:
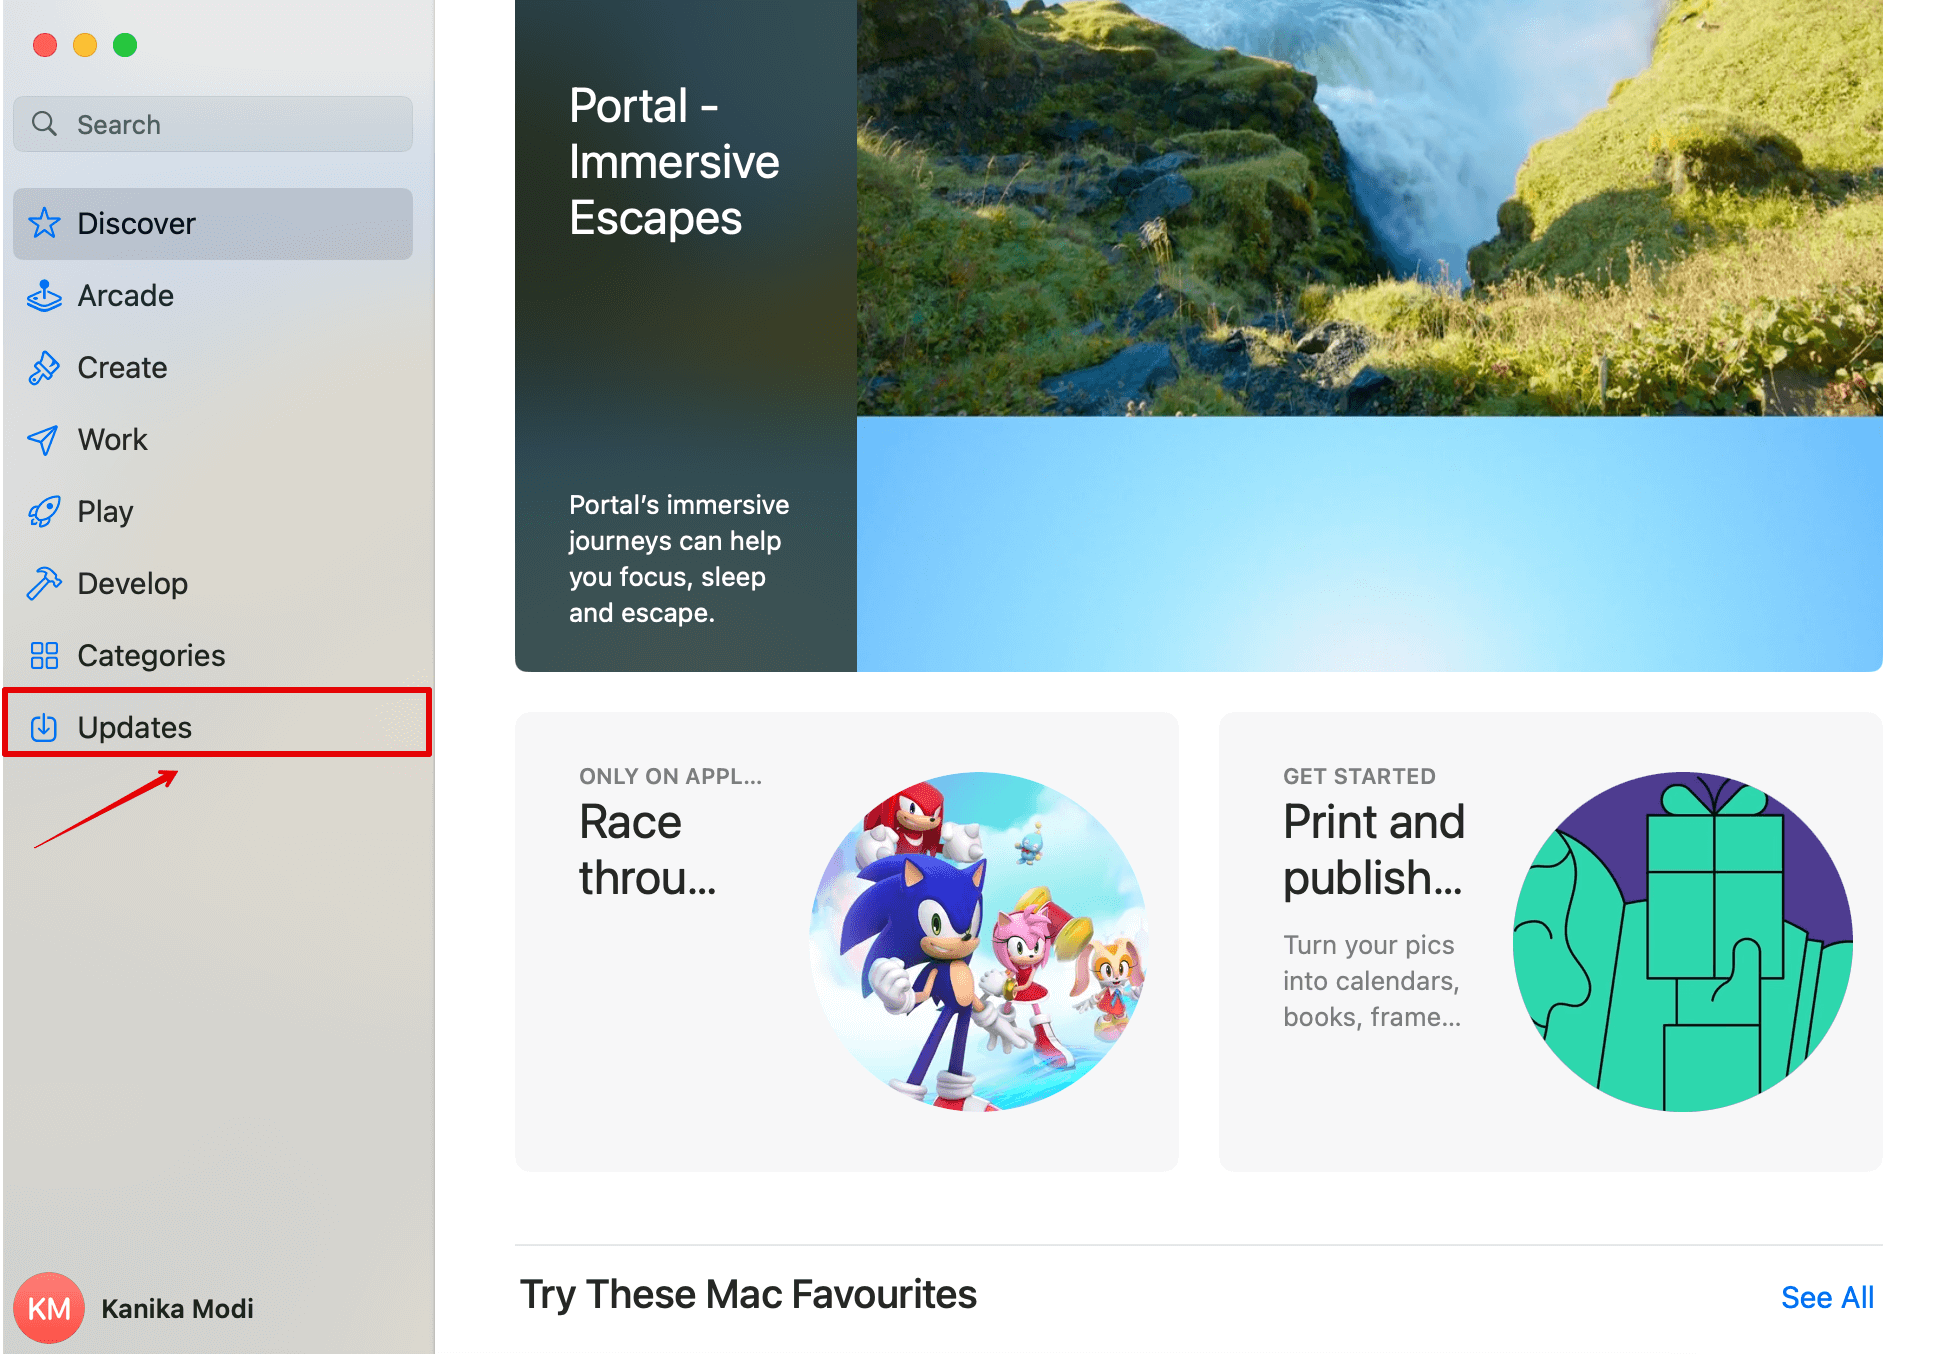
- Open the App Store from Dock on your Mac.
- Click on Updates on the left sidebar.
- Now, look for Microsoft Outlook on the right and click on Update.
Once the update is complete, try restarting the application and check if the error has been resolved.
4. Restart Your Mac
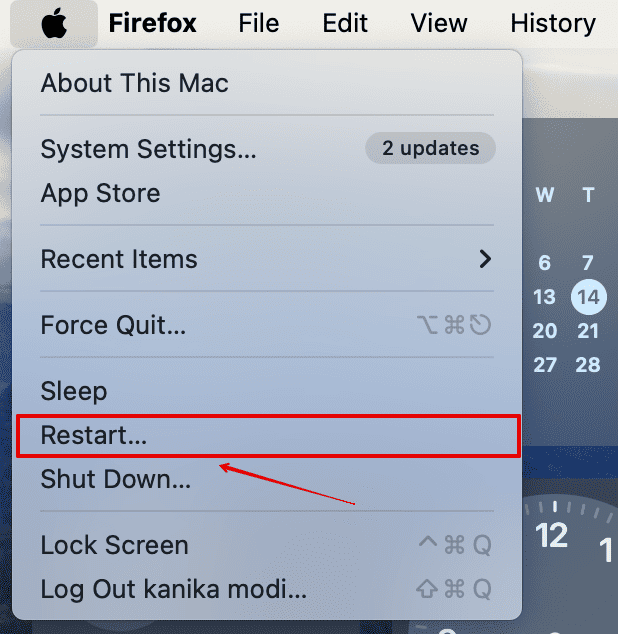
- Go to the Apple menu on the top-left of your desktop.
- Click on Restart.
5. Re-add Your Email Account
Deleting and re-adding your email account might help fix the configuration issue on your Microsoft Outlook application. Follow the steps below:
- Open Microsoft Outlook on your Mac.
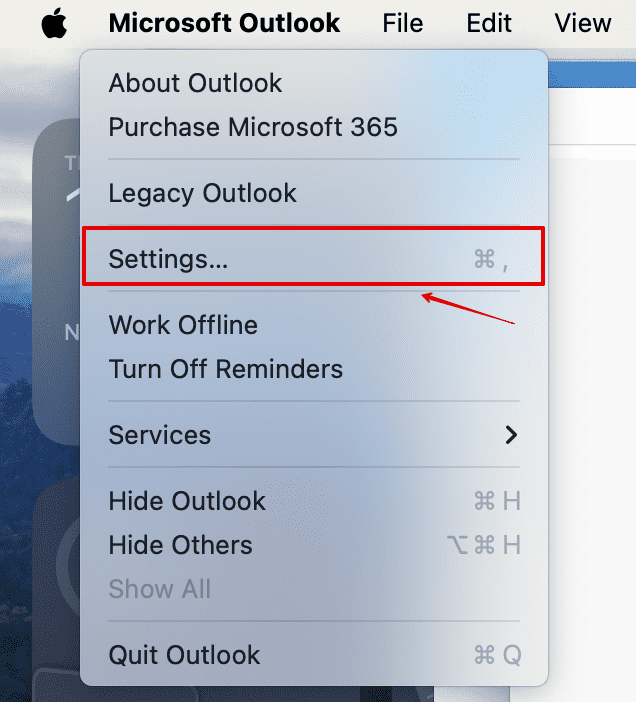
- Click on Microsoft Outlook on the top menu bar and select Settings.
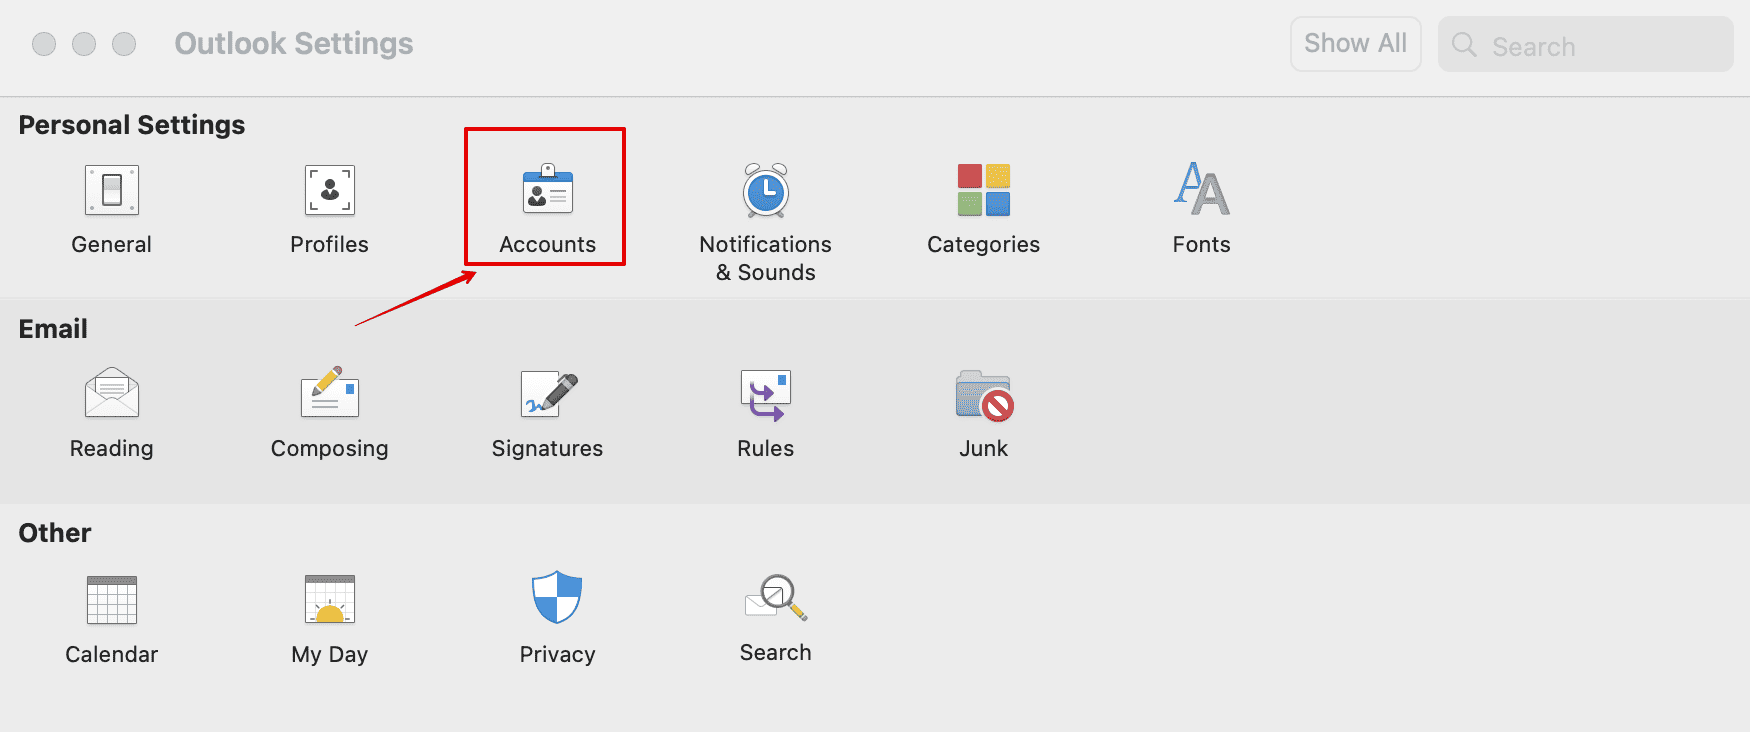
- Under Personal Settings, open Accounts.
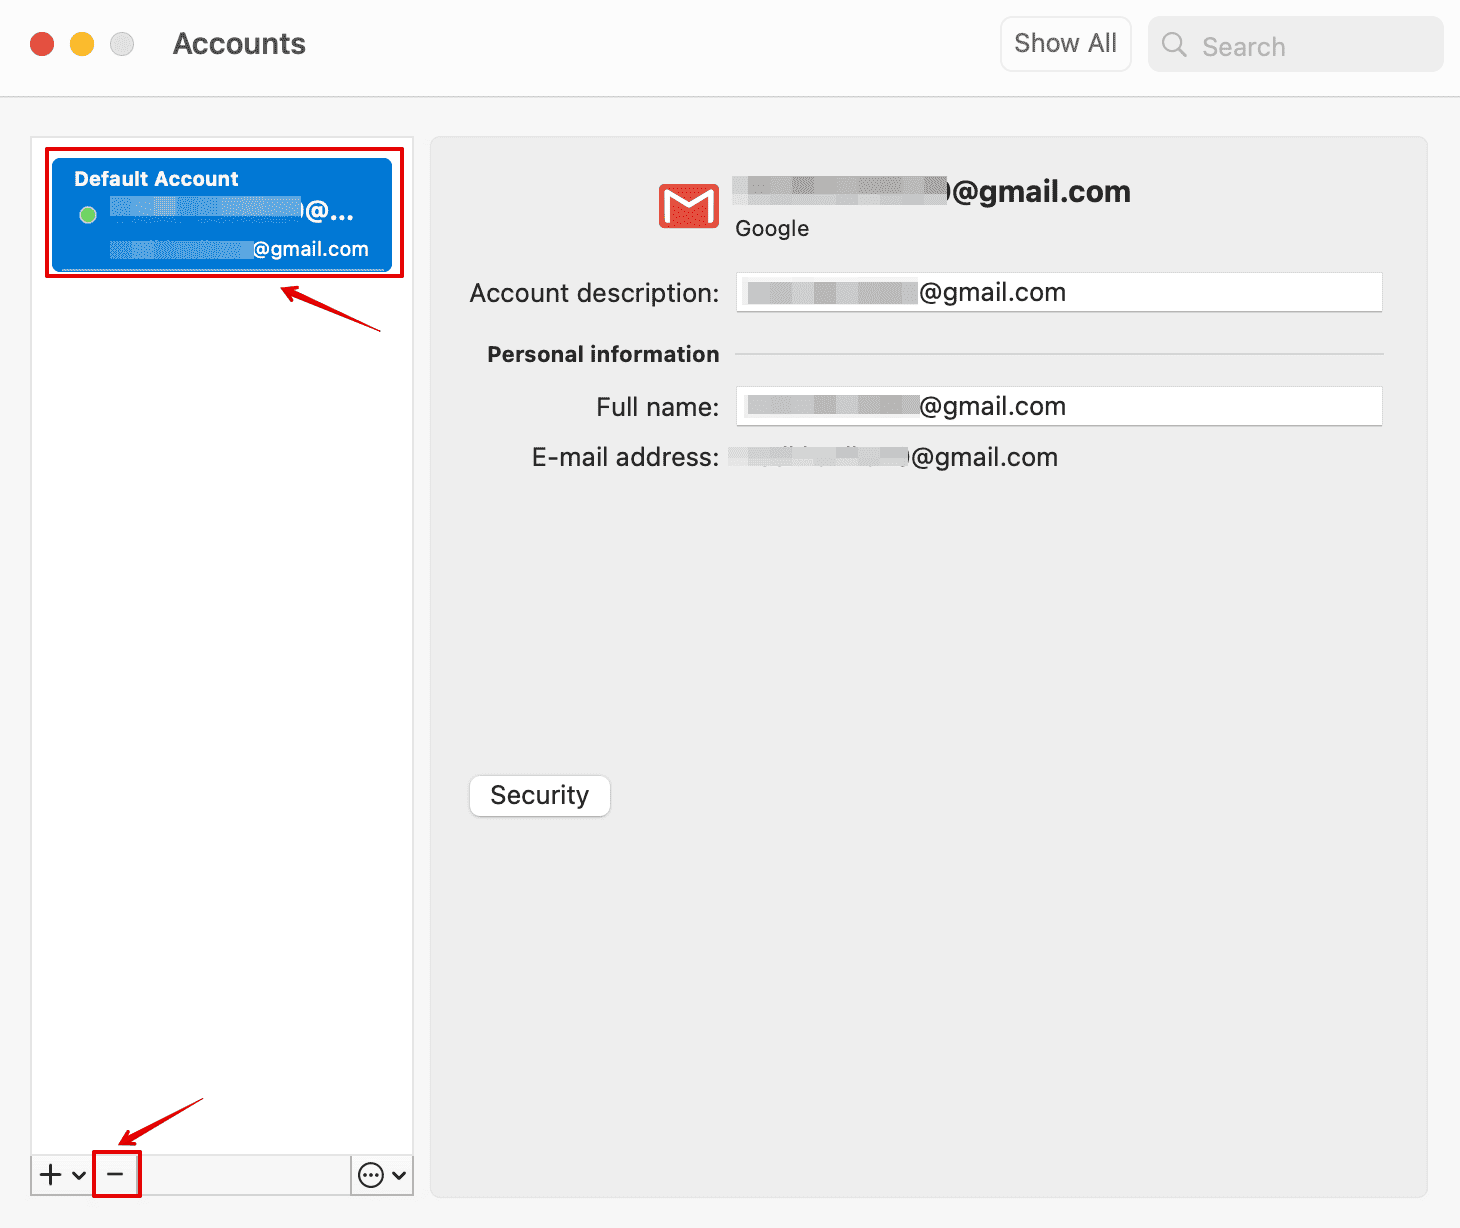
- Select the email ID you want to remove and click on the – icon below.
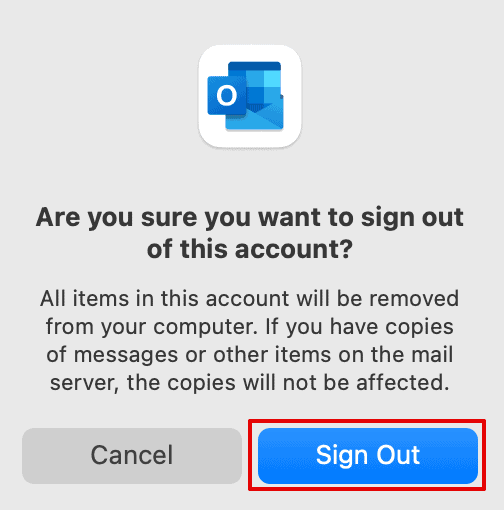
- Click on Sign Out.
- Then, click on Add Email Account.
Follow the process to re-add your email account. Once done, quit Outlook and relaunch it.
6. Launch Outlook in Safe Mode
Safe Mode might help you identify if the third-party extensions or apps are causing the Outlook error. Hence, I will list the steps you can follow to launch Outlook in safe mode and check if the issue persists.
6.1 If you have a Mac with Apple Silicon
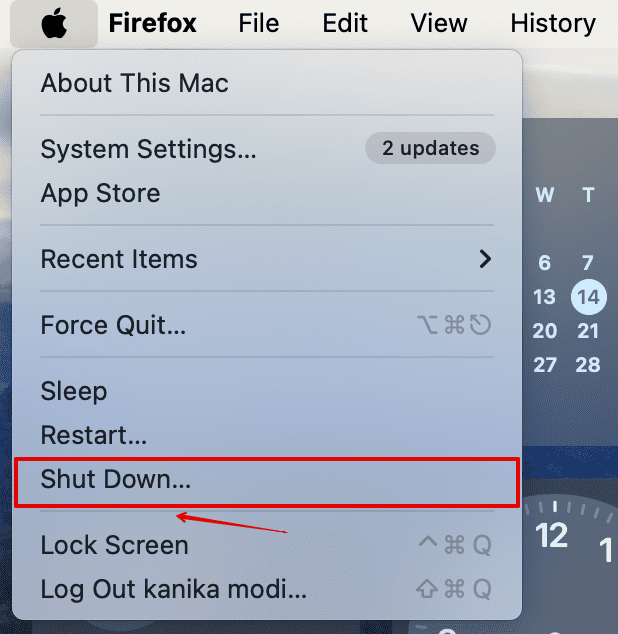
- Go to the Apple menu and click on Shut Down.
- Now, press and hold the power button till you see the Loading startup options on the screen.
- Select your disk.
- Then, press and hold the Shift Key and click on Continue in Safe Mode.
The computer will restart in safe mode. You can now launch Outlook and check for any errors.
6.2 If you have an Intel-based Mac
- Go to the Apple menu and click on Shut Down.
- Then, click on the power button to restart your Mac.
- Press and hold the Shift key while the system restarts till a login window appears.
- Now, log in to your Mac.
You will see the Safe mode on your screen, and you can then open Outlook.
7. Give Full Disk Access
Giving full disk access to Outlook can ensure that the app has the necessary permission for verification and accessing the system.
- Go to the Apple menu on the top-left corner of your desktop.
- Click on System Settings.
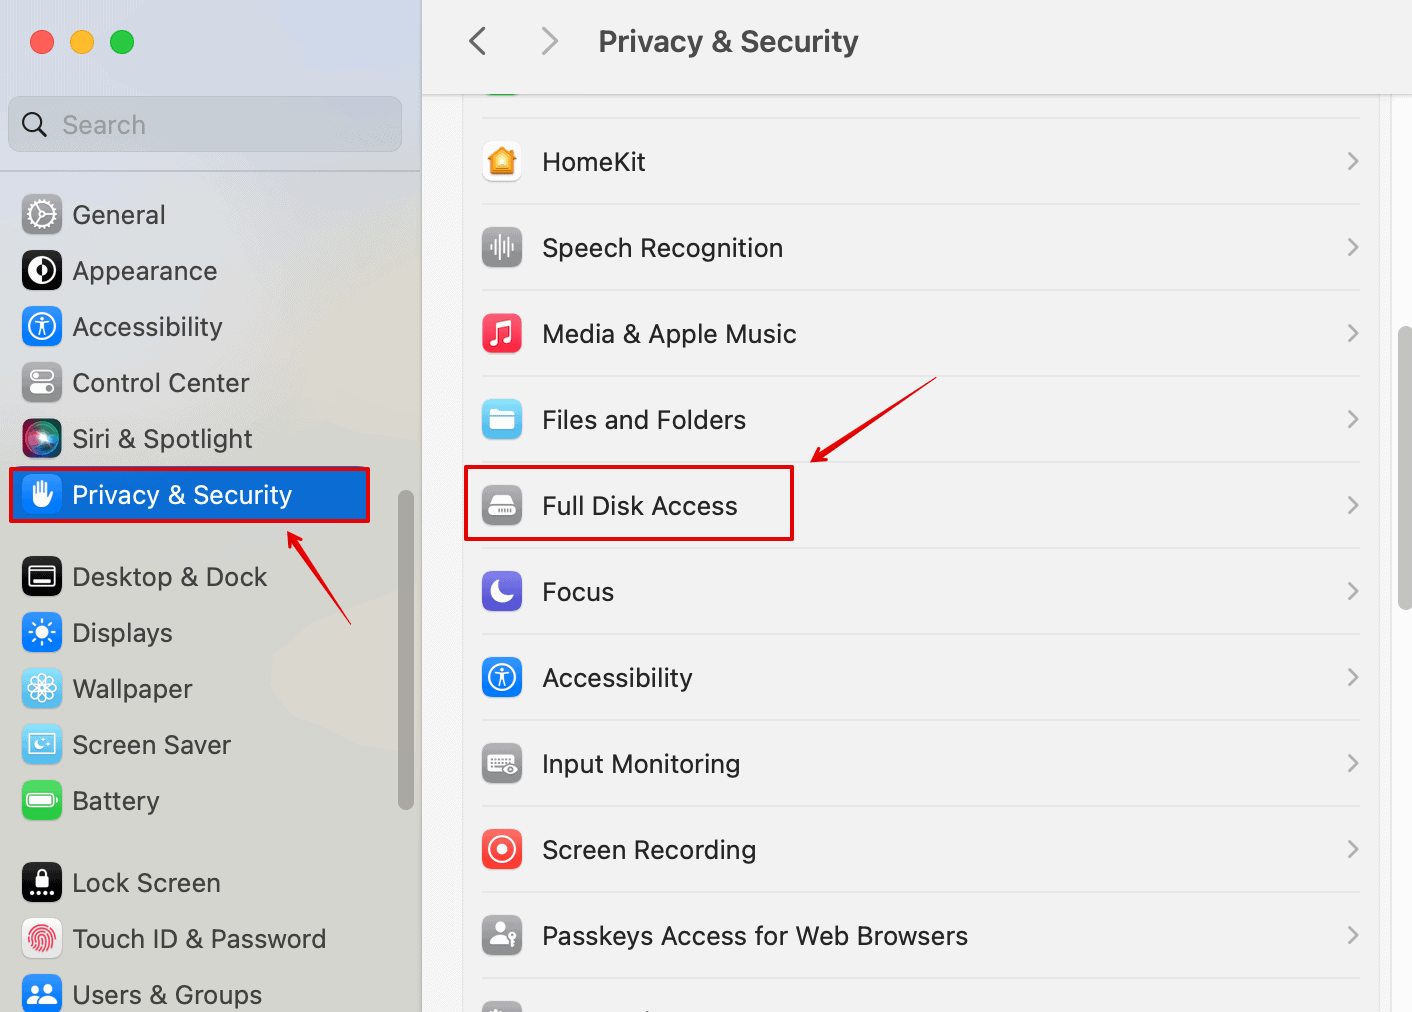
- Open Privacy & Security on the left sidebar and click on Full Disc Access.
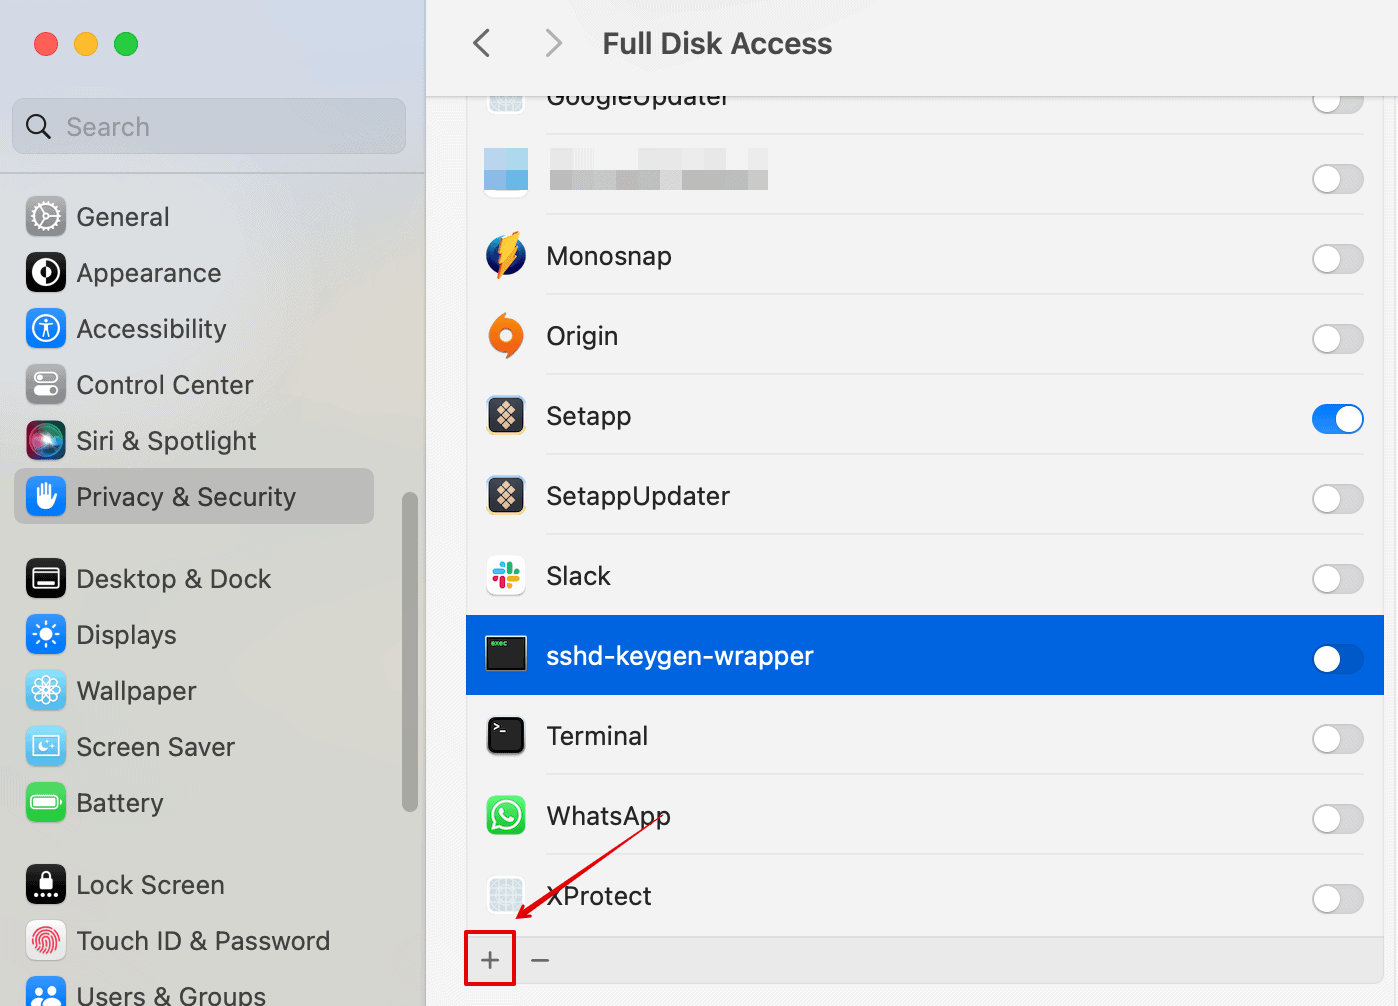
- Click on the + icon below and add Microsoft Outlook to the list.
8. Reinstall Outlook
If nothing works to fix this error, you can try reinstalling a fresh copy of Outlook:
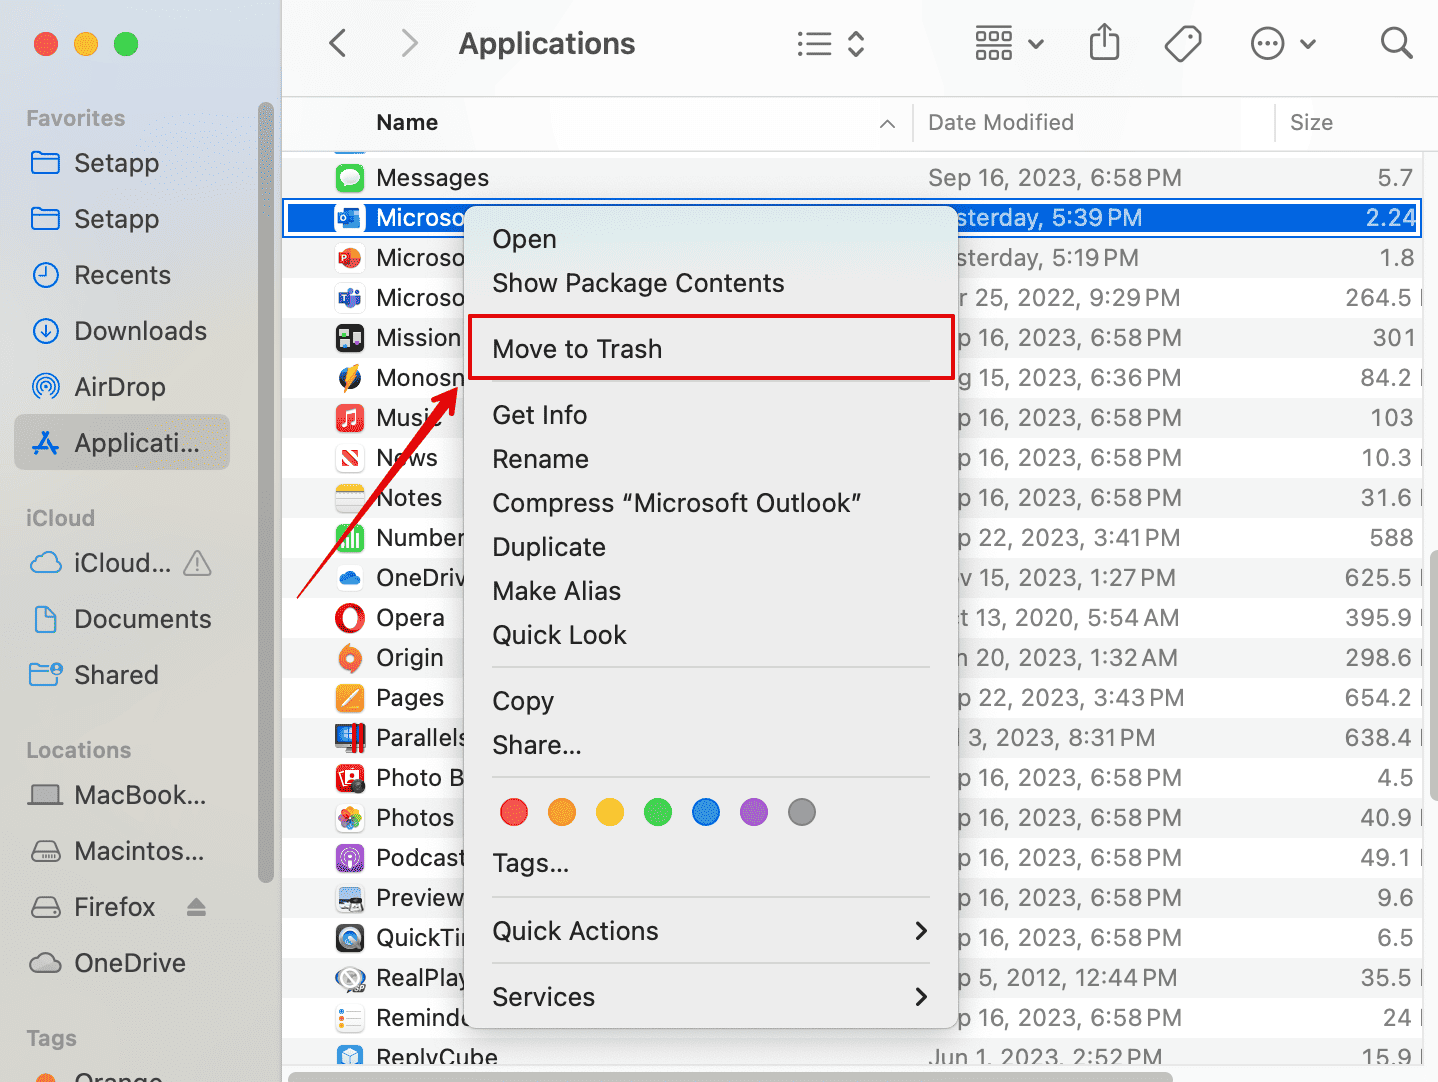
- Open Finder from Dock on your desktop.
- Click on Applications from the left sidebar.
- Make a right-click on Microsoft Outlook and choose Move to Trash.
- Go back to the desktop and Empty the Trash.
- Now, open the App Store and download Outlook again.
All the above methods have worked for me and hundreds of other Mac users. However, if you still need help with this, try contacting Apple Support or Microsoft Support for more help.
Let us know which solutions worked for you in the comment section below.
