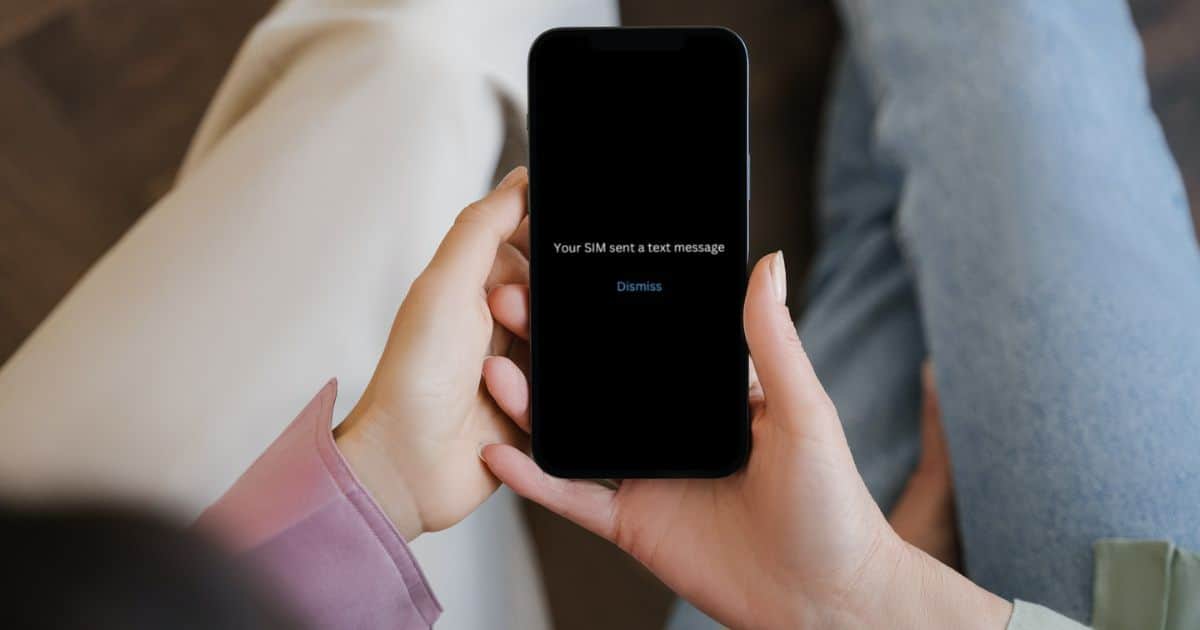
Do you often get a ‘Your SIM sent a text message’ pop-up? What is that? Why does it keep happening?We will explain what the ‘Your SIM sent a text message’ pop-up is all about. Then, will look at easy fixes to make it go away.
What Does ‘Your SIM Sent a Text Message’ Mean on iPhone?
Whenever you get the ‘Your SIM sent a text message’ pop-up on your iPhone, it usually means that your iPhone’s SIM is trying to contact your wireless carrier but cannot. There can be many reasons why this is happening. Inactive cellphone numbers, incorrect SIM card setup, outdated carrier settings, and corrupt network services are a few of the reasons why this pop-up appears.
And if you try and dismiss it, it will reappear soon. Sometimes even after a minute. Before you go ahead and contact your wireless carrier services provider, here are a few easy fixes that you can try yourself to resolve the issue. Work your way through them from the top down.
How to Fix the “Your SIM Sent a Text Message” Issue on iPhone
1. Enable and Disable Airplane Mode
This is the best fix for the ‘Your SIM sent a text message’ issue. Doing this will reconnect your SIM to its carrier network and will resolve any minor network issues.
Time needed: 1 minute
How to enable and disable Airplane Mode.
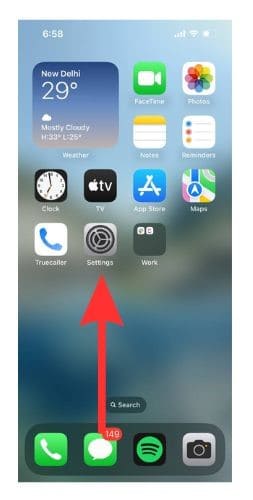
- Open Settings on your iPhone.
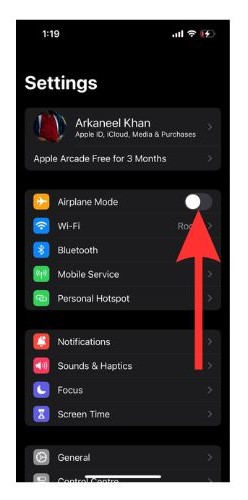
- Turn the toggle beside Airplane Mode on. Wait for 10 seconds. And then turn it off again.
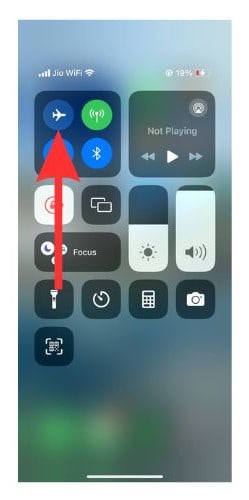
- You can also scroll down from the top right side of your home screen to open Control Centre on your iPhone. Then turn on Airplane mode by tapping on the airplane icon. Wait for 10 seconds. And then turn it off.
2. Restart Your iPhone
If turning Airplane modes on and off doesn’t work, the next step would be to restart your iPhone. You can do this by pressing the power and volume-up buttons. Or, you can also restart your iPhone via Siri.
In most cases, the ‘Your Sim sent a text message’ issue will get sorted by these two methods. In case, it doesn’t, do not worry. We have a few more tricks up our sleeves.
3. Check for Updates in Carrier Settings
Sometimes, faulty or outdated Carrier Settings might be the root cause of the issue.
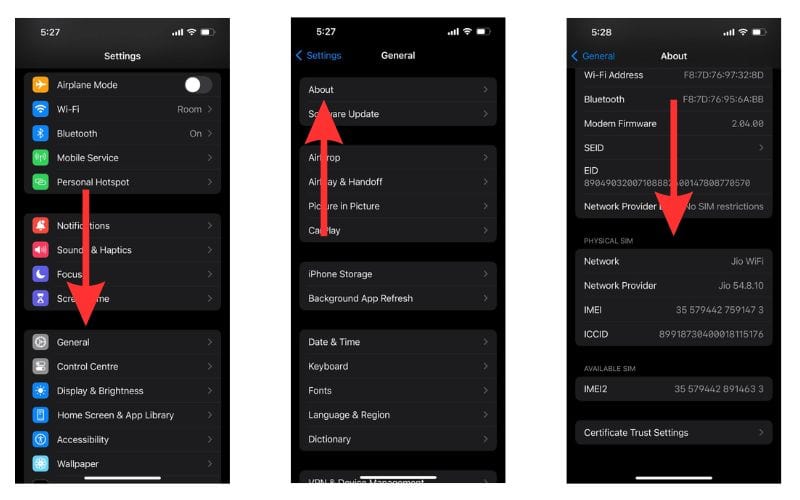
- Open Settings on your iPhone and go to General.
- Go to the About section and scroll down to the Physical SIM section.
- Now wait for 30 seconds. If a prompt shows up about the Carrier Settings update, tap Update.
4. Reset Network Settings to Factory Default
Sometimes resetting your Network Settings to factory default can solve the ‘Your SIM sent a text message’ pop-up issue. But please note that doing this will delete all your cellular, APN, VPN, and Wi-Fi settings.
- Go to Settings on your iPhone and open General.
- Now select Transfer or Reset iPhone.
- Then select Reset.
- Now select Reset Network Settings.

5. Update iOS
If all the methods mentioned above fail, you might have an issue with your iOS version. So, it is best to check whether there are any updates pending.
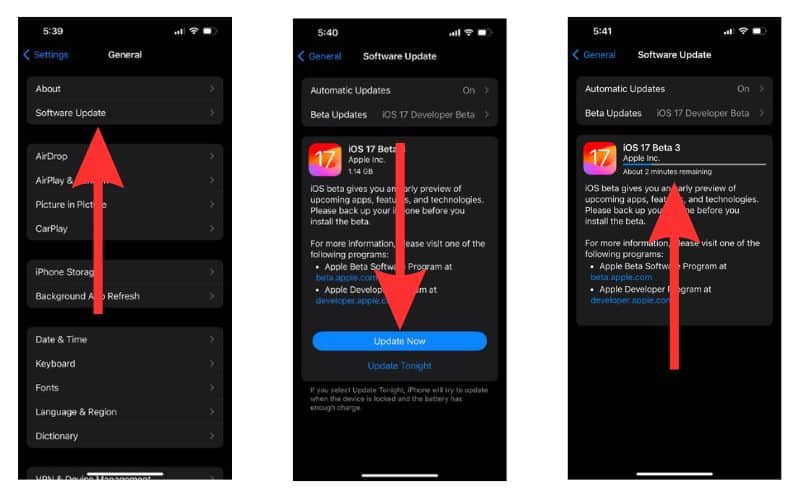
- Open General in your iPhone Settings.
- Now tap on Software Update.
- If you have any update is available, you will find a Download and Install button. Tap that to start the update process.
6. Turn off Automatic Network Selection To Resolve ‘Your SIM Sent a Text Message’ Issue
In default mode, your iPhone is instructed to switch networks based on the strength of the cellular signal. This, however, sometimes ends up causing issues. So, let us see how to turn it off.
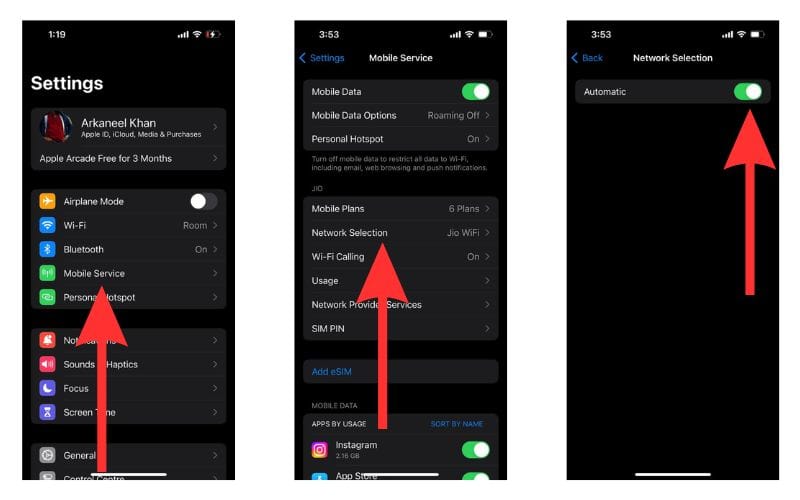
- Go to Settings on your iPhone and open Mobile Service.
- Select Network Selection.
- Turn off the toggle beside the Automatic option.
7. Eject and Reinsert the SIM Card
Sometimes ejecting the SIM card and reinserting it might help solve the issue. Before putting the SIM card back in after ejecting it, wipe it with a microfiber cloth. If you use an eSIM, do not delete it without talking to your carrier first.
8. Call Carrier Services To Fix ‘Your SIM Sent a Text Message’ Issue
If none of the above fixes work for you, then it is time for you to call your carrier services. There must be some issue elsewhere that is making the ‘Your SIM sent a text message’ pop-up appear. Your carrier services will then advise you on how to proceed after assessing your situation.
If your issue does get fixed by any of these solutions, do let us know which one did the trick for you.
