Anyone who’s tried to install or update macOS knows it can sometimes be a bit… tricky. In this article, I’ll show you how to fix the “could not be verified” issue when upgrading to or reinstalling macOS, whether it’s Big Sur, Monterey, Ventura, Catalina, or any other version.
Why Won’t My Mac Let Me Install macOS Big Sur?
macOS Big Sur came with a lot of excitement, but some folks faced roadblocks during the installation. There are several reasons why your Mac might not want to cooperate with the Big Sur installation. It could be due to incompatible hardware, or perhaps your storage space isn’t up to snuff. A good macOS cleaner like Intego Washing Machine can be a great solution, as it can help you get rid of all unnecessary files, caches, and other build-ups, optimizing almost immediately your storage space.
Keep in mind that Apple typically supports Mac models for around seven years. If your device is older, it might not be able to handle Big Sur. Additionally, macOS Big Sur needs at least 35.5GB of available storage, so if you’re running on less, that could be the reason the installation isn’t working.
Why Is My Mac Unable To Verify macOS?
Verifying macOS is an essential step for your system’s security and stability. However, there are times when your Mac struggles with this task. It’s often due to a wonky internet connection, incorrect date and time settings, or having an outdated macOS.
How To Fix Could Not Be Verified macOS Big Sur, Ventura, Monterey, Catalina
Before moving on to more complex solutions, make sure to do the following:
- Check Apple’s system status page to ensure there isn’t a global issue with macOS Software Update. If there is an outage, all you need to do is wait. If not, proceed to the next steps.
- Make sure you have a strong, stable connection. Try to minimize network traffic by disconnecting other devices, consider using an Ethernet cable for a more reliable connection, or get closer to your router. If you are using a VPN or security software, temporarily disable them, as they can sometimes interfere with the update process.
- Firewalls blocking incoming connections can prevent the macOS installer from running correctly. Make sure that your settings allow incoming connections. Go to System Settings > Network > Firewall and turn it off.
1. Use the App Store
Time needed: 1 minute
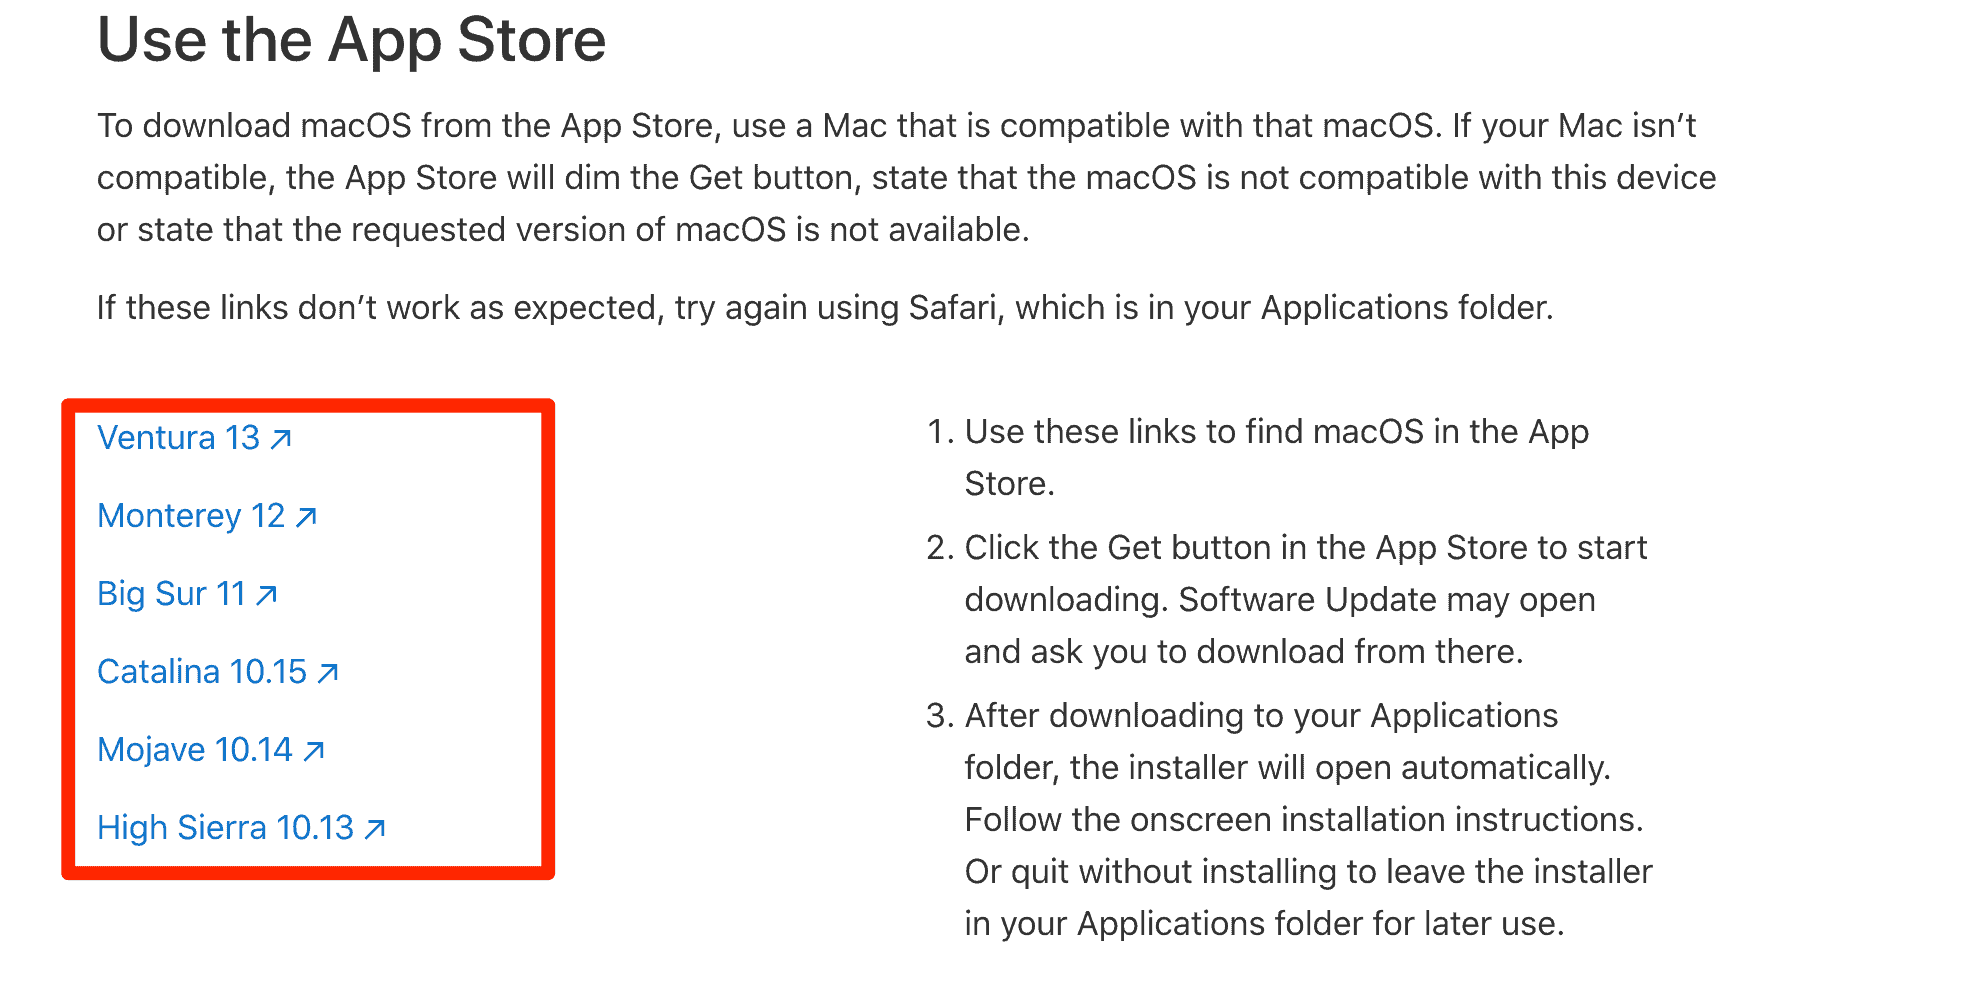
If you haven’t tried to update your Mac from the App Store, it’s worth a shot. Download the full installer from the App Store and run it.
- Go to Apple’s website and click on the link to the macOS version that you want to download.
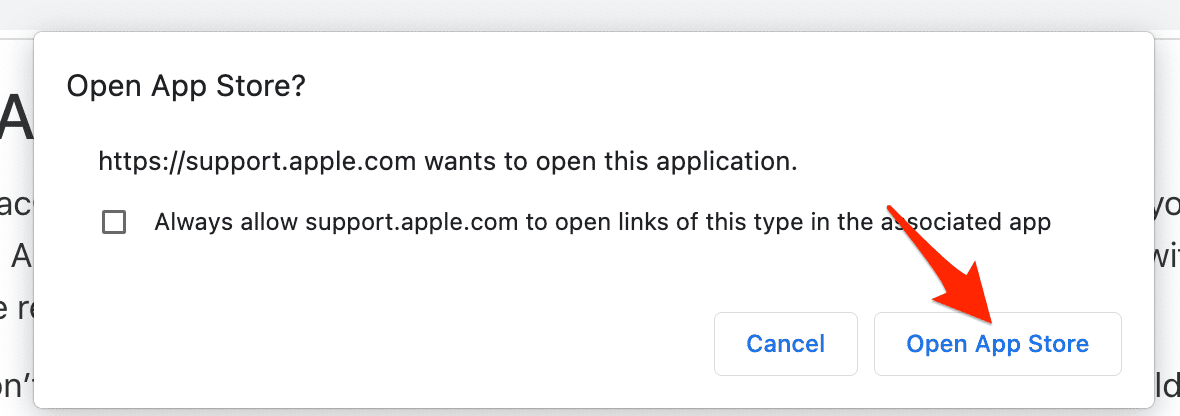
- Select Open App Store.
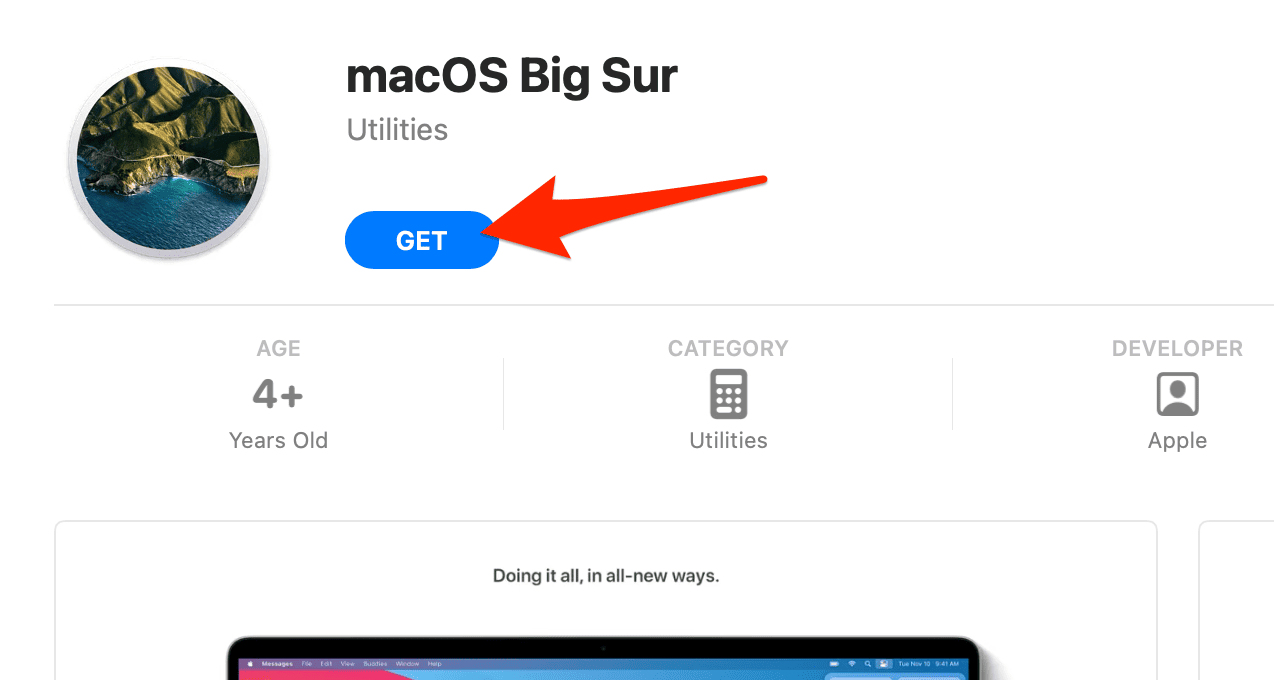
- Click Get then Install and follow the on-screen steps to finish the installation.
macOS Ventura won’t install? Check out the best solutions to successfully install it.
2. Boot Into Safe Mode
Safe Mode loads only the necessary components and verifies your startup disk. It can often resolve issues that occur during normal operation.
For Macs with Apple Silicon
- Start by choosing Apple menu > Shut Down on your Mac.
- After your Mac has completely shut down, press and hold the power button until you see Loading startup options.
- Select the volume you wish to boot from.
- Continue holding the Shift key and then click Continue in Safe Mode.
- Your Mac will then restart automatically. Once the login window appears, you should see Safe Boot in the menu bar, indicating that you are in Safe Mode.
- Now try once again to update or install your macOS.
For Intel-based Macs
- Turn on or restart your Mac and then immediately press and hold the Shift key until the login window appears.
- Log into your Mac. You might be asked to log in a second time.
- Either on the first or second login window, you should see Safe Boot in the menu bar, which confirms you are in Safe Mode.
- Try again to update or install your macOS.
3. Repair Your Startup Disk
You can use Disk Utility’s First Aid in macOS Recovery to check for and repair disk errors that might be causing verification failures. Here’s how to do this:
- Restart your Mac.
- While the startup disk is waking up, press and hold the Command and R keys together. This will boot your Mac into Recovery Mode.
- Once you see the Apple logo or a spinning globe, release the keys.
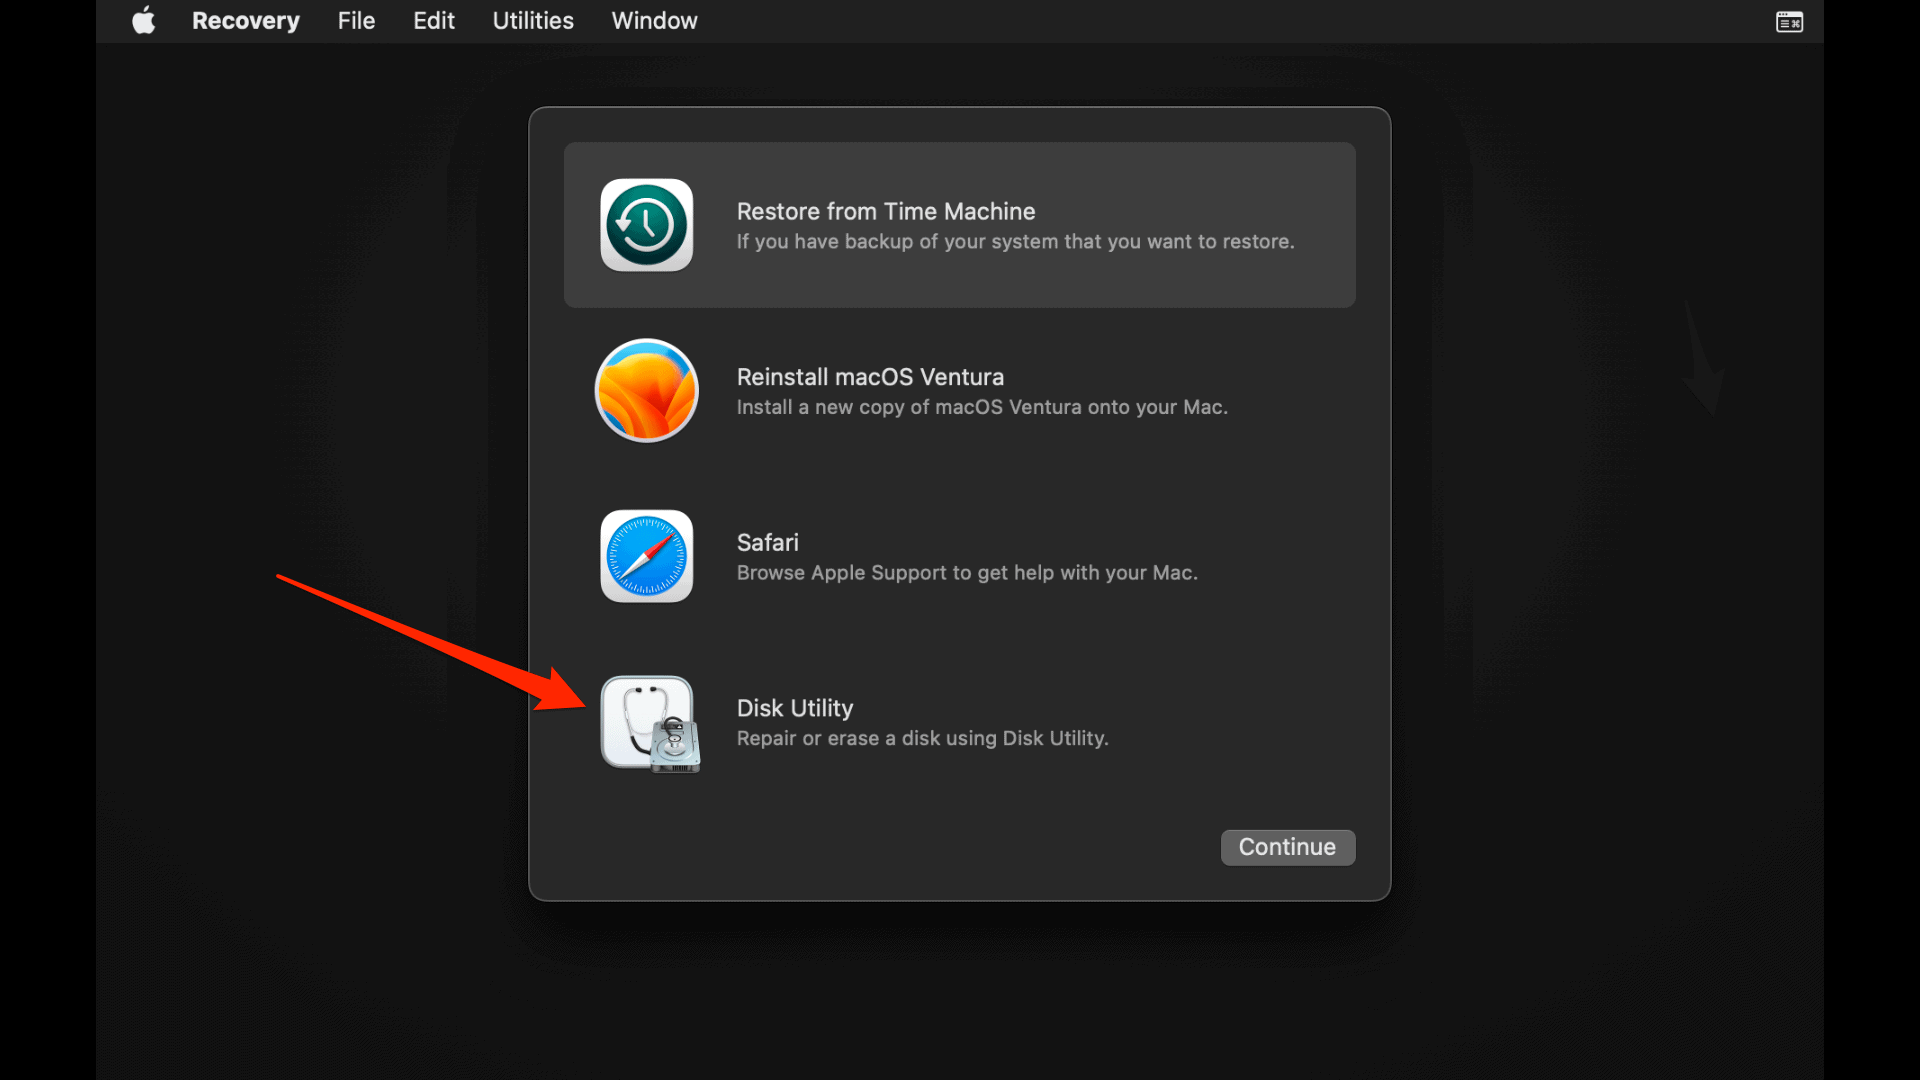
- When the macOS Utilities window appears, select Disk Utility and click Continue.
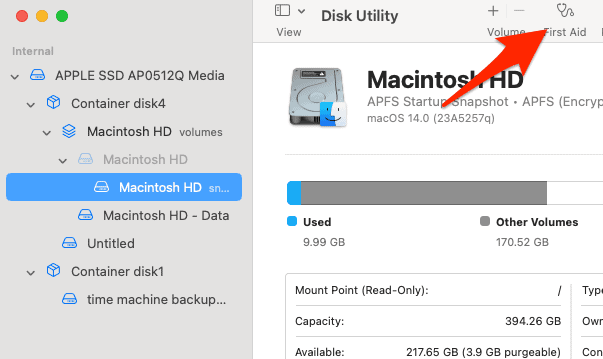
- Choose your startup disk from the sidebar and click on First Aid.
- Click Run to start the disk checking and repair process. If Disk Utility tells you the disk is about to fail, back up your data and replace the disk. Otherwise, if no errors are reported click Done.
- Restart your Mac normally to exit Recovery Mode.
4. Check Your Date & Time Settings
Incorrect date and time settings can interfere with macOS verification. Go to System Settings > General > Date & Time and ensure your settings are correct. The “could not be verified” issue while updating macOS Big Sur and the other releases should be fixed.
What Do I Do When My Mac Is Stuck on Software Update?
There are several solutions to get your device back up and running. Safe booting, resetting the NVRAM, or booting in Recovery Mode can often resolve this issue. If you’re still experiencing difficulties, consulting with a tech professional or Apple’s support might be necessary.
Why Does My Mac Say ‘An Error Occurred During Update’?
Your Mac may occasionally display the ‘an error occurred during update’ message. It might mean that the macOS download file is corrupt or that there’s an issue with your Mac’s software update service. Resolving this can involve deleting and re-downloading the update, or resetting the Software Update service.
Why Does My Mac Keep Saying ‘Error While Installing’?
Seeing the ‘error while installing’ message repeatedly during a macOS update is typically a symptom of minor software glitches, an overworked system, or a lack of storage space. Try closing unnecessary applications to free up system resources and ensure that your Mac has enough space to perform the update.
Remember, before trying any fix that involves system changes or data loss, always ensure your data is safely backed up.
