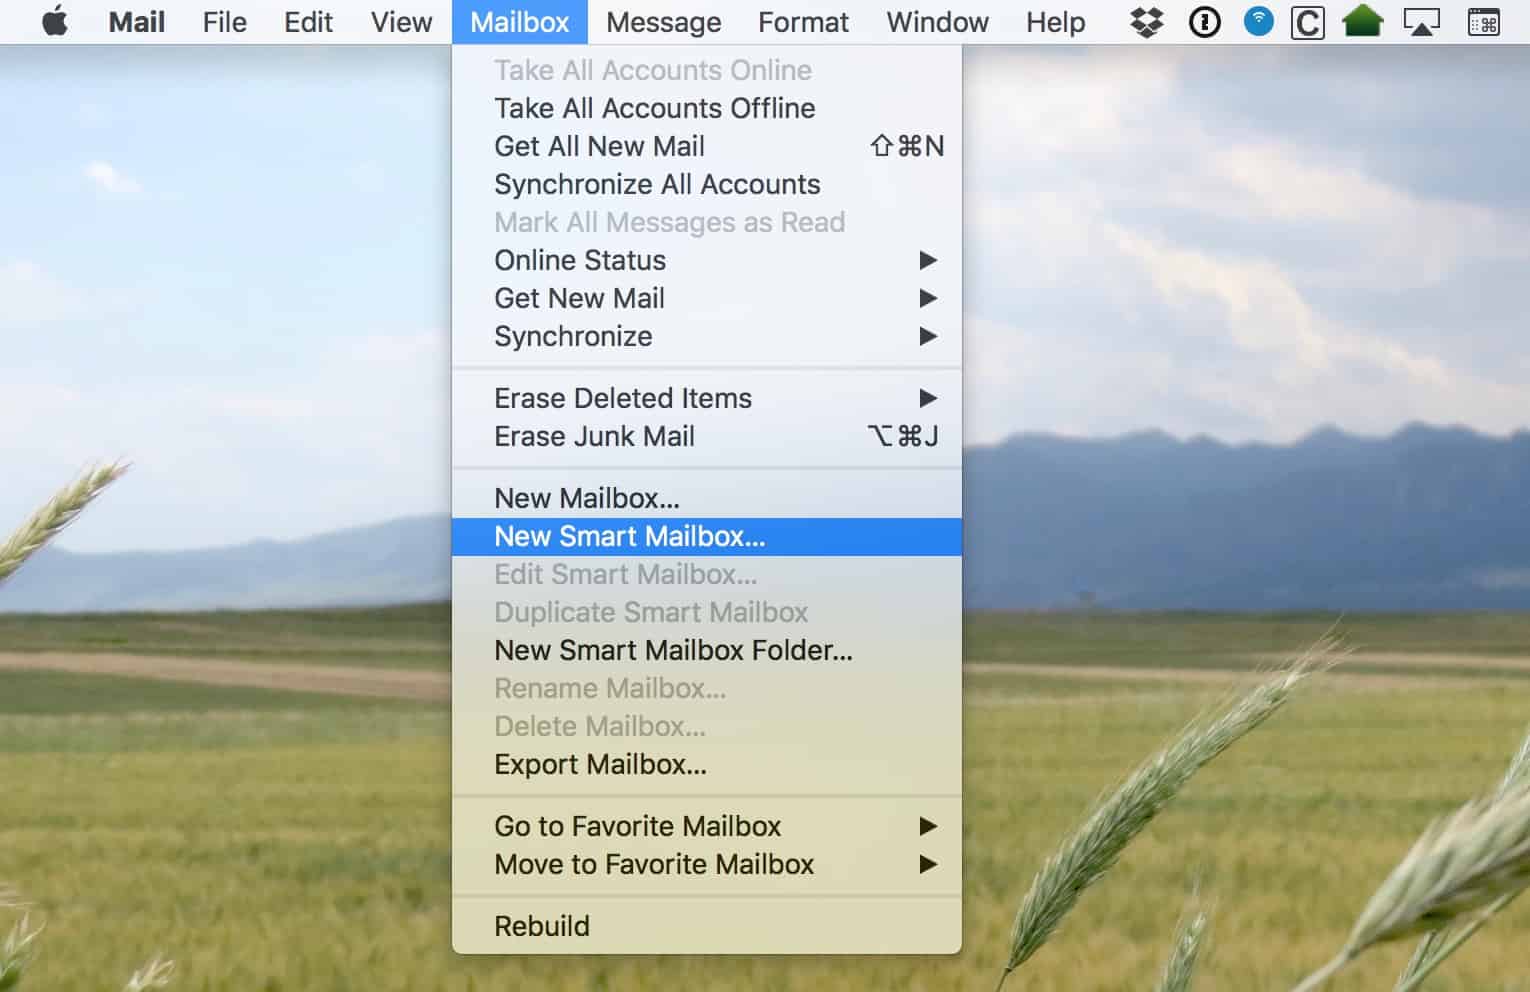
I use Mail’s smart mailboxes all of the time. These saved searches make my life much easier by allowing me to set criteria for the messages I’d like to see within a mailbox without having to move anything around manually. You can configure one, too, just by using the Mailbox > New Smart Mailbox menu option.

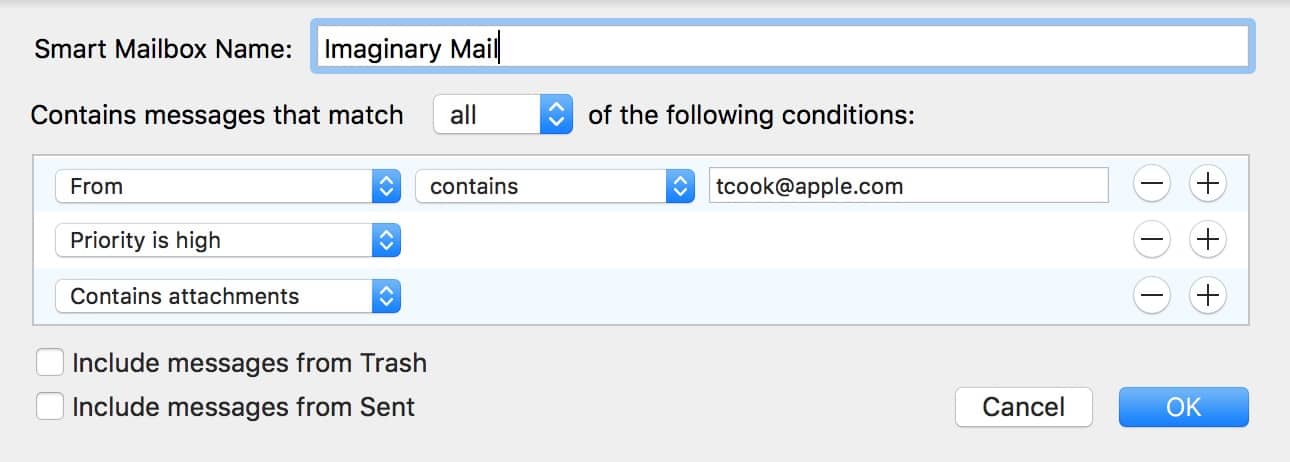
Once you click that, you’ll be asked to name your new mailbox and define what types of messages you want it to contain. You can click the plus button shown on the right to add additional parameters, too. So if, for example, you needed a mailbox to show you messages from Tim Cook that had a high priority and contained attachments, you could do just that.

And if those conditions actually would apply to you, drop me a line. I have so many questions.
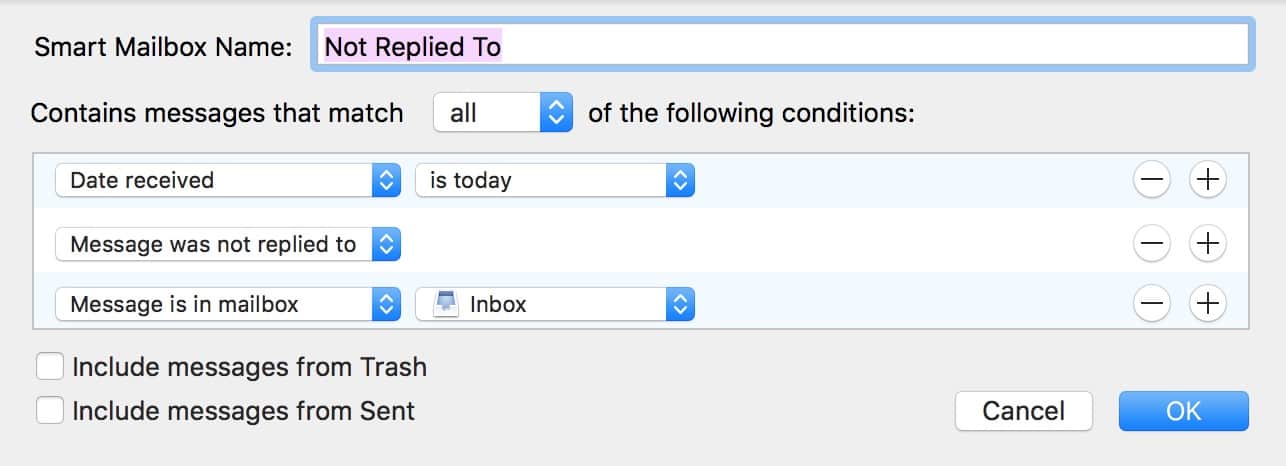
Anyway, once your smart mailbox is created, it’ll show up in Mail’s sidebar (View > Show Message List), and you can click on it at any time to find emails that match the criteria you set up. What I wanted to talk about today, though, is a special way to configure a smart mailbox to show only messages you haven’t replied to. I’ve been using this lately to keep up with the tons of email that I get, and it’s been very helpful! Here’s what you’ll do. First, choose Mailbox > New Smart Mailbox as shown above, and then when the configuration window appears, choose options like these:

Of course, you can set the “Date received” drop-down to any time period that you want, and you could also add on any additional rules that you’d like. Another suggestion would be to limit this to your inbox.

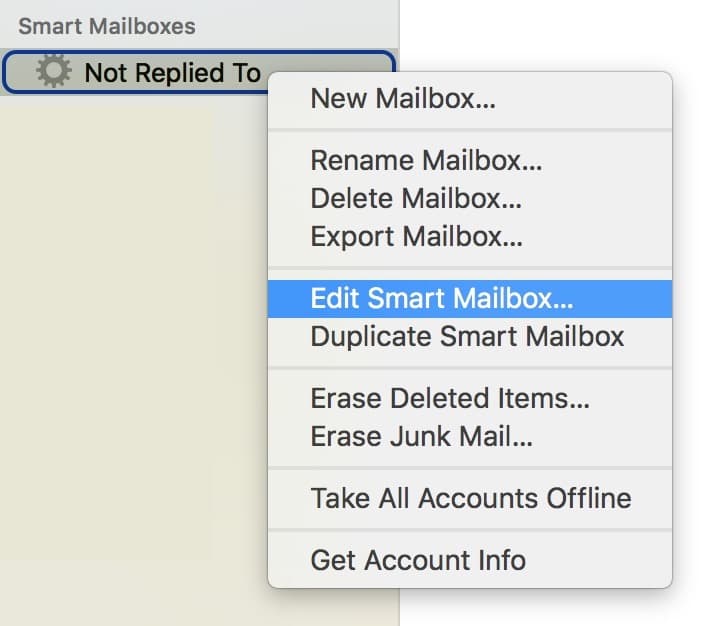
You’d do this if you had incoming emails automatically routing to other mailboxes when they arrived, for example, and you didn’t want to include them in this search. Also, know that you can edit a smart mailbox at any point by right- or Control-clicking on it in the sidebar:

Anyway, once you’ve got your cool new mailbox all ready to go, you can click on it at any point to see the matching emails. Smart mailboxes don’t actually move anything, either—they’re just a convenient way to redo searches and keep tabs on stuff. In this case, seeing which emails I haven’t replied to at a glance is worth clicking away from my inbox! Because I gotta tell you, anything I can do to make sure I don’t miss things right now is time well spent.

Great article! I do have an inquiry… is there a way to do a Smart Mailbox for organizing emails you like to send yourself for anything… such as finding a website you want to email yourself from your iOS devices to check later or have documented?! I’ve tried many things like FROM+contains+email address 1
FROM+contains+email address 2
FROM+contains+email address 3
FROM+contains+email address 4
FROM+contains+email address 5
Using multiple of my email addresses, I can’t use the “ALL” option, because I wouldnt email myself from ALL those addresses. If I use the “ANY” option, then WAY MORE than what I want shows up?! I’m not sure what else to try, but i thought I’d ask.
Thanks so much!
Hey Jeremy! Thanks for reading!
So just to be sure I understand, you want to set up a smart mailbox with emails FROM you and TO you, correct? If that’s right, I’d configure it to match ALL of the conditions, and then do:
From> contains> Your email address 1
Any recipient> contains> Your email address 1
If you’d like, you could then configure subsequent mailboxes to catch the ones from your other emails…or you could just make sure that you always send those types of messages from a certain address. Of course, you’ll want to be certain you’re sending TO the listed address, as well!
Alternatively, you could consider setting up a series of rules in Mail that would move all messages from you and to you into a specific mailbox, maybe a new one you set aside for this purpose. Then you wouldn’t have to check several smart mailboxes or worry about the sending or receiving address!
Hope that helps!
Melissa
Great tip!