We’re still a few months away from seeing the M5 Mac (at best). Even so, you may already be getting ready to sell your current MacBook. Listing it early gives you more time to find a buyer, so you’re not scrambling once the new model drops. If you’re not the type to keep two laptops around, here’s what to do.
What Exactly Does “Ready To Sell” Mean for a MacBook?
Well, a few things, to be honest. Before selling your old Mac, you’ll want to transfer all your data to your new device, for instance. It’s also a good security practice to delete all your files, which is something that can be trickier than it sounds.
There’s the matter of faulty or worn-out hardware, too, which can be a missing key or a swollen battery. Lastly, if you don’t remove your Apple Account from the old Mac, you’re in for a small headache.
Trade-In Versus Private Reselling
One thing to consider is whether you’ll use your old Mac as a trade-in rebate or sell it. The former is more convenient, but generally gets you worse valuations. The latter demands more time and effort but gives you more advantageous deals.
If you opt for an online trade-in, Apple ships you tools and instructions to send them the old Mac. In-store trade-ins will require you to leave your previous computer with them, making data transfers harder.
For this guide, we will presume you’ll have some time with both your new and old Mac. This happens both in the online trade-in and the private reselling cases.
Preparing Your MacBook For Selling
There are three moments to consider for this guide. Here’s what to do before your new Mac arrives, when you have it with you, and after transferring your data.
1. Before the New M5 Mac Arrives
These steps can be performed at any moment. For better results, however, the first one should be done as closely to the new Mac’s arrival as possible.
Time Machine Backup
Contrary to iPhone and iPad, you can’t back up your Mac completely to iCloud. Some folders, like Desktop and Documents, can be synced, as do your Photos library, notes, calendar, contacts, and so on.
To really have a full backup, however, you’ll need Time Machine. There are some macOS backup solutions better than it, but Time Machine does the trick for what we need right now.
Get a Thunderbolt Cable
Believe me, a Thunderbolt cable will speed your data transfer a few orders of magnitude. One user in Apple’s support forums reported Wi-Fi reached 4MB/s, while a Thunderbolt cable hit 1,400 MB/s. That’s 350 times faster!
If you have a really old Mac (no judgments, I own a 2012 MacBook Pro), you’ll likely have different connections. In this case, you can grab a Thunderbolt 3 to Thunderbolt 2 adapter from Apple’s online store.
2. When the new Mac Arrives
After your new Mac arrives, you can cry tears of joy start the transfer procedure. There are a few things to do at this stage, check below.
Use Migration Assistant

The first thing is to open Migration Assistant on your new Mac. You’ll be offered to do so in one of the first screens upon turning it on for the first time. If you, by accident, skip this, you can always open the assistant on Launchpad, under Utilities.
As pointed out previously, using a Thunderbolt cable speeds up this step significantly. The setup may look odd, but it’s really as simple as connecting both Macs with the cable.
If you can’t make Migration Assistant work by any means, it’s time to make use of that Time Machine backup. Things should work basically the same as if transferring data from another Mac.
Double-Check for Data Not Transferred
Even with Migration Assistant, some things won’t be transferred over to your new Mac. The most noticeable is app permissions. Every authorization you have ever given an app on the old Mac will need to be given again.
Just to be extra safe, I also recommend you triple-check the Applications folder. Make sure all of your apps have been transferred successfully, especially non-App Store ones.
3. Getting Your Old MacBook Ready To Sell
Now that your new Mac is all setup, it’s time to finally prepare your old MacBook to be sold. Here are the steps to take for that.
Disable Find My and Disconnect Your Apple Account and iCloud Session
Recent Macs work very similarly to iPhones and iPads regarding stolen device protection. If you don’t remove your Apple credentials, the new owner will have to enter your password during the initial setup.
To avoid this, go to System Settings and click on your name or photo on the top left. Scroll all the way down on the right-side panel, and click Sign Out… to open the logout dialog. You’ll need to enter your Apple Account password.
If you have Find My Mac enabled, you may need to disable it first. To do that, go to the Apple Account settings page and take the steps below:
Time needed: 5 minutes
- Click on iCloud.
- Under Saved to iCloud, look for Find My Mac. If it’s not listed, click on See All.
- Turn the Find My Mac toggle off. You’ll be prompted for your Apple Account password.
Securely Erase the Storage
After removing your Apple Account, you’ll also want to make sure your personal files aren’t accessible by the new owner. That requires securely erasing your Mac’s SSD.
There are two ways of doing that. The fastest involves simply opening System Settings and going to General > Transfer or Reset, then following the on-screen instructions.
The long way, however, is even more secure. You’ll need to reboot your old Mac on Recovery Mode, then erase your SSD using Disk Utility. Here’s how to do that:
- After restarting your Mac in Safe Mode, select Disk Utility on the initial menu. On newer Macs, this will be under the Options entry.
- Select the Mac’s startup disk. It should be labeled Macintosh HD, Macintosh SSD, or something similar to that. Do not erase the Apple Disk Image or macOS Base System disks, they are the recovery partition!
- Click Erase in the top menu, then Security Options. Move the slider all the way to Most Secure, on the right, then click OK.
- Rename the disk if you want to. It should have APFS under Format and GUID Partition Map under Scheme. Click Erase and you’re good to go.
- The procedure might take several hours. After that, your MacBook will be almost ready to sell, with the storage wiped clean.
Check for Faulty or Missing Hardware
That cracked trackpad you promised for years to get fixed, but never did? A swollen battery? Missing keys? These not only affect your old Mac’s resale value, but they may make it harder to find a buyer as well.
Take note of everything that is in suboptimal condition. You can then decide what to replace or fix, and what to keep as is.
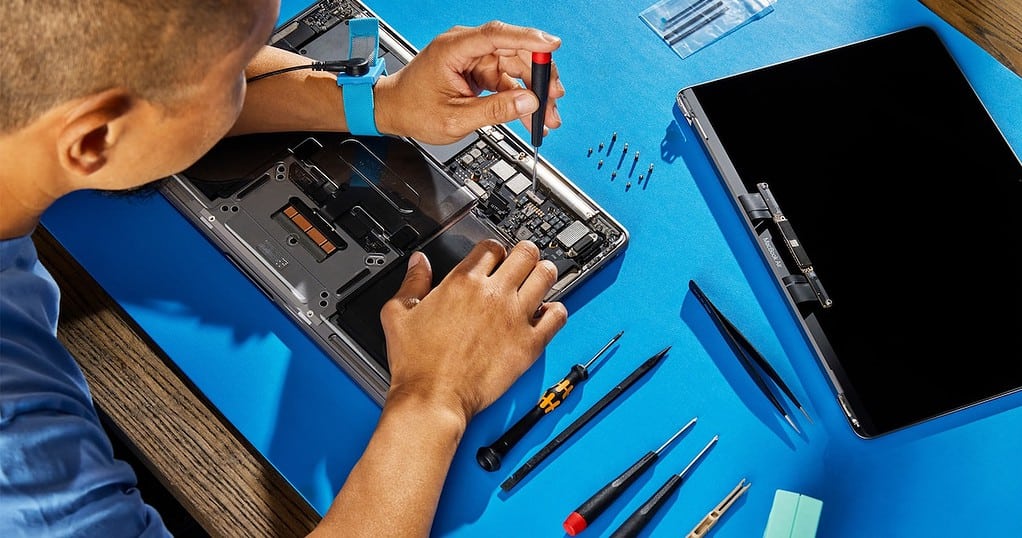
Replace Worn Out Parts
For the latter option, you have three alternatives. Buying the parts and replacing them yourself is inexpensive, as is taking your old MacBook to third-party repair shops.
If you choose to have an authorized service center do the job, you’ll spend a pretty penny. If you go that way, be sure the additional cost is worth it. You may end up spending more than the extra money you can charge for having the Mac in perfect condition.
There’s one additional risk to that, for significantly old Macs at least. Apple has a list of “vintage” and “obsolete” products. Vintage devices may or may not be accepted by Apple service centers, depending on part availability. Obsolete products, on the other hand, have servicing refused outright.
Lastly, there’s a silver lining to repair your MacBook at an Apple service center. In this case, the company offers a warranty period — which varies by country — for the replaced parts.

Getting an old MacBook ready to sell isn’t the simplest task — if you want to do it the right way. After spending a significant amount of money on a new Mac, you’ll likely want to avoid any additional costs, too. That’s understandable. However, dedicating some time to the procedure (and, if needed, some money) will pay off when selling your previous device.