I think that I should have a boilerplate paragraph that I insert at the top of every backup article that I do. I’d use an attention-grabbing bold font to tell you why you should have more than one backup, and it’d have scary red text with cautionary tales about folks who didn’t back up their stuff.
Let’s just assume I’ve done that, and you listened, and you’ve now got redundant backups, all right? Go you!
So if you’re like me, and you’ve got multiple backups through Apple’s Time Machine software, you may know that the program will switch back and forth between your available disks. So when it’s time to do an hourly backup, Time Machine will update the first disk, and then the next hour, it’ll update the second, and so on. Sometimes, though, you might need to force a backup to a particular disk; maybe one of your backups seems fine, for example, but the other keeps erroring out, and you’d like to reboot your Mac and then test to see if the problem has resolved itself. Doing that is easy through a little hidden menu, so to get to it, start by clicking on the Time Machine icon in your menu bar and choosing “Open Time Machine Preferences.”

(If you don’t see that icon in your menu bar, click on the Apple Menu, choose “System Preferences,” and then select “Time Machine” from the list.)
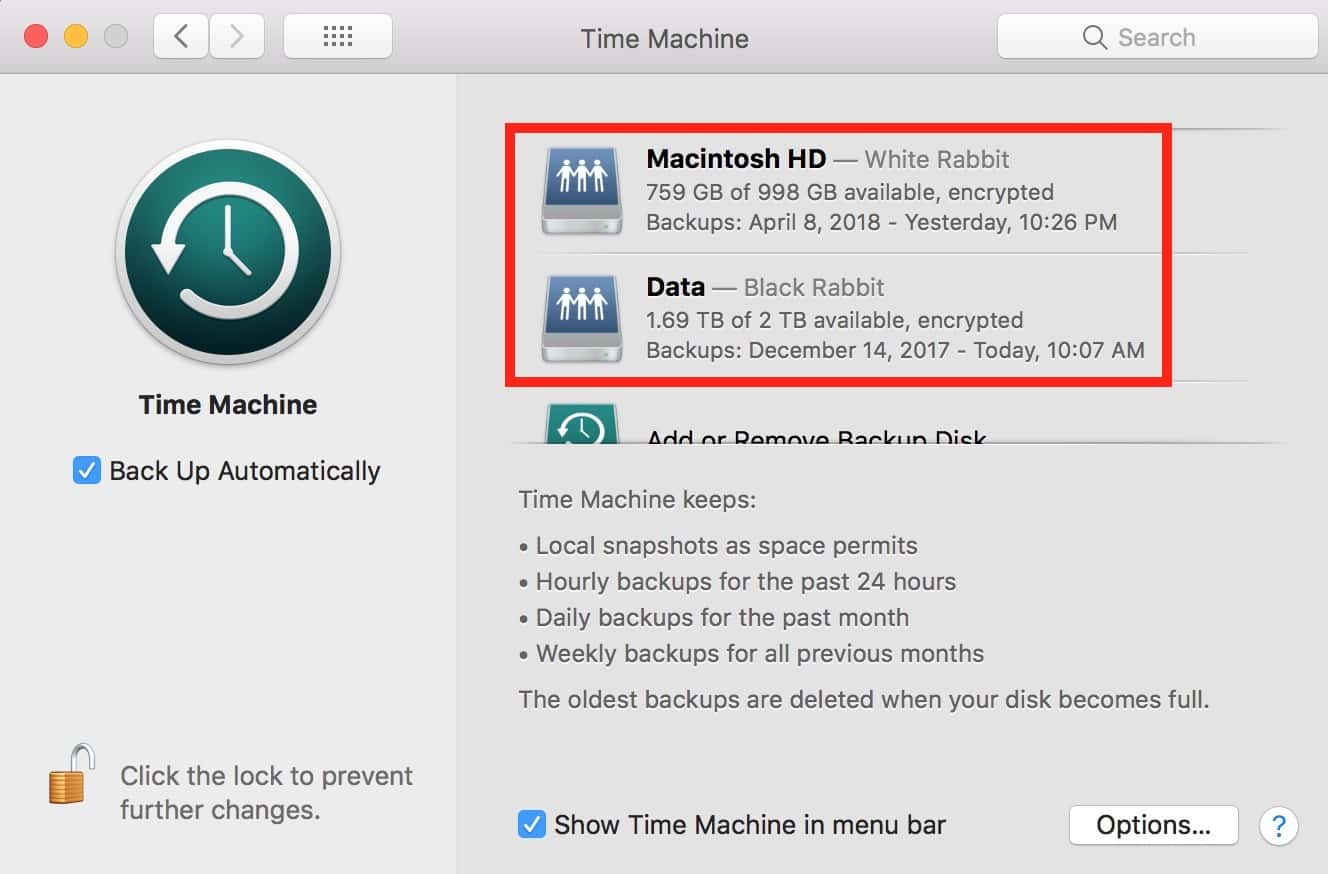
Once you’re within the Time Machine preferences, you’ll find a list of the disks you back up to with the ranges of dates within which they’ve done backups.

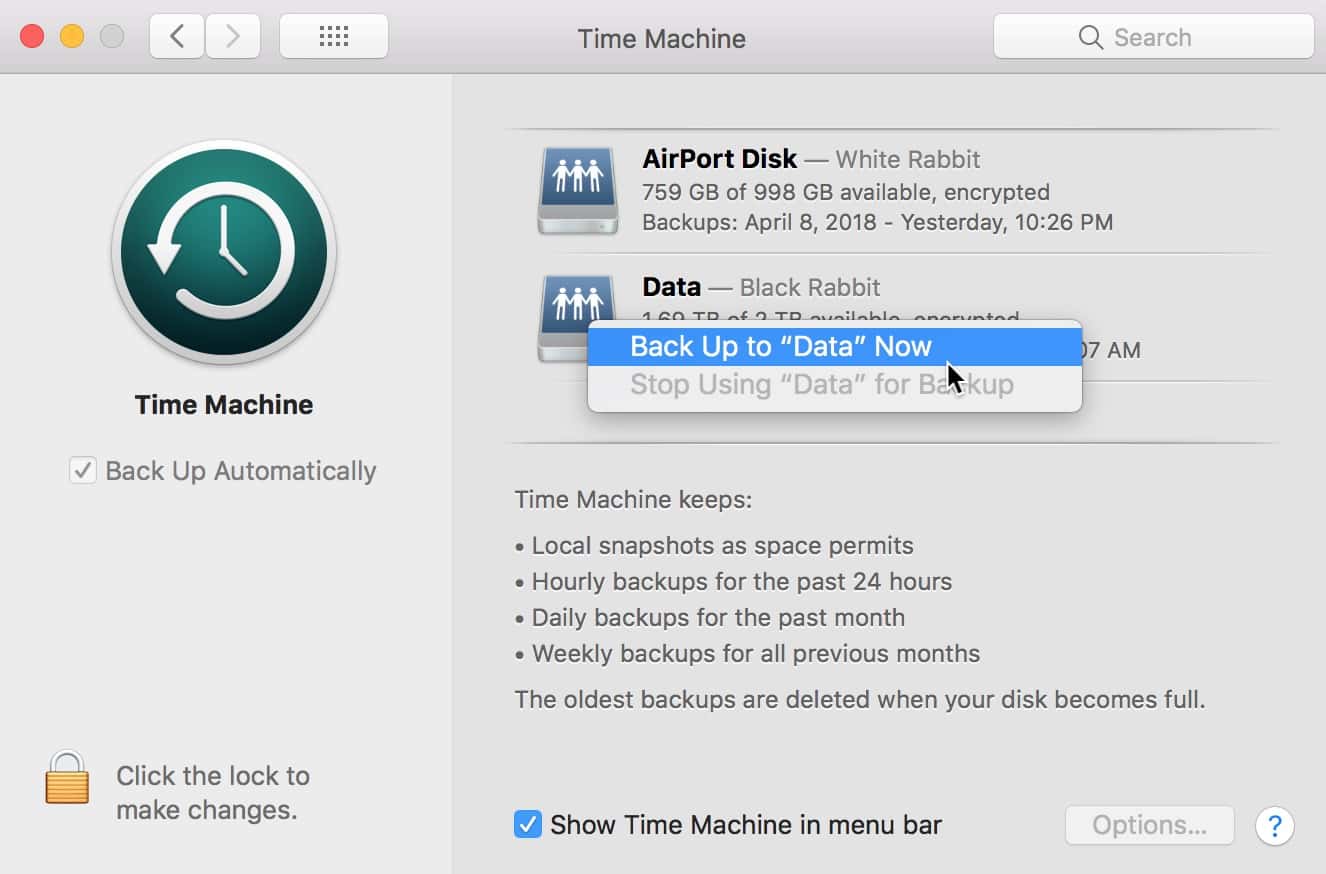
If you’d like to force a backup to a particular disk (even if it’s out of order, from Time Machine’s perspective), right- or Control-click directly on the disk icon of the one in question and choose “Back Up to [Name] Now.” If you right-click on the text next to that icon, this won’t work.

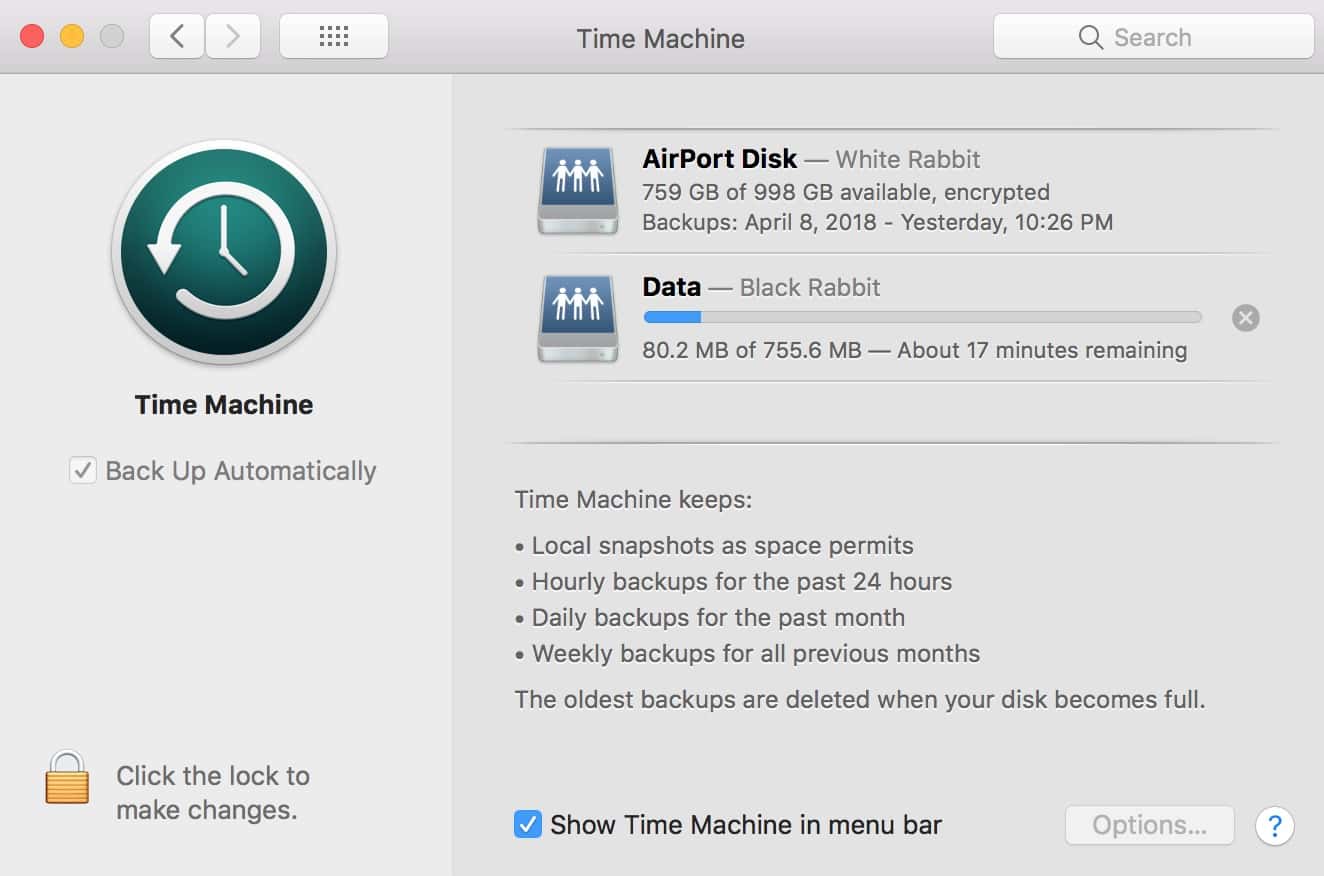
When you do that, Time Machine will walk through its typical steps to prepare the backup, and then you’ll get a progress bar for the backup itself. Assuming that everything is hunky-dory, that is.

After it’s done, you’ll of course see today’s date appear in the Time Machine preferences window for that disk. Or you’ll know that you need to do some further troubleshooting if the backup still won’t complete. Restart your Time Capsule if that’s where the backups reside! Unmount the disk, unplug it, and plug it back in if it’s directly connected! Dance around your apartment and forget the blinds are open!
I admit that last thing might not help. But it is both fun and embarrassing, I’ve found.

Melissa, I hope you have really good public liability insurance ? 😉
Uhhhh…there’s something I, uh…forgot…I gotta go!