If you’re using several messaging apps on your iPhone, it could become quite a hassle to check them one by one if there are new messages. That’s when notifications come in handy. However, message notifications don’t always work properly. There might come a time when notifications stop coming in. Take the case of WhatsApp. Several users have noted that they stopped receiving notifications on their iPhones. And the only way they could check and read messages was by opening the app. If you want to know how to fix WhatsApp Notifications not appearing on iPhone, then this tutorial is for you.
Reasons Why WhatsApp Notifications Would Stop Appearing on iPhone
There are several reasons why WhatsApp notifications would stop working on your iPhone. It could be due to a network failure including unstable connectivity, restricted background data, or erroneous app preferences. Don’t worry, the reasons may sound complicated but the truth is, the issue can be fixed by taking a few simple steps to resolve WhatsApp notifications not appearing on your iPhone and let you read messages again through the notifications window.
Troubleshooting WhatsApp Notification Not Appearing on iPhone Issue
Follow the troubleshooting tips below when WhatsApp notifications stopped working on your iPhone.
Check WhatsApp Notifications
Sometimes when you update your iPhone to the latest iOS release, some app settings change, including notifications. So, the first thing you need to do when WhatsApp notifications stop working is to check the app’s notification settings.
Time needed: 1 minute
Follow the steps below to check WhatsApp settings on your iPhone.
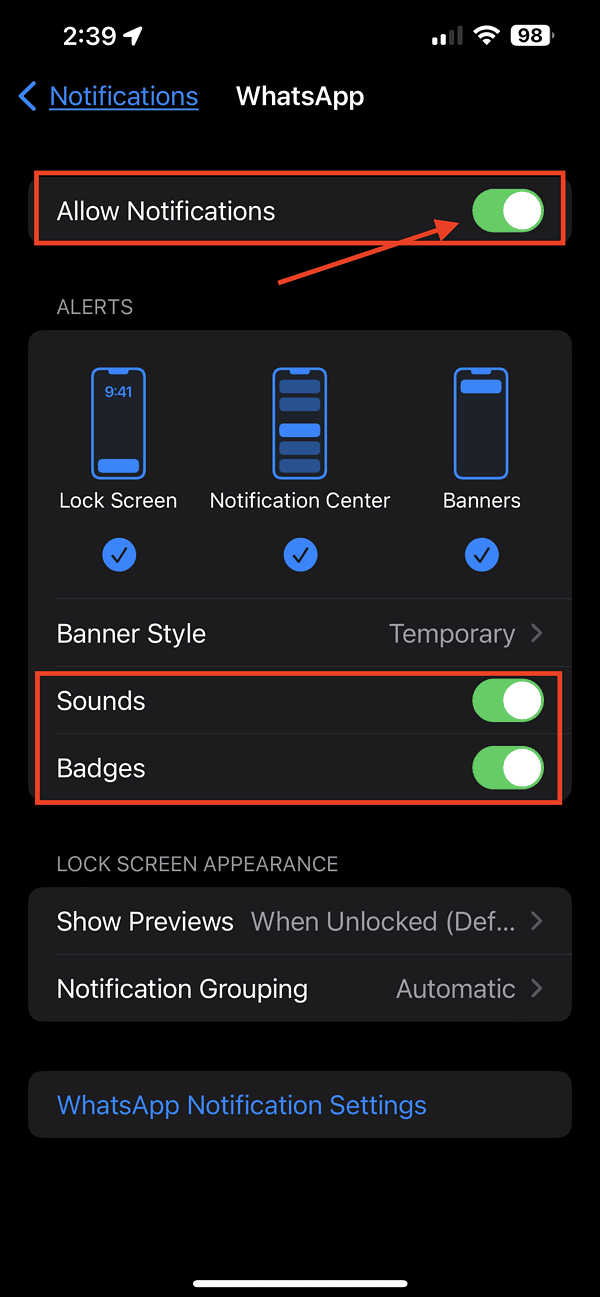
- Tap Settings > Notifications.
- Tap WhatsApp, then toggle on Allow Notifications.
- Toggle on Sounds and Badges.
From here you can also choose the type of alerts that you want to receive. You can choose from Lock Screen notifications, Notification Center, or banner.
Enable Background App Refresh
If Background App Refresh is disabled on your iPhone, no incoming notifications will come through, especially when your device cannot access the internet. This includes WhatsApp notifications. Follow the steps below to enable Background App Refresh on your iPhone.
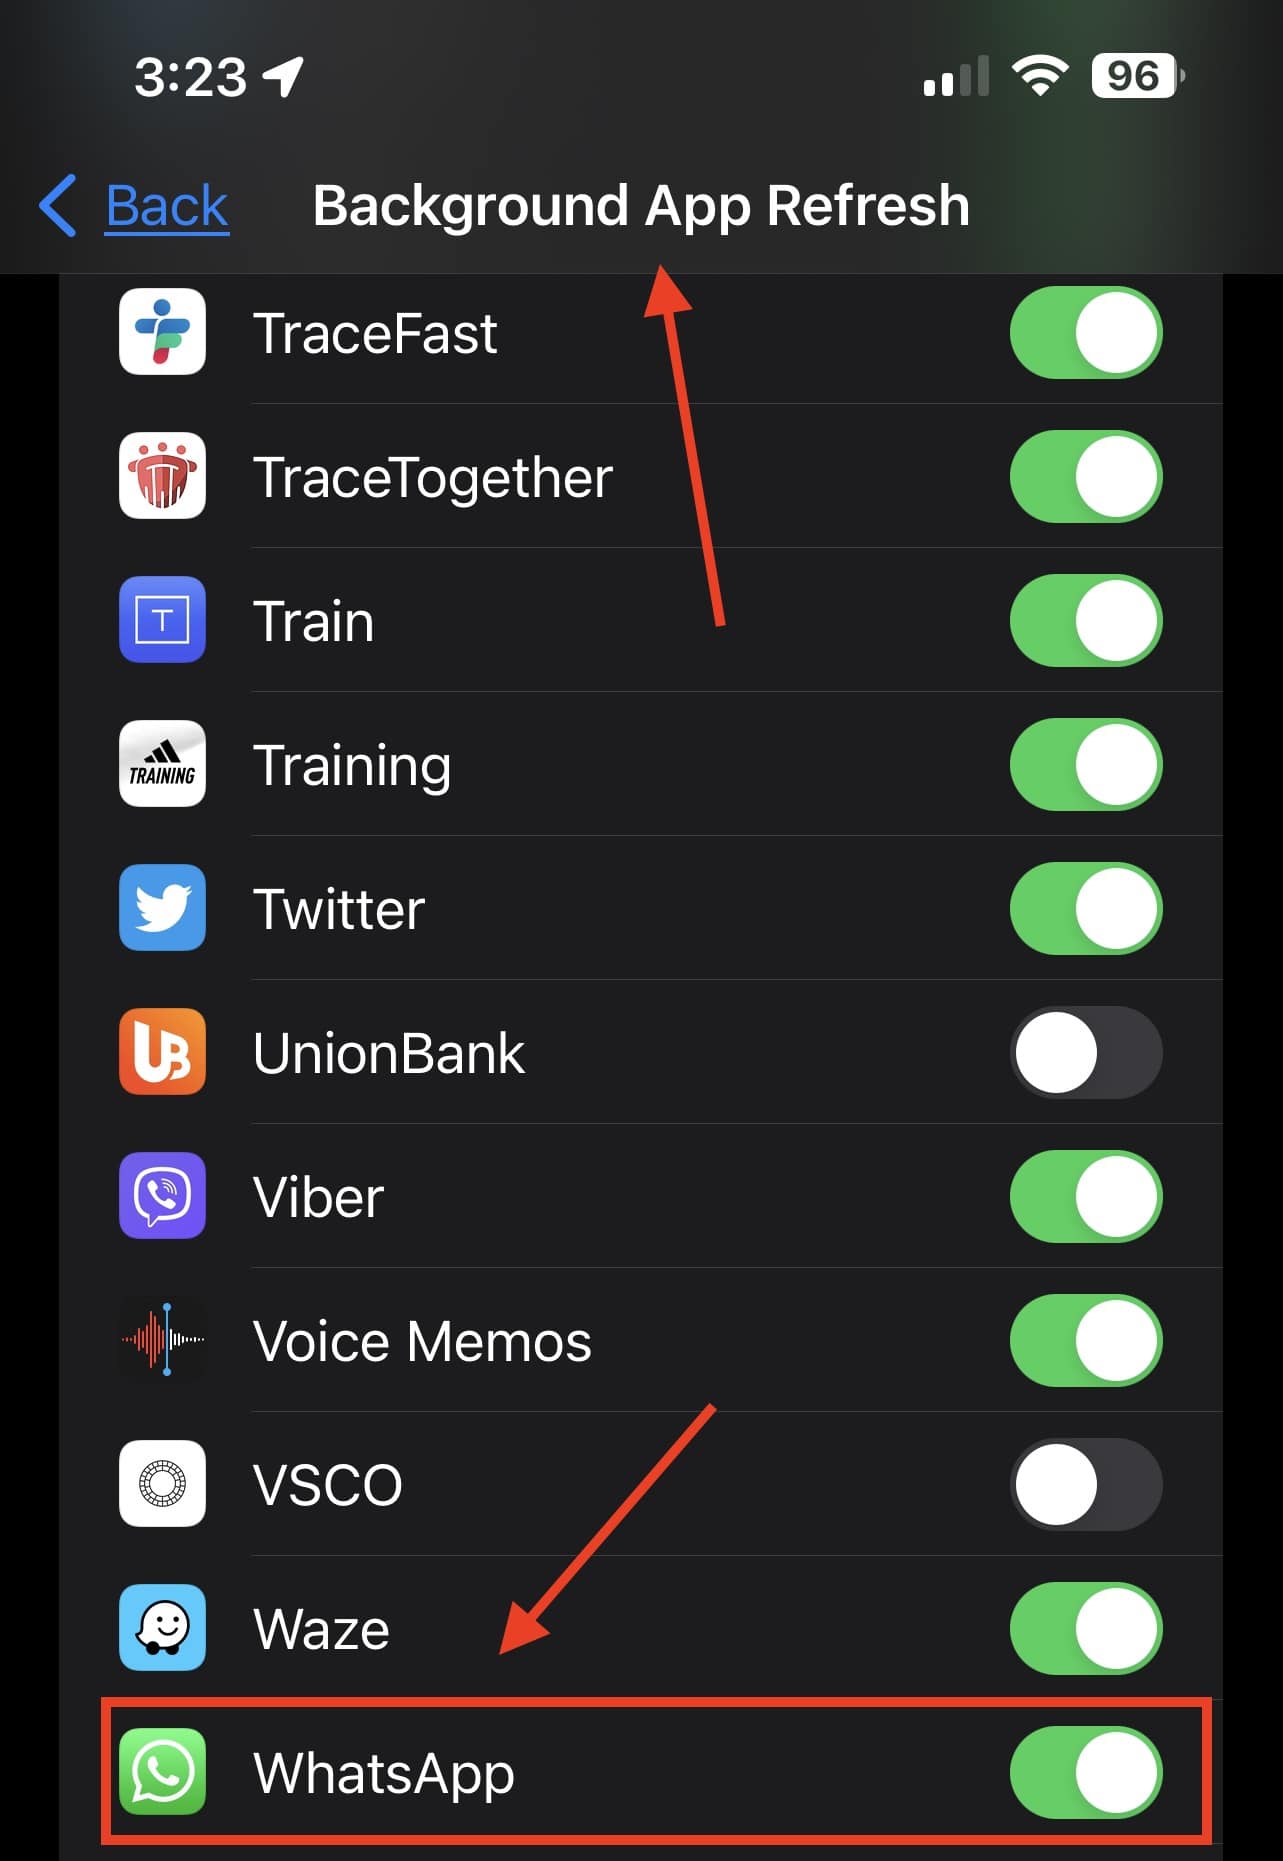
- Tap Settings > General.
- Tap on Background App Refresh.
- Scroll down to WhatsApp, then toggle on Background App Refresh.
Restart Your iPhone
After enabling Background App Refresh on WhatsApp you find notifications are still not working, try restarting your iPhone to fix the issue. You won’t believe how many times this step can fix various issues on your iPhone, especially system-related ones.
So, take a few minutes to turn off your iPhone and start it again. Hopefully, your WhatsApp notifications will start appearing again on your iPhone. If not, move on to the next tip.
Reinstall WhatsApp
Next is to remove the app and reinstall it again. But before you delete the app, make sure to back up your data first. After reinstalling, notifications will hopefully start coming in again.
Check Your iPhone’s Network Connection
If the previous steps fail to resolve the issue of WhatsApp notifications not appearing on your iPhone, the next thing to do is to check your iPhone’s network connection and settings.
- Tap Settings > General.
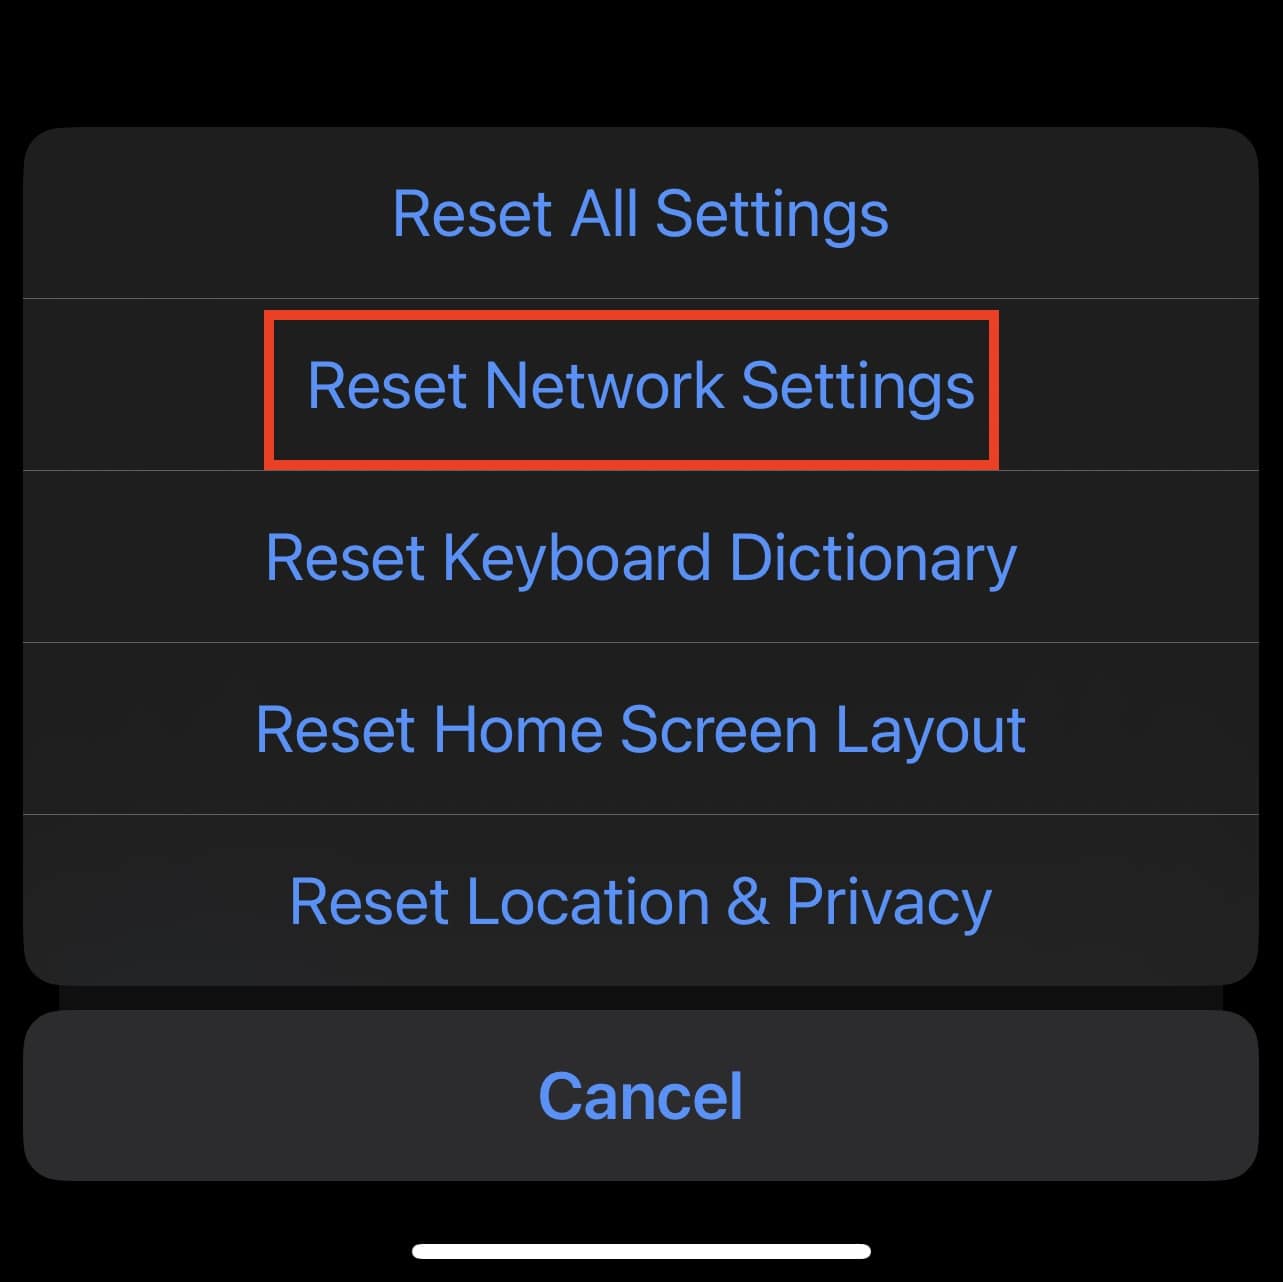
- Tap Transfer or Reset iPhone > Reset.
- Tap Reset Network Settings.
- Enter your iPhone passcode, then tap Reset Network Settings to continue.
If resetting the network settings on your iPhone doesn’t help make WhatsApp notifications appear again on your iPhone, you can also try resetting all settings.
Bonus Tip: Enable WhatsApp Notifications on Your Apple Watch
If you were able to fix the issue of WhatsApp notifications not appearing on your iPhone, you might want to consider mirroring them to your Apple Watch. This would allow notifications to come either through your Apple Watch or your iPhone.
But note that it will only come through one device at a time and not both at the same time. So, if your iPhone is unlocked, the notifications will appear on your iPhone. But when your iPhone is locked, the notifications will go to WhatsApp on your Apple Watch first.


